
Before You Begin
You’ll need:- Your restaurant’s basic information (name, address, hours)
- A valid credit card for billing
- About 10 minutes
1
Create your account & get started
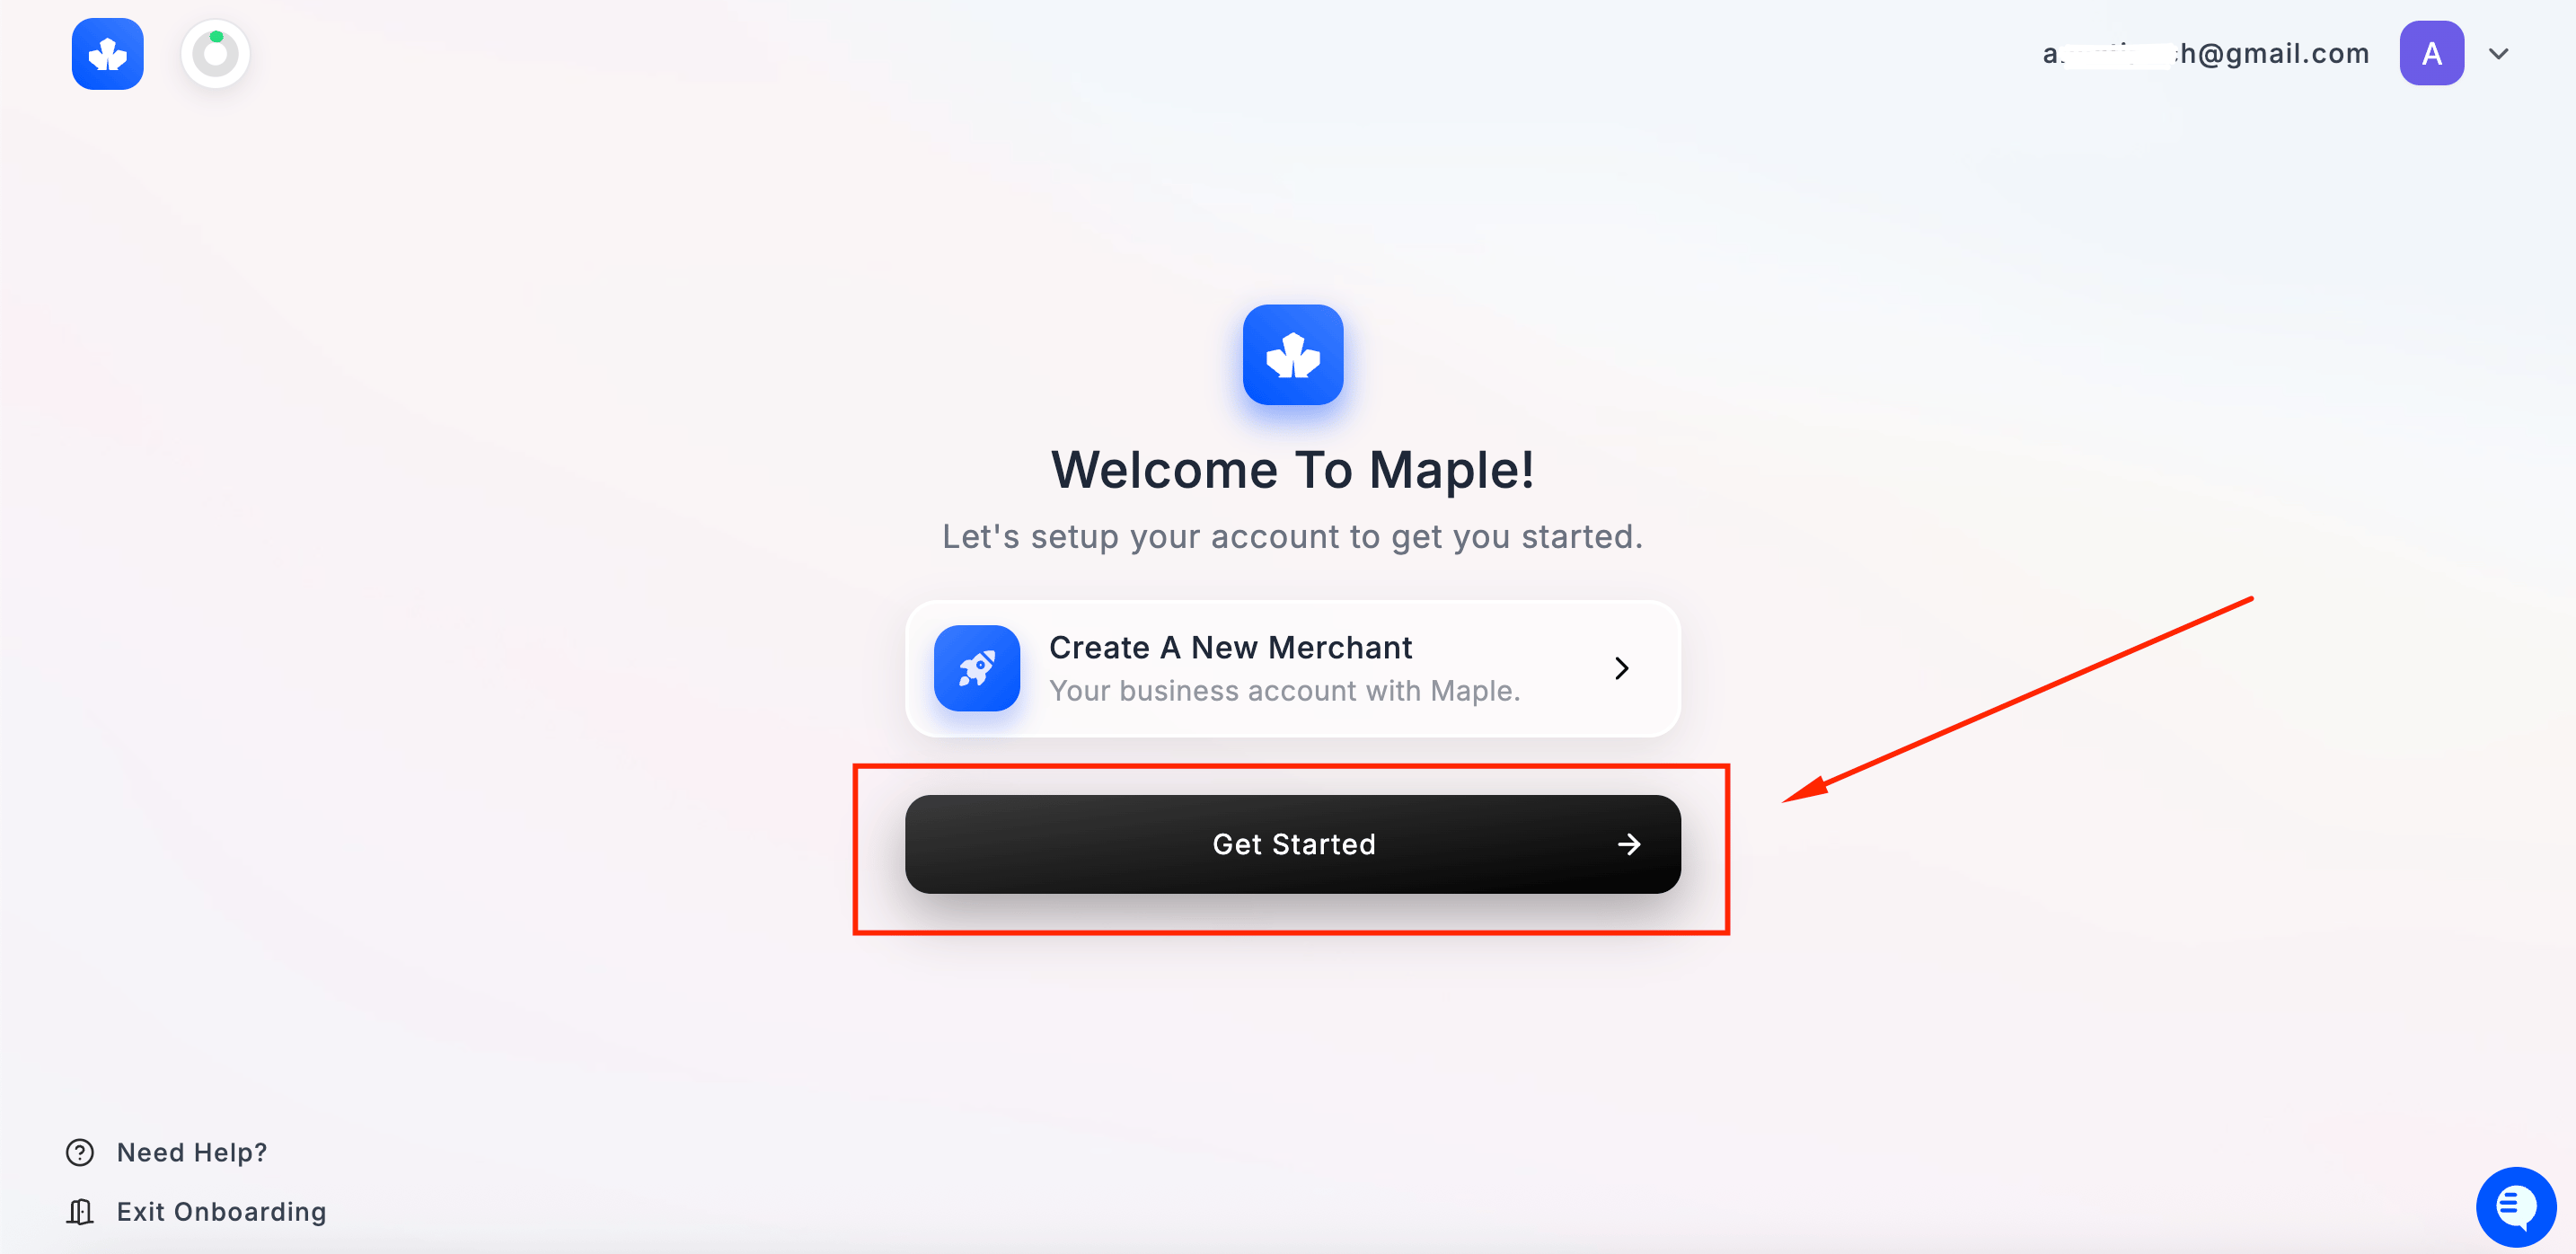
- Visit app.maple.inc and sign in or create your account
- You’ll land on the Welcome to Maple screen
- Click Get Started to begin setting up your merchant account
2
Choose how to proceed with onboarding
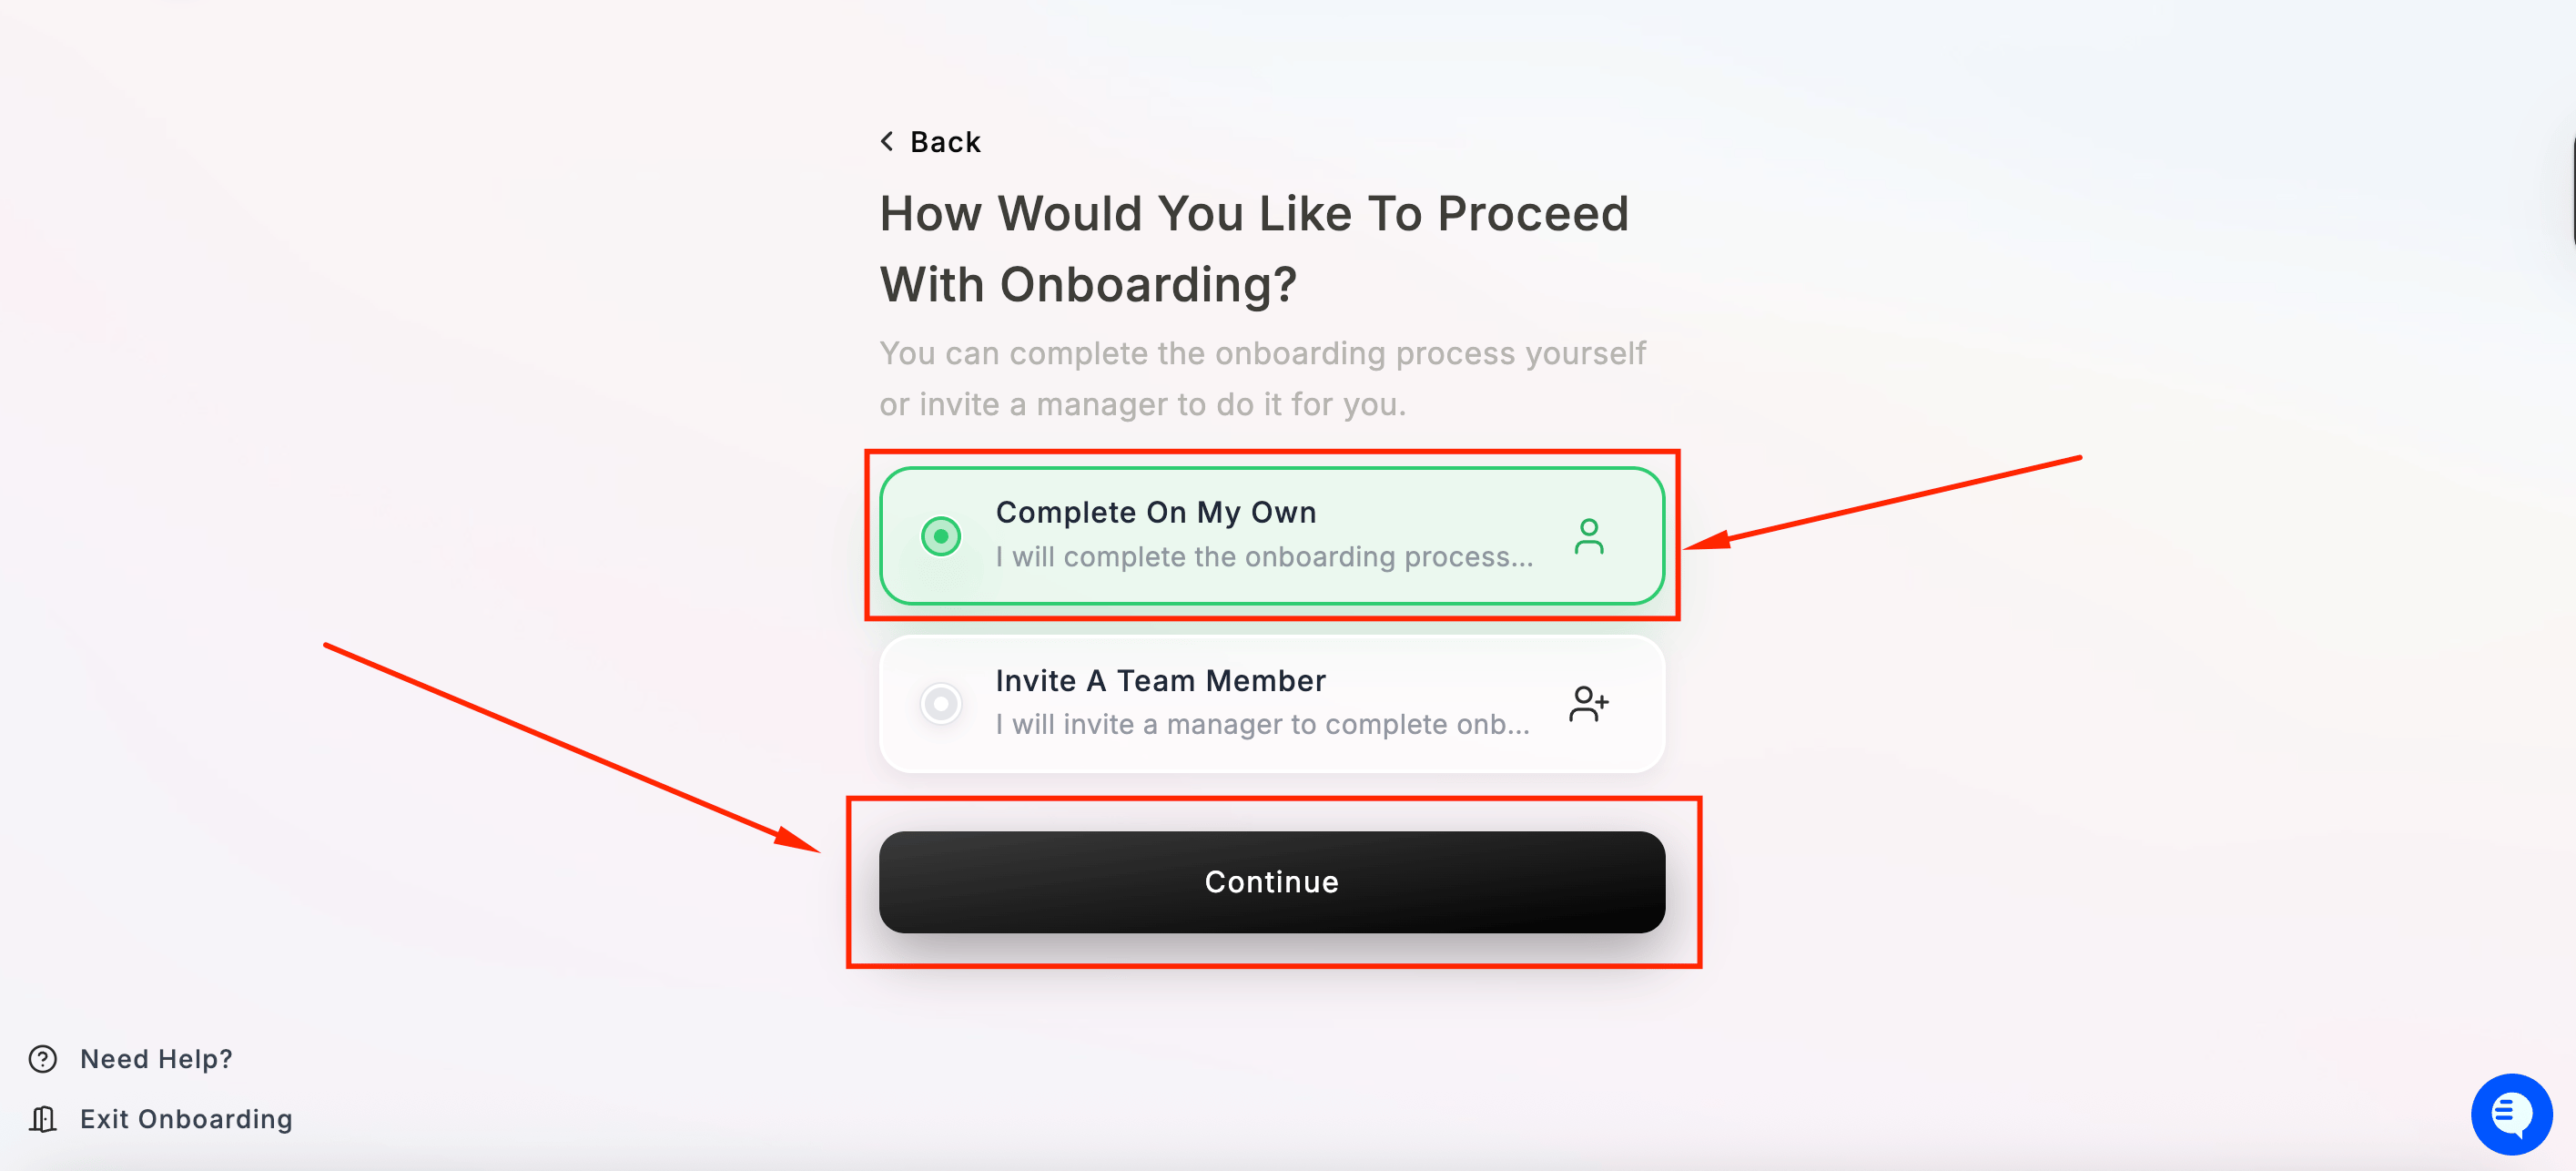
- Complete On My Own — you’ll fill in all the details yourself
- Invite A Team Member — send the onboarding to a manager to complete on your behalf
3
Enter your legal business name
Enter the legal name of your business entity — for example, Maple’s Burgers LLC. This is used for your merchant account and billing records. It will not be visible to your customers.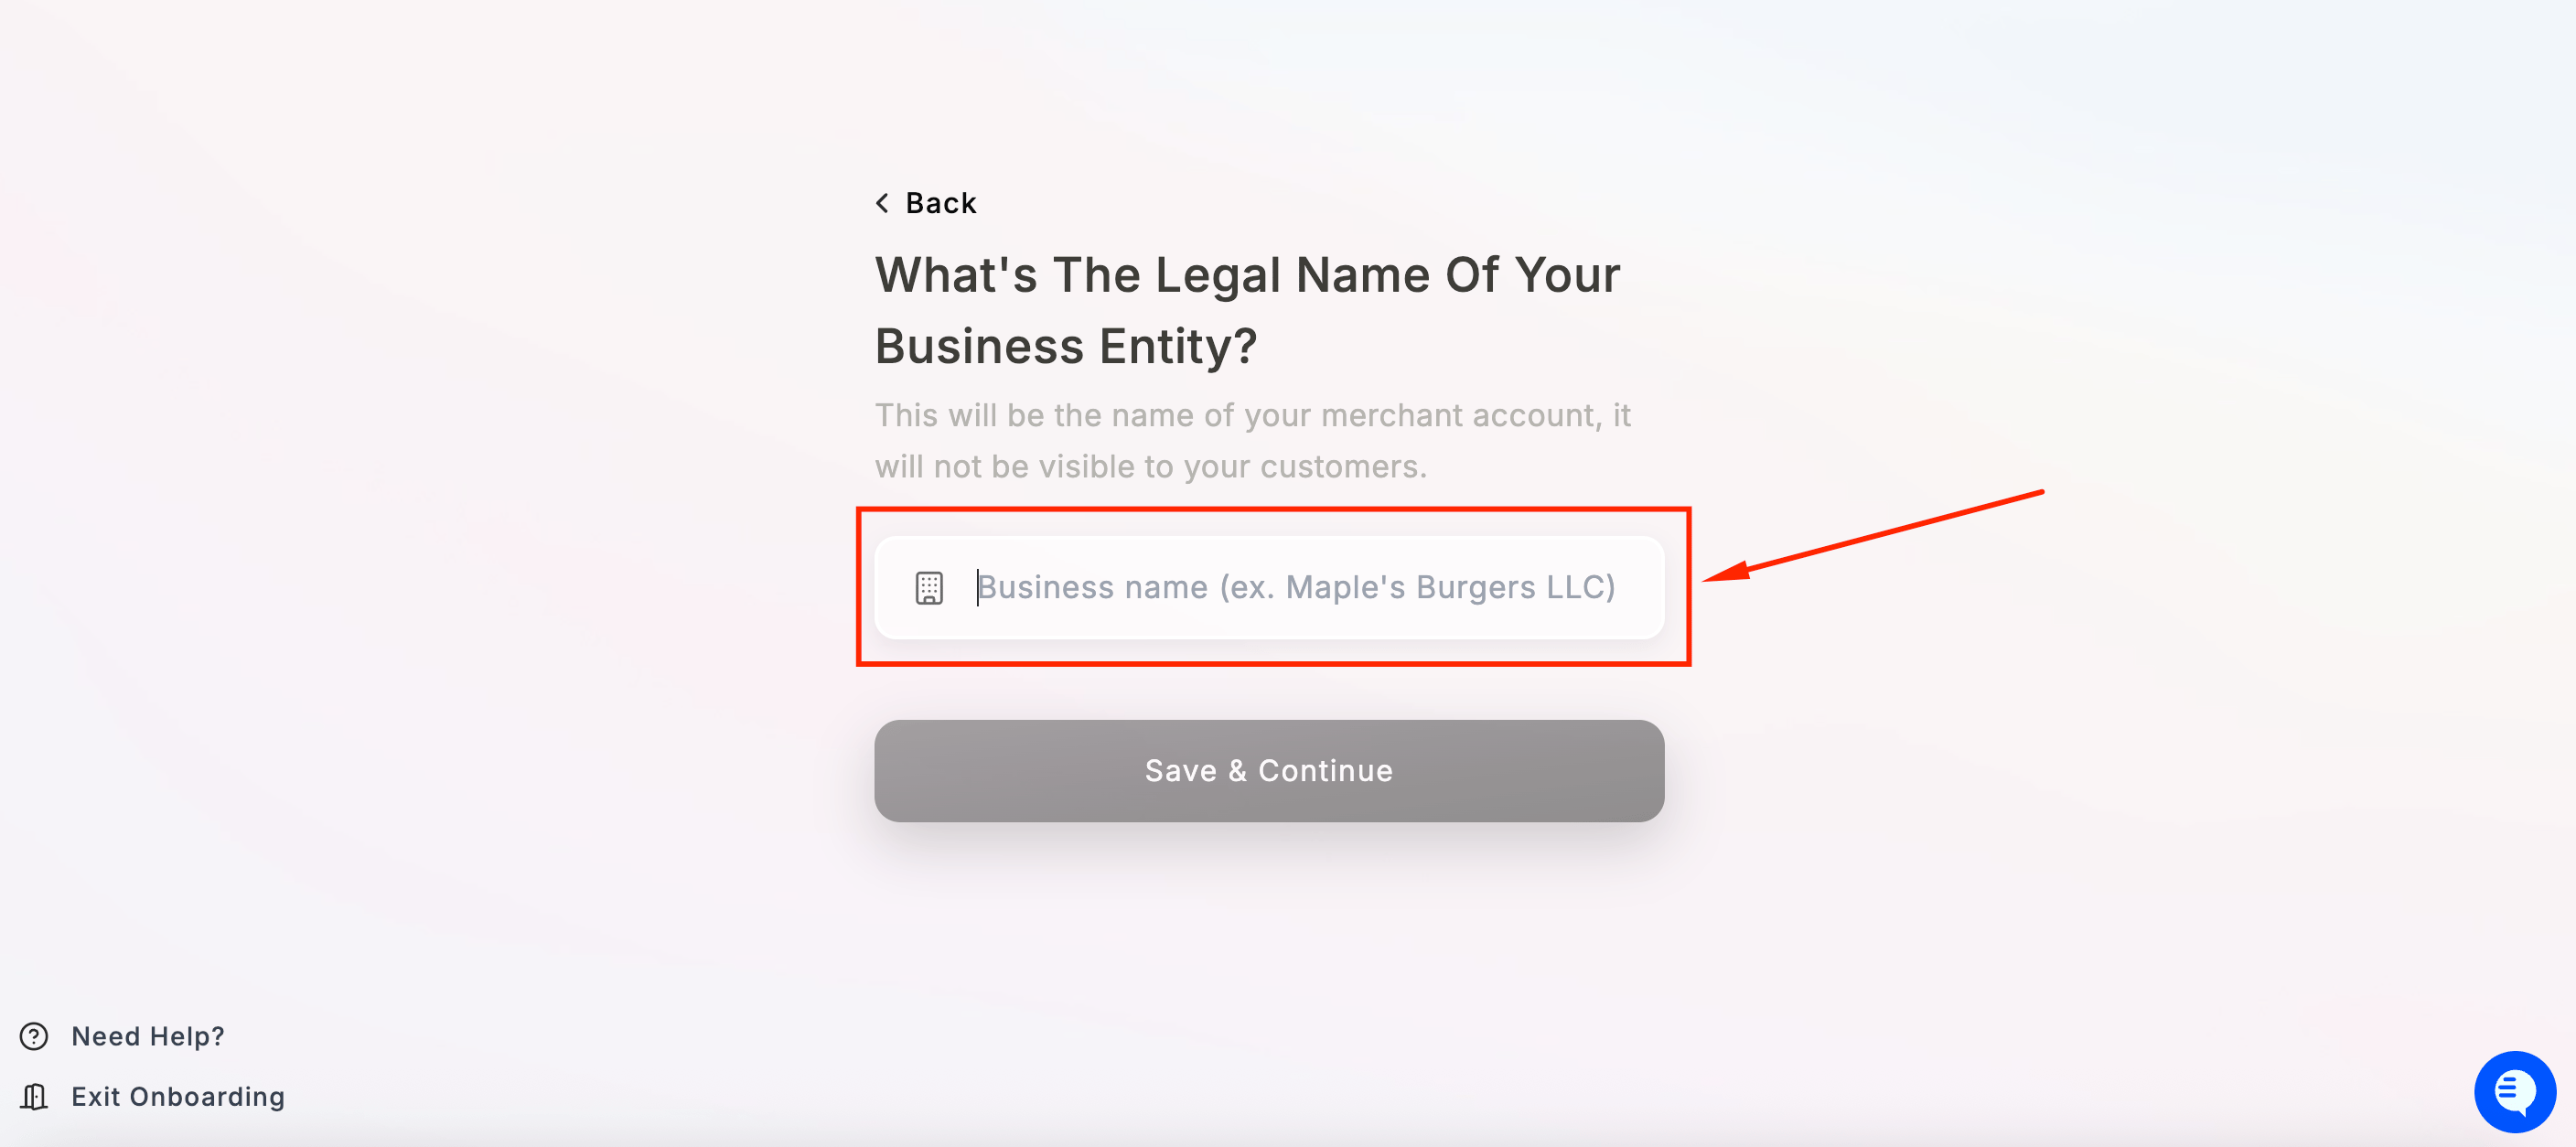
Choose the option that best describes your business:Select Restaurant / Cafe and click Continue as Restaurant.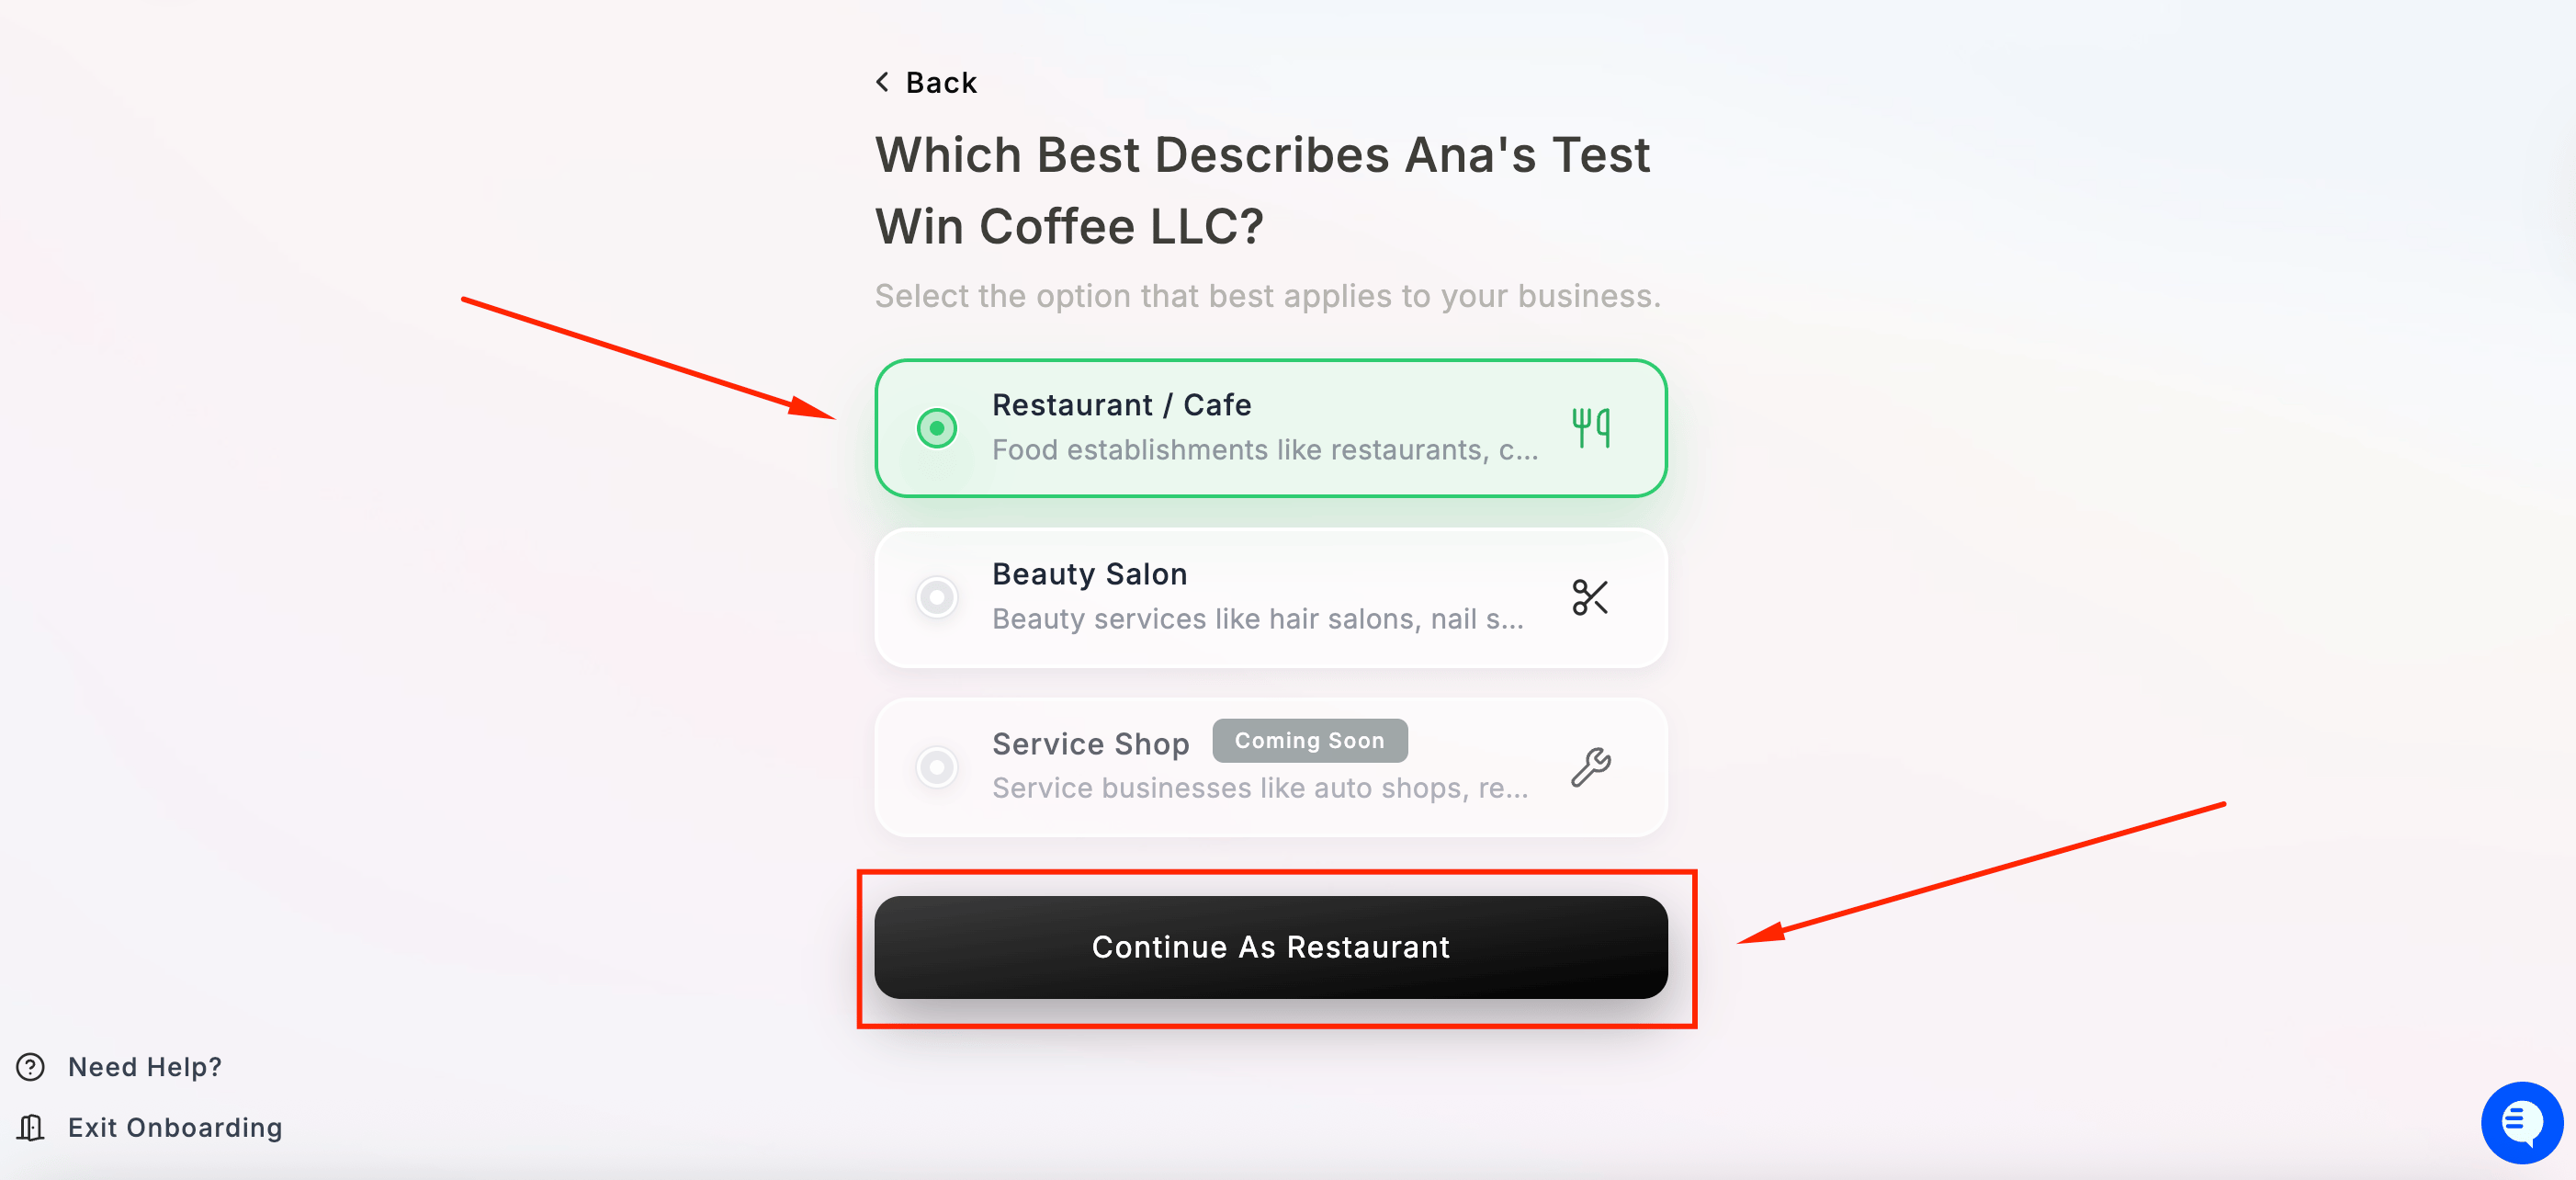
Choose the option that best describes your business:
Currently, we support the following store types: Restaurant and Salon.
4
Enter the number of locations
Enter how many locations you operate under this business entity. Use the – and + buttons to adjust.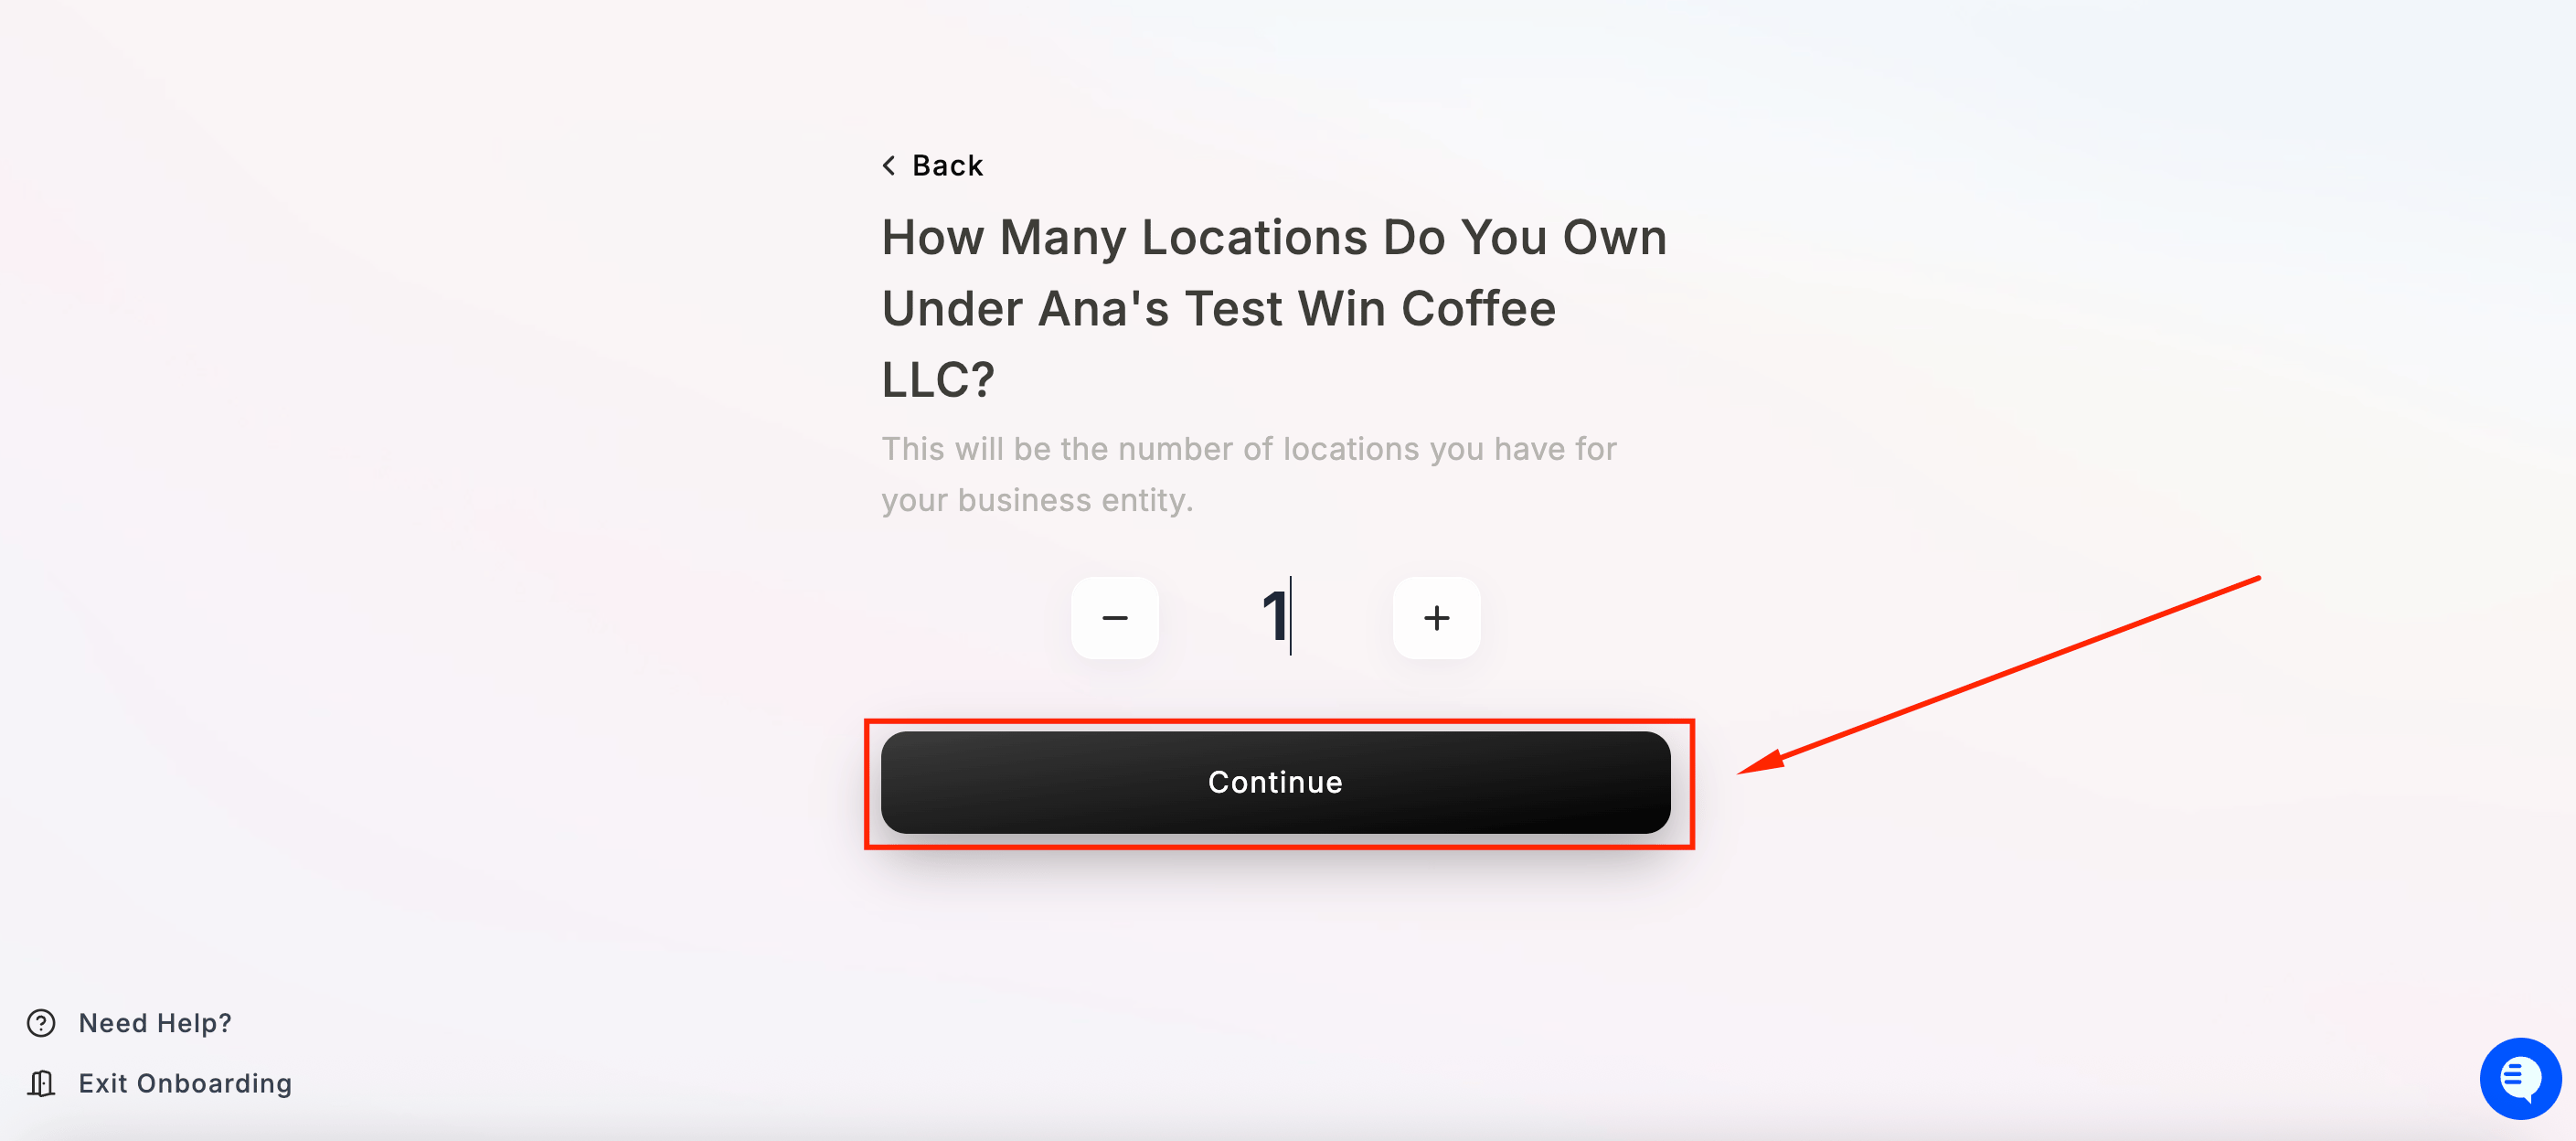
5
Choose your plan
Select the plan that fits your needs. Maple Voice is required and included in all plans. Add Orders or Bookings if needed.Click Continue when ready.You can change your plan at any time from your dashboard.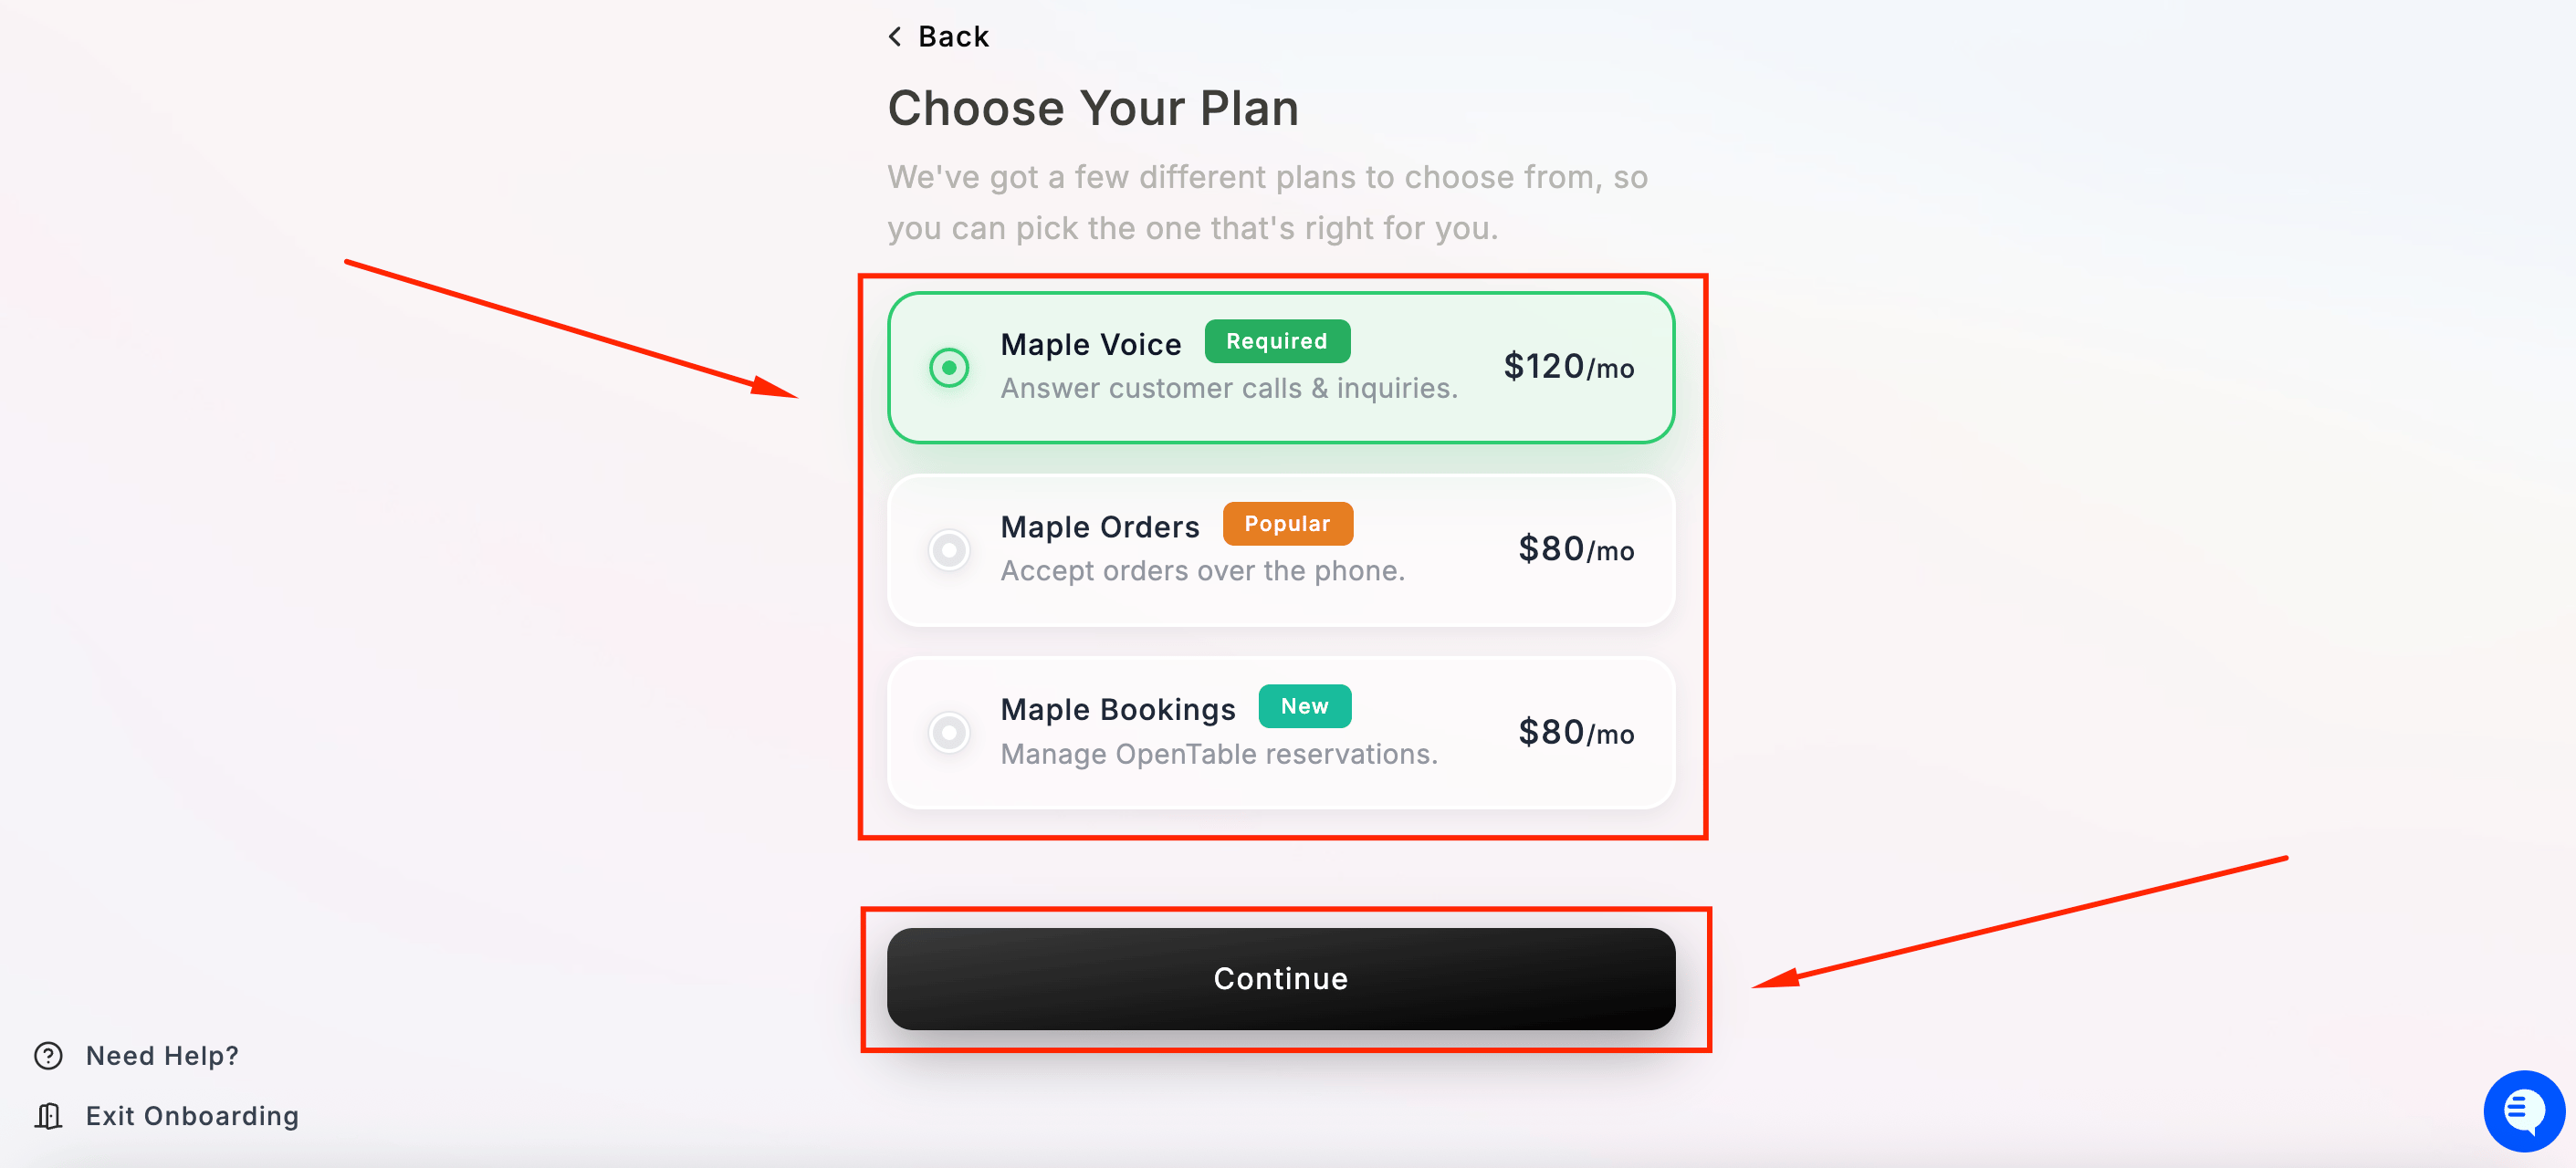
6
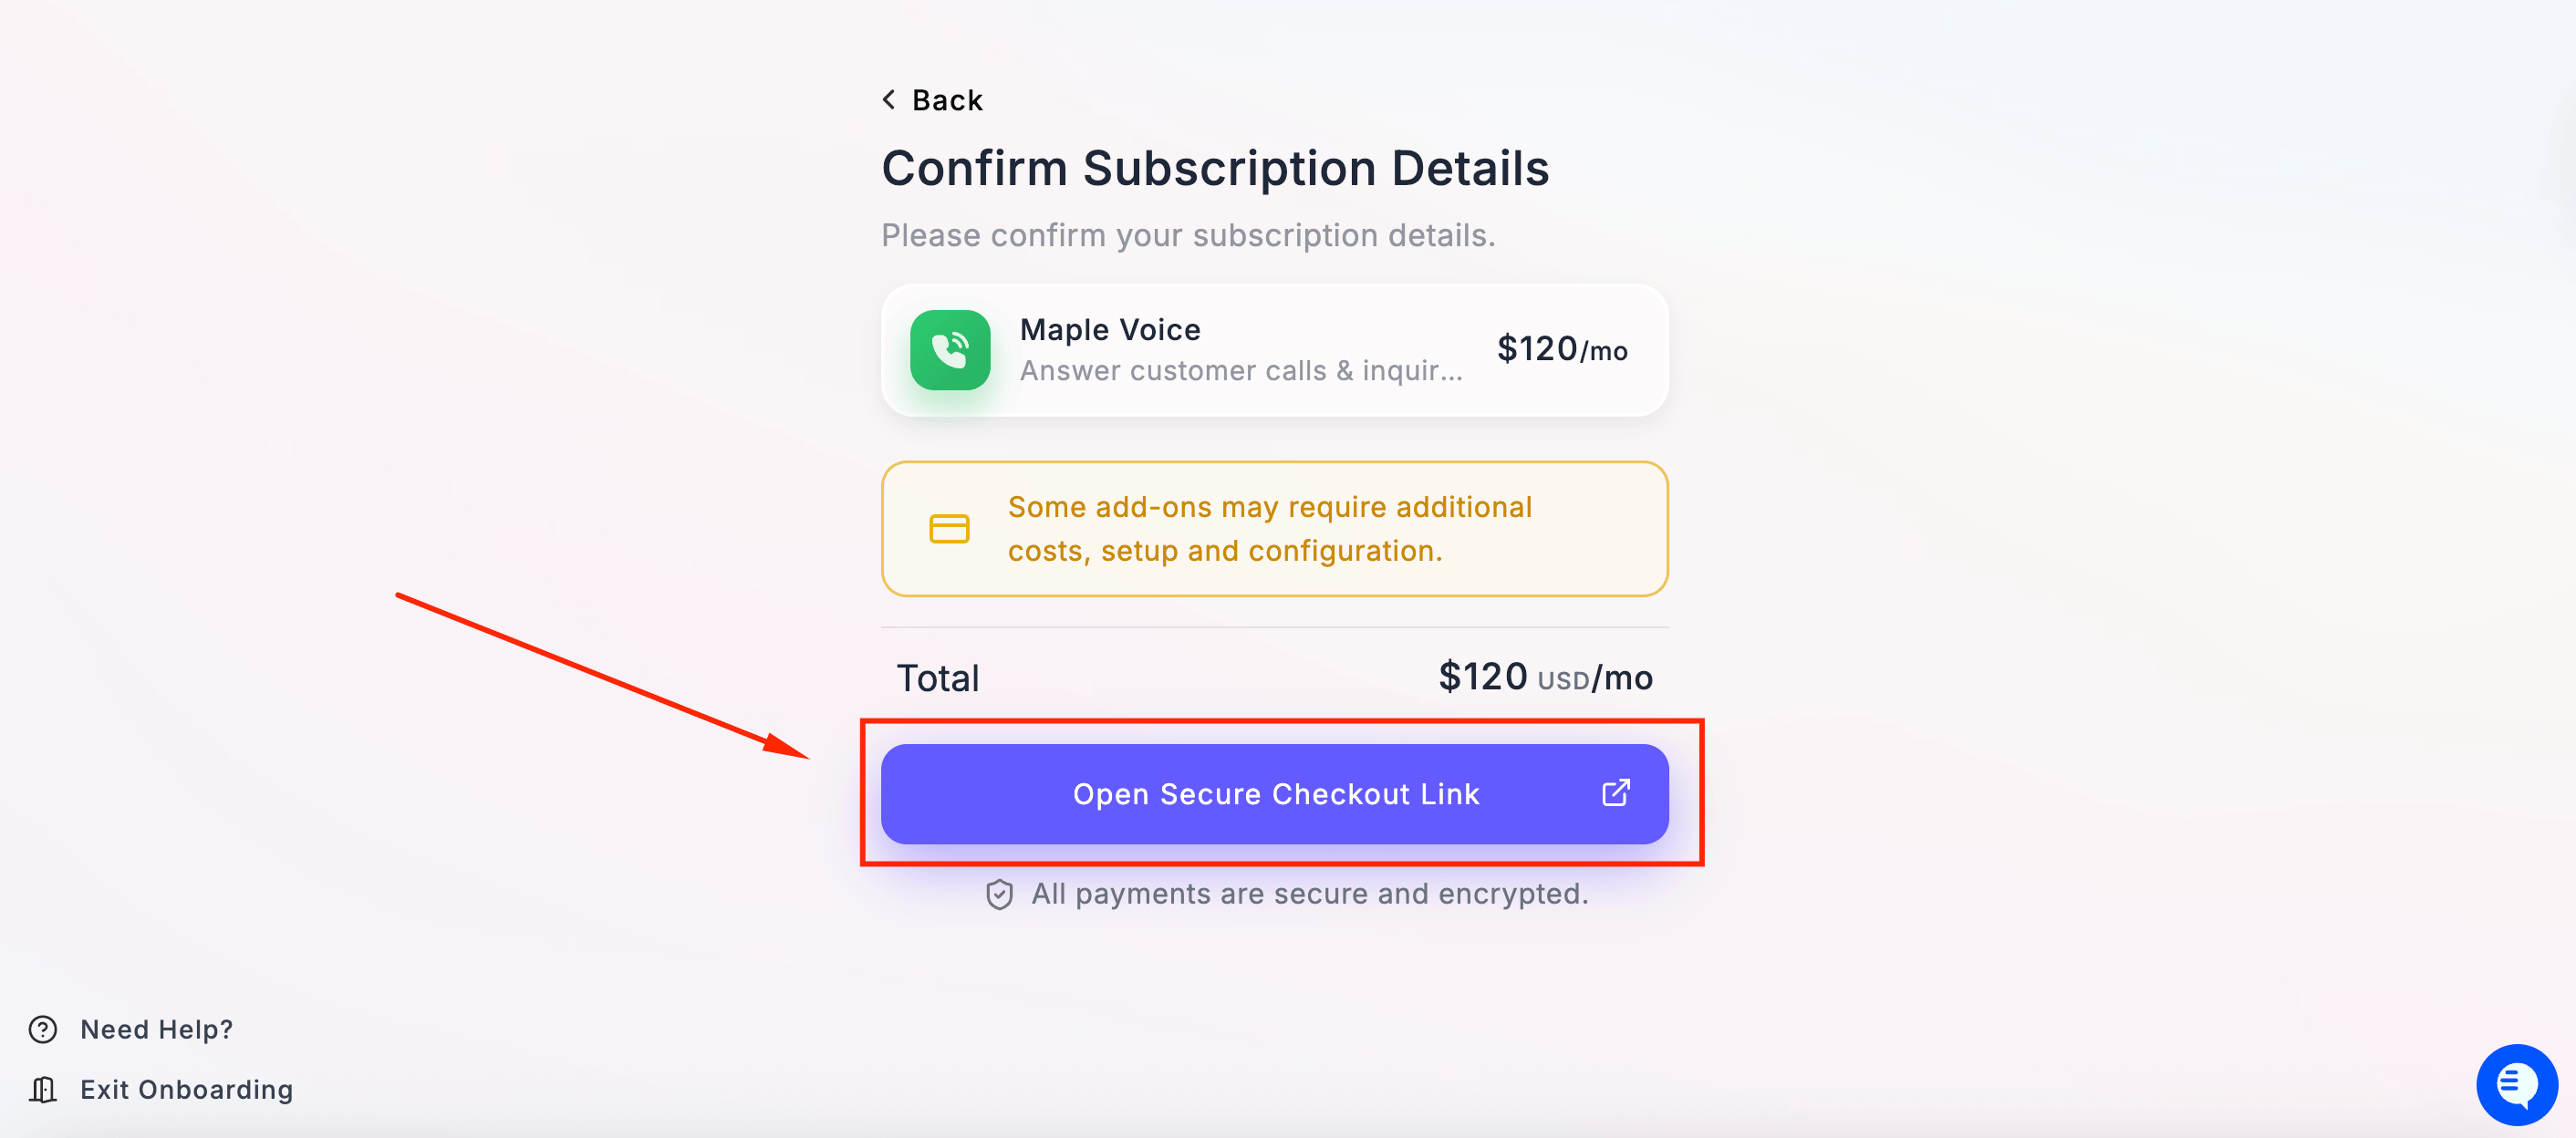
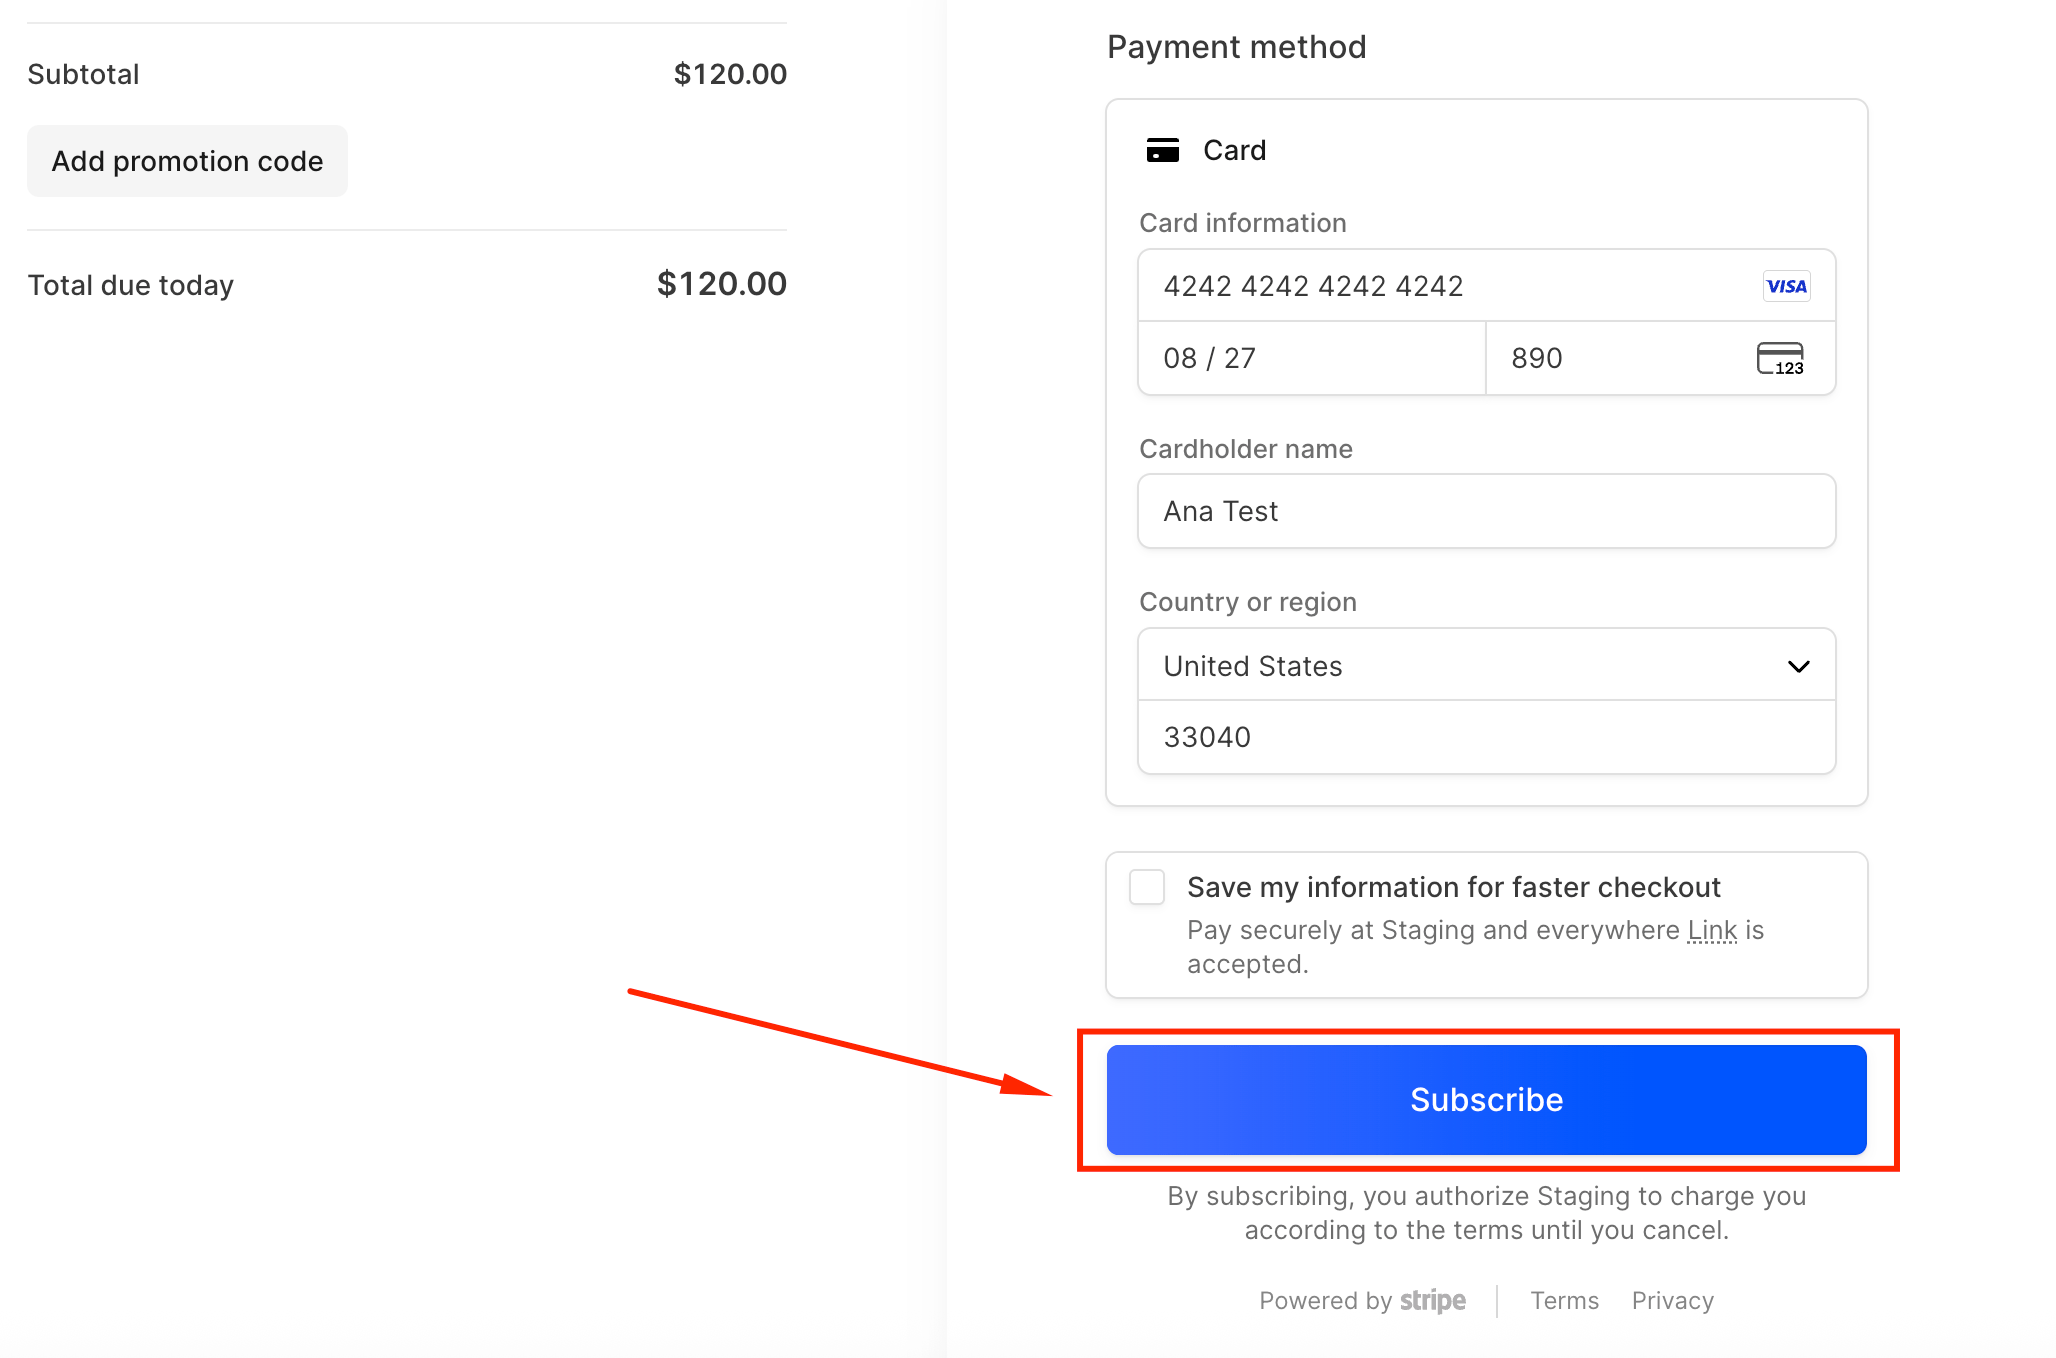
Confirm subscription details & complete payment
Review your subscription summary. Click Open Secure Checkout Link to proceed to payment.
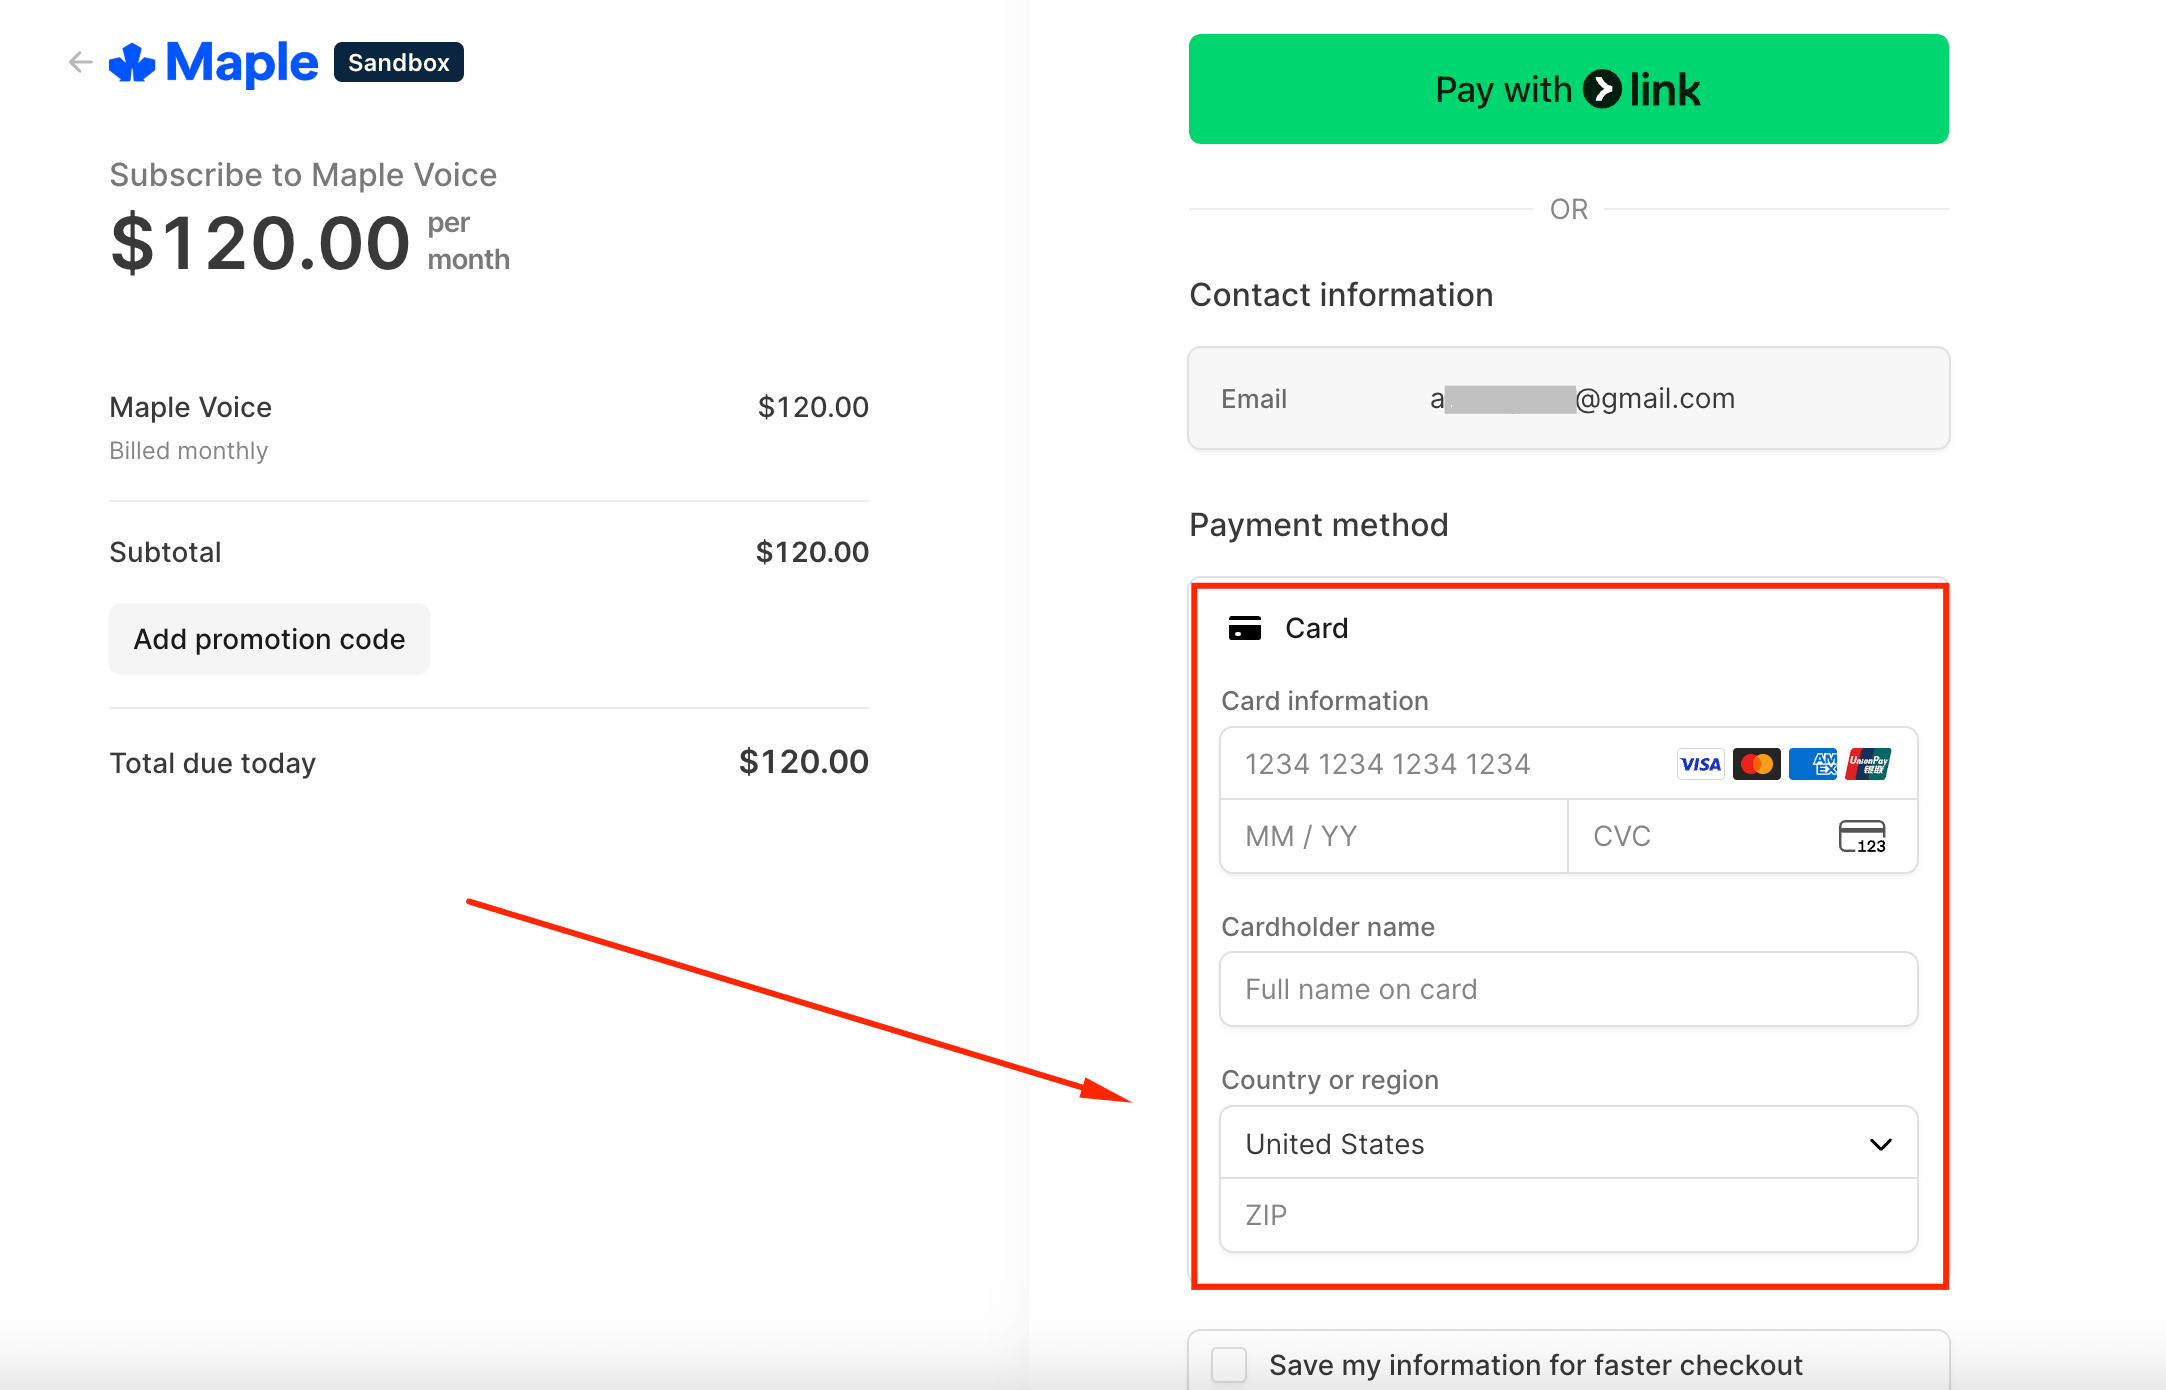
- Enter your card number, expiration date, and CVC
- Enter your cardholder’s name
- Select your country and enter your ZIP code
- Optionally add a promotion code if you have one
- Click Subscribe to complete your purchase
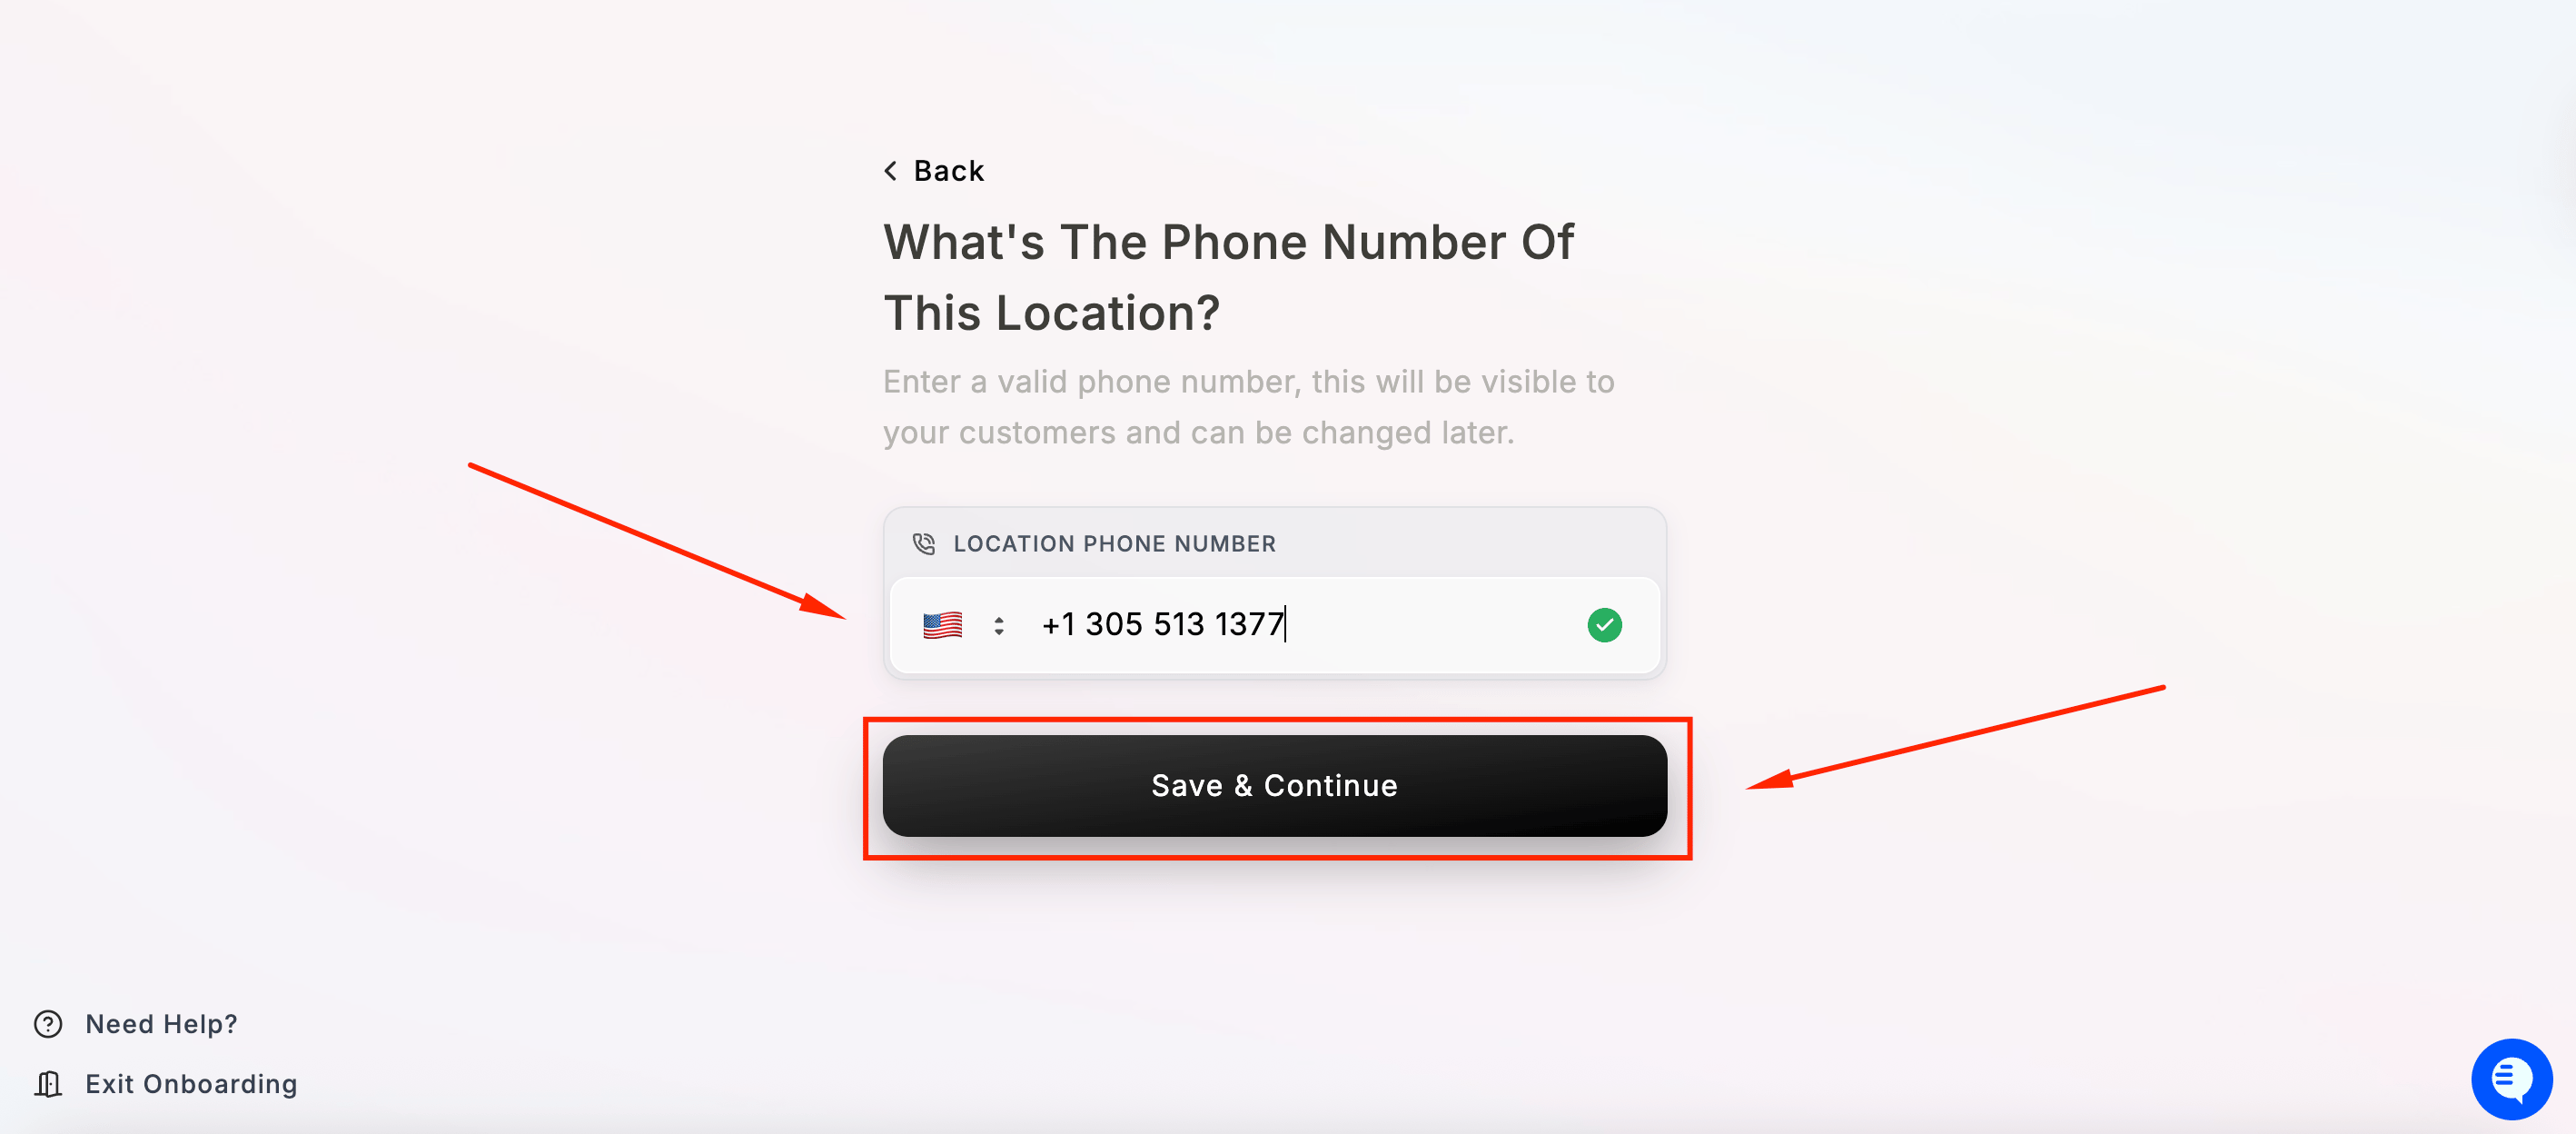
7
Enter your location's phone number
8
Add your restaurant's website (optional)

9
What's Next?
You’re all set with the basics! Here’s what to do next:
- Complete your Onboarding
- Maple Dashboard Overview
- Need Help?
What’s Next?
Customize Your Voice
Adjust voice settings and personality
Add More FAQs
Add more FAQs and train your AI
Add Orders Module
Start taking orders automatically
Set Up SMS
Enable text messaging capabilities
Configure Store Hours
Set detailed hours and holidays
View Analytics
Monitor performance and insights
Need Help?
- Common Issues: Check our Maple Voice Core Troubleshooting
- Live Support: Available Monday-Friday, 9 AM - 6 PM EST