
Navigation
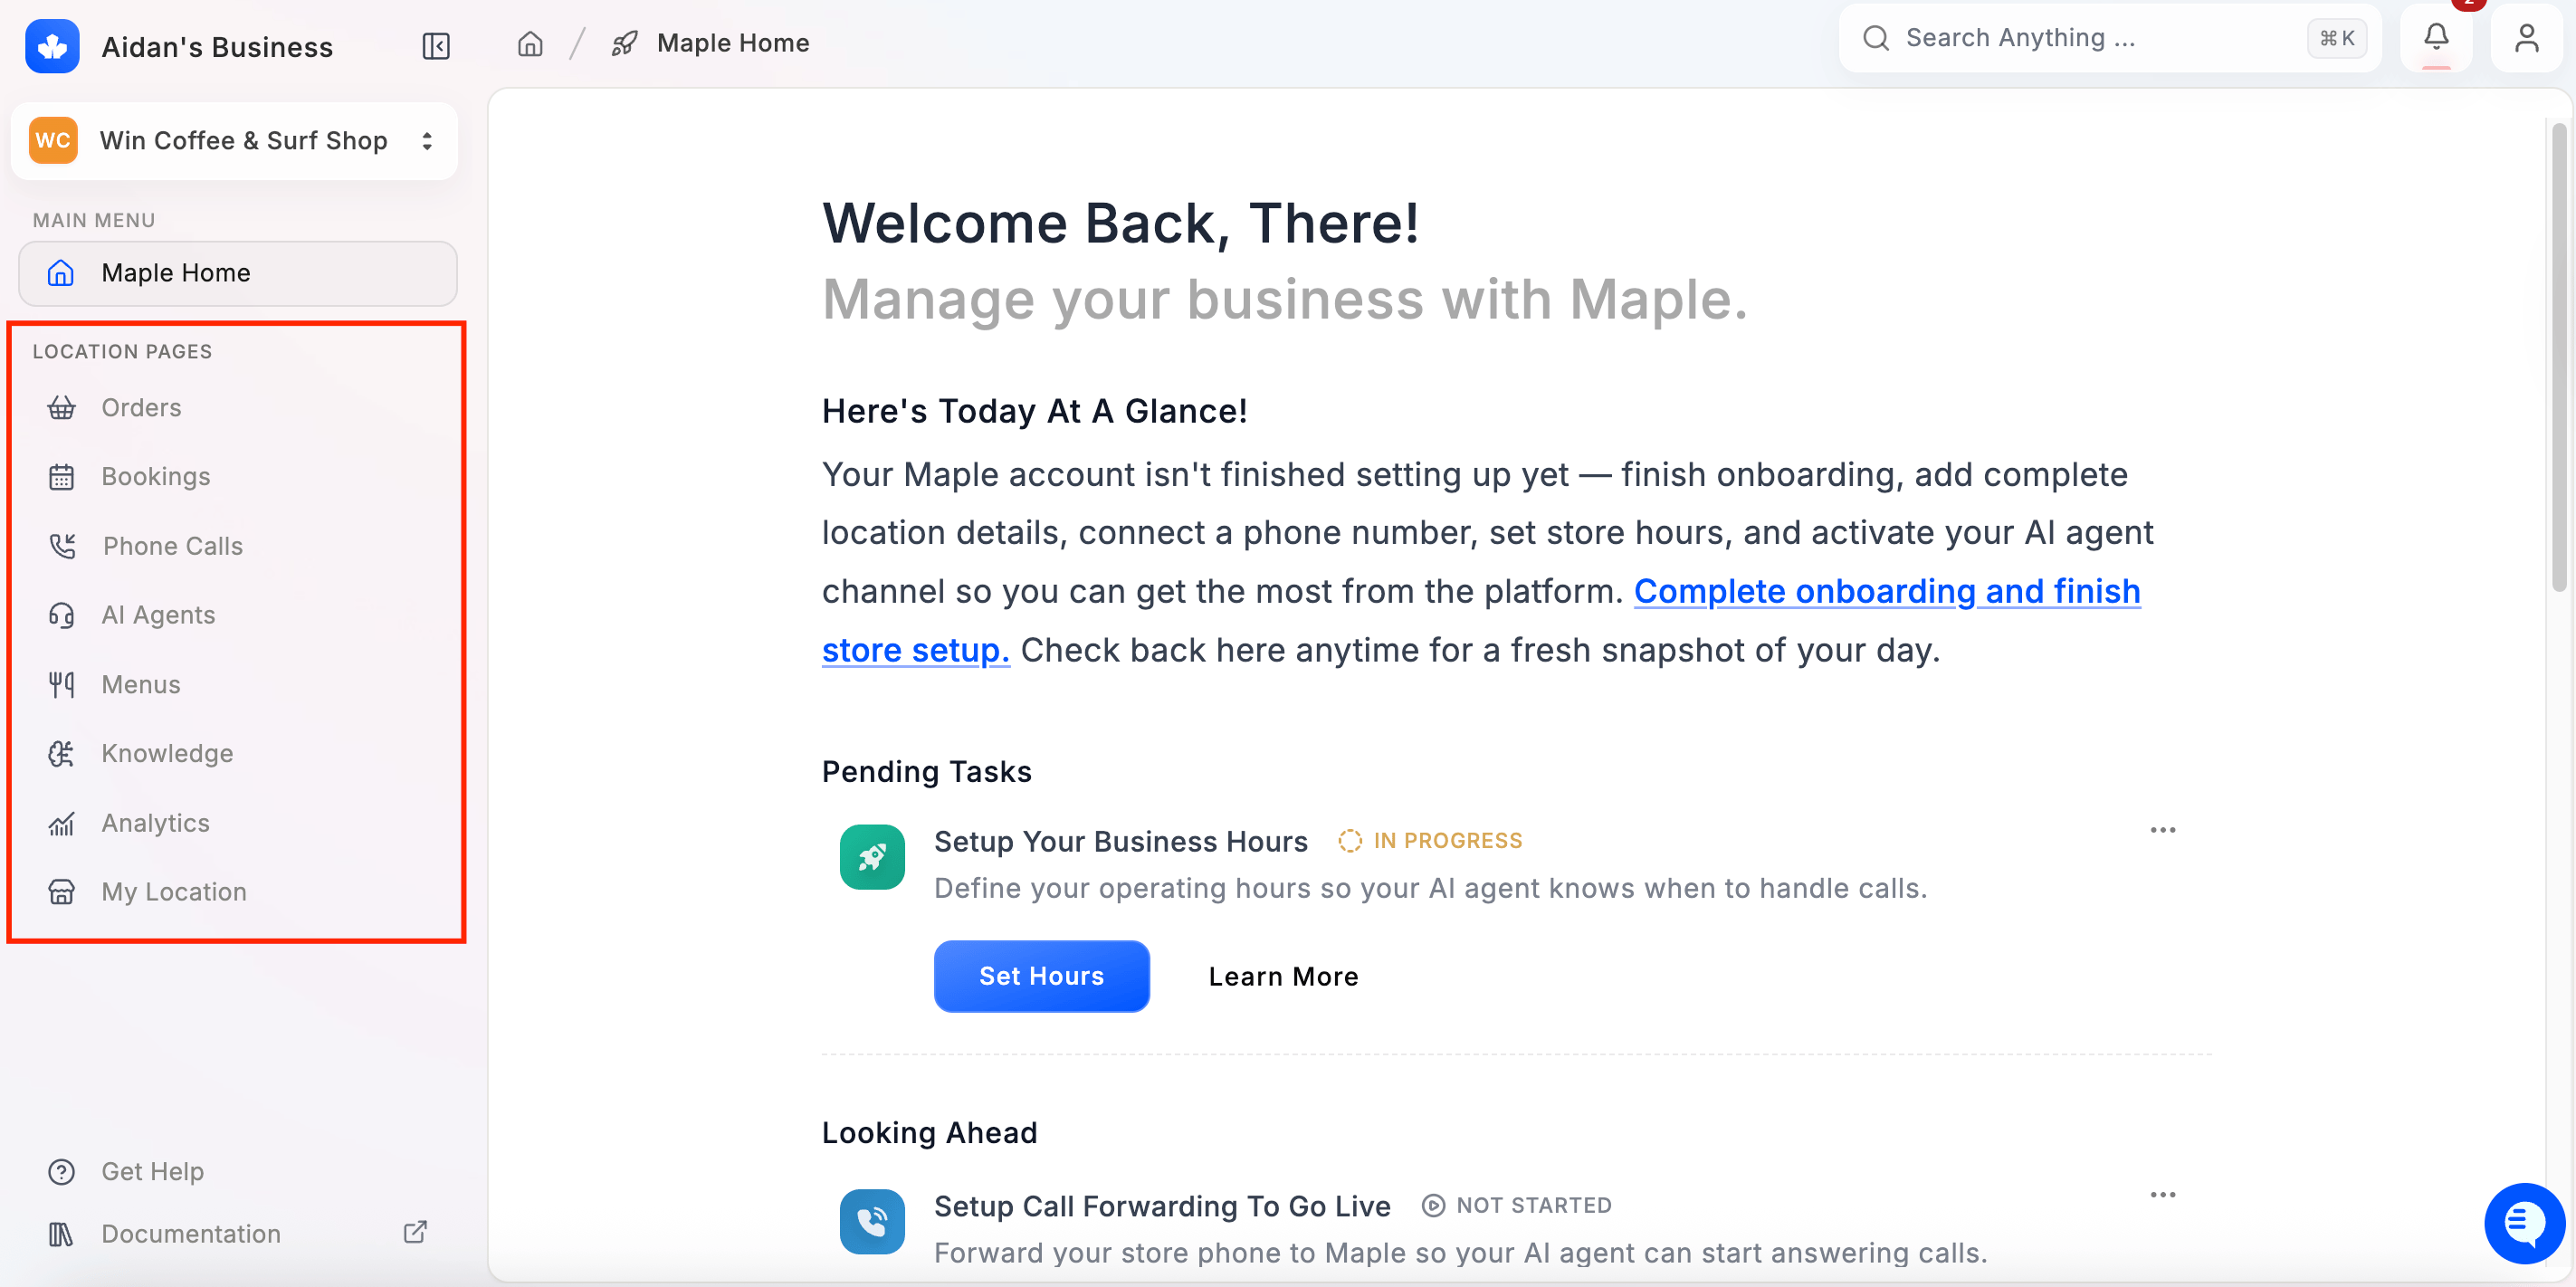
When you log into app.maple.inc you’ll see the sidebar on the left with two sections:- Main Menu — top-level navigation across your account
- Location Pages — everything specific to your active location: Orders, Bookings, Phone Calls, AI Agents, Menus, Knowledge, Analytics, and My Location
Maple Home
The home screen gives you a snapshot of your account status and any pending tasks.- Pending Tasks — items still needed before you’re fully live (e.g., setting business hours, enabling call forwarding)
- Looking Ahead — upcoming actions like going live
Location Pages
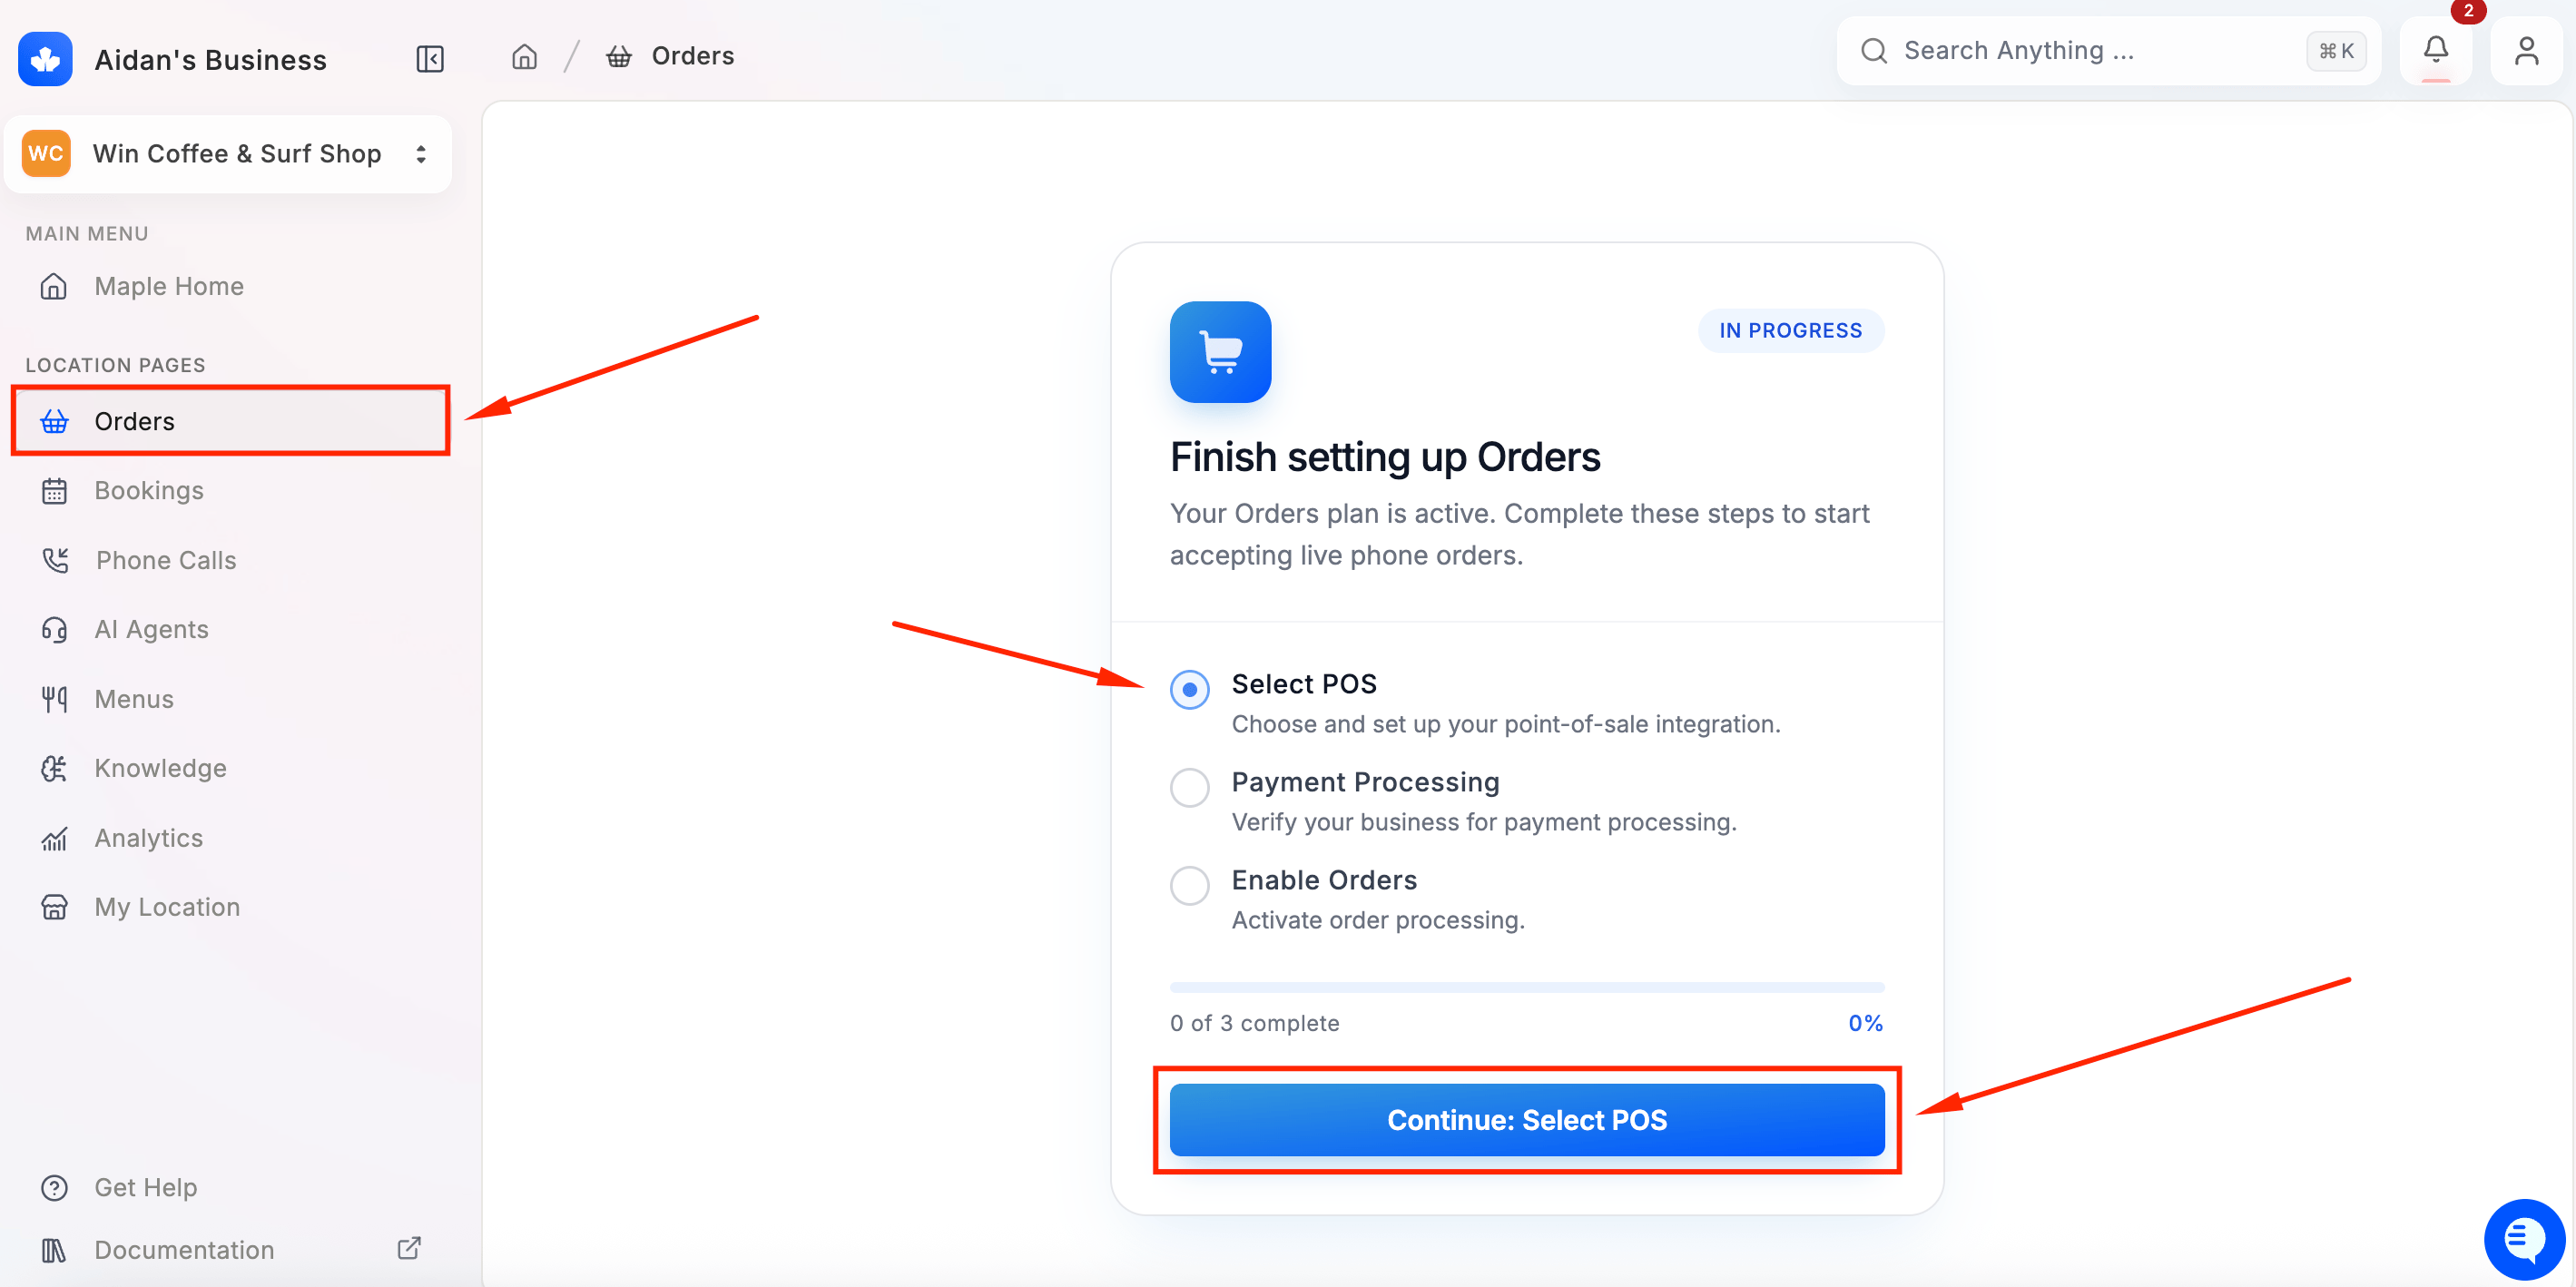
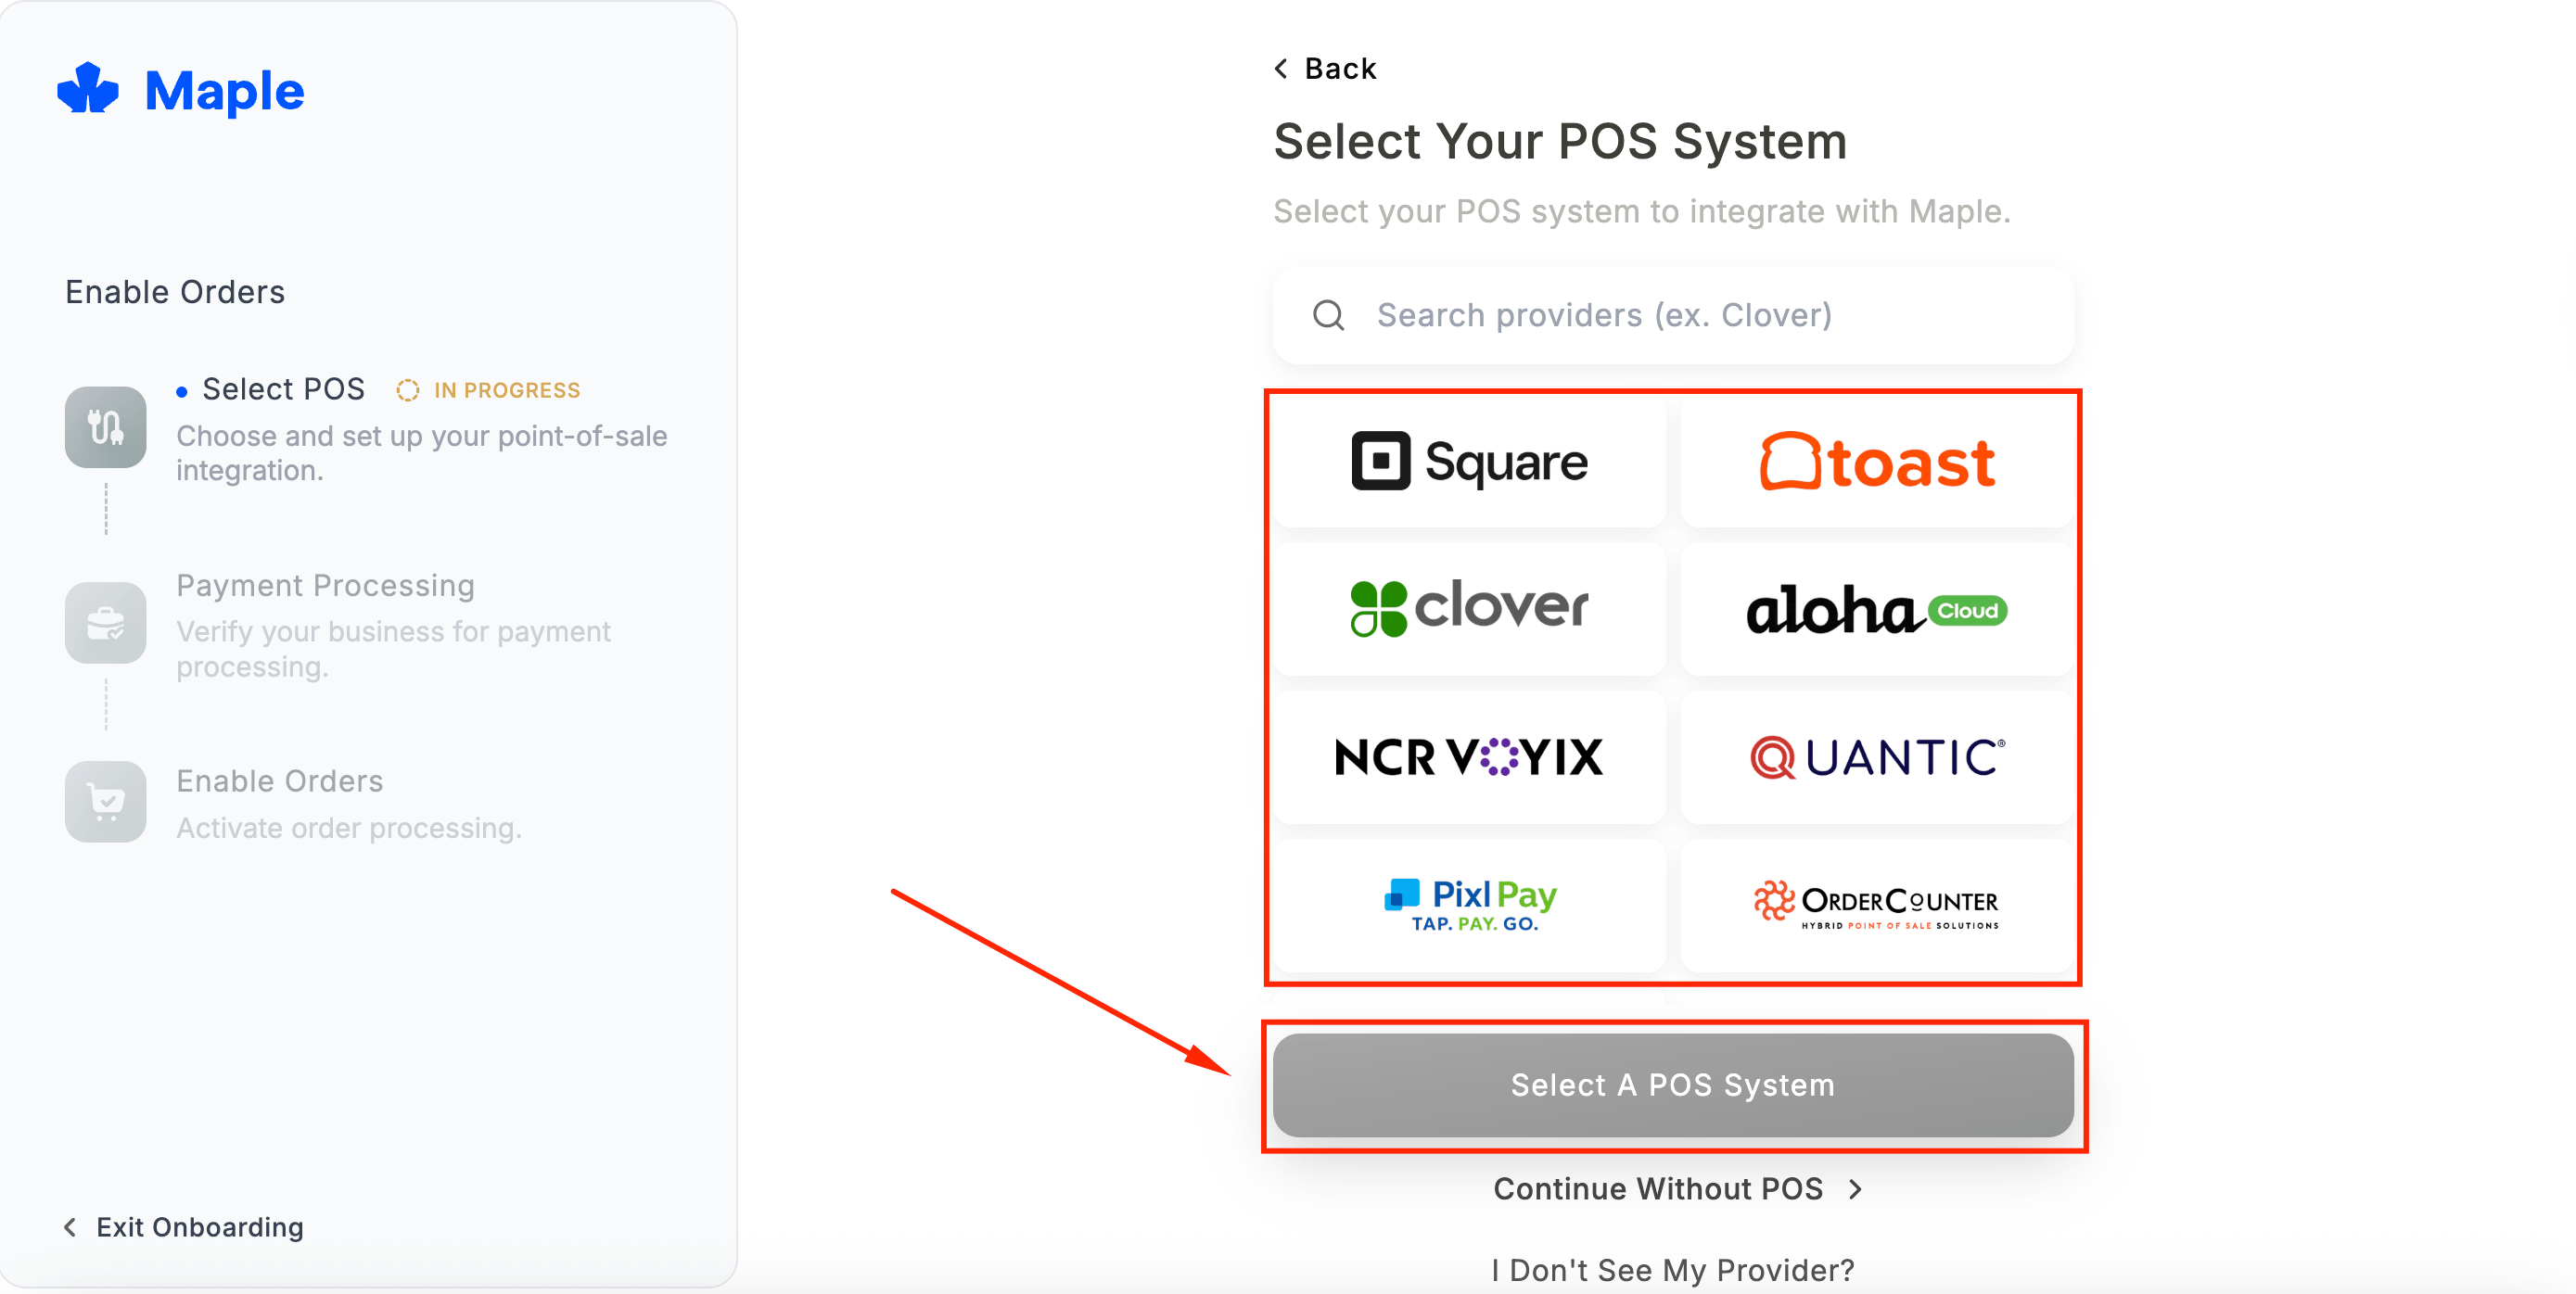
- Select POS — choose and connect your point-of-sale system
- Payment Processing — verify your business for payment processing
- Enable Orders — activate order processing
Step 2 — Menus: Review Your Menu
Click Menus in the sidebar to review the menu that synced from your POS.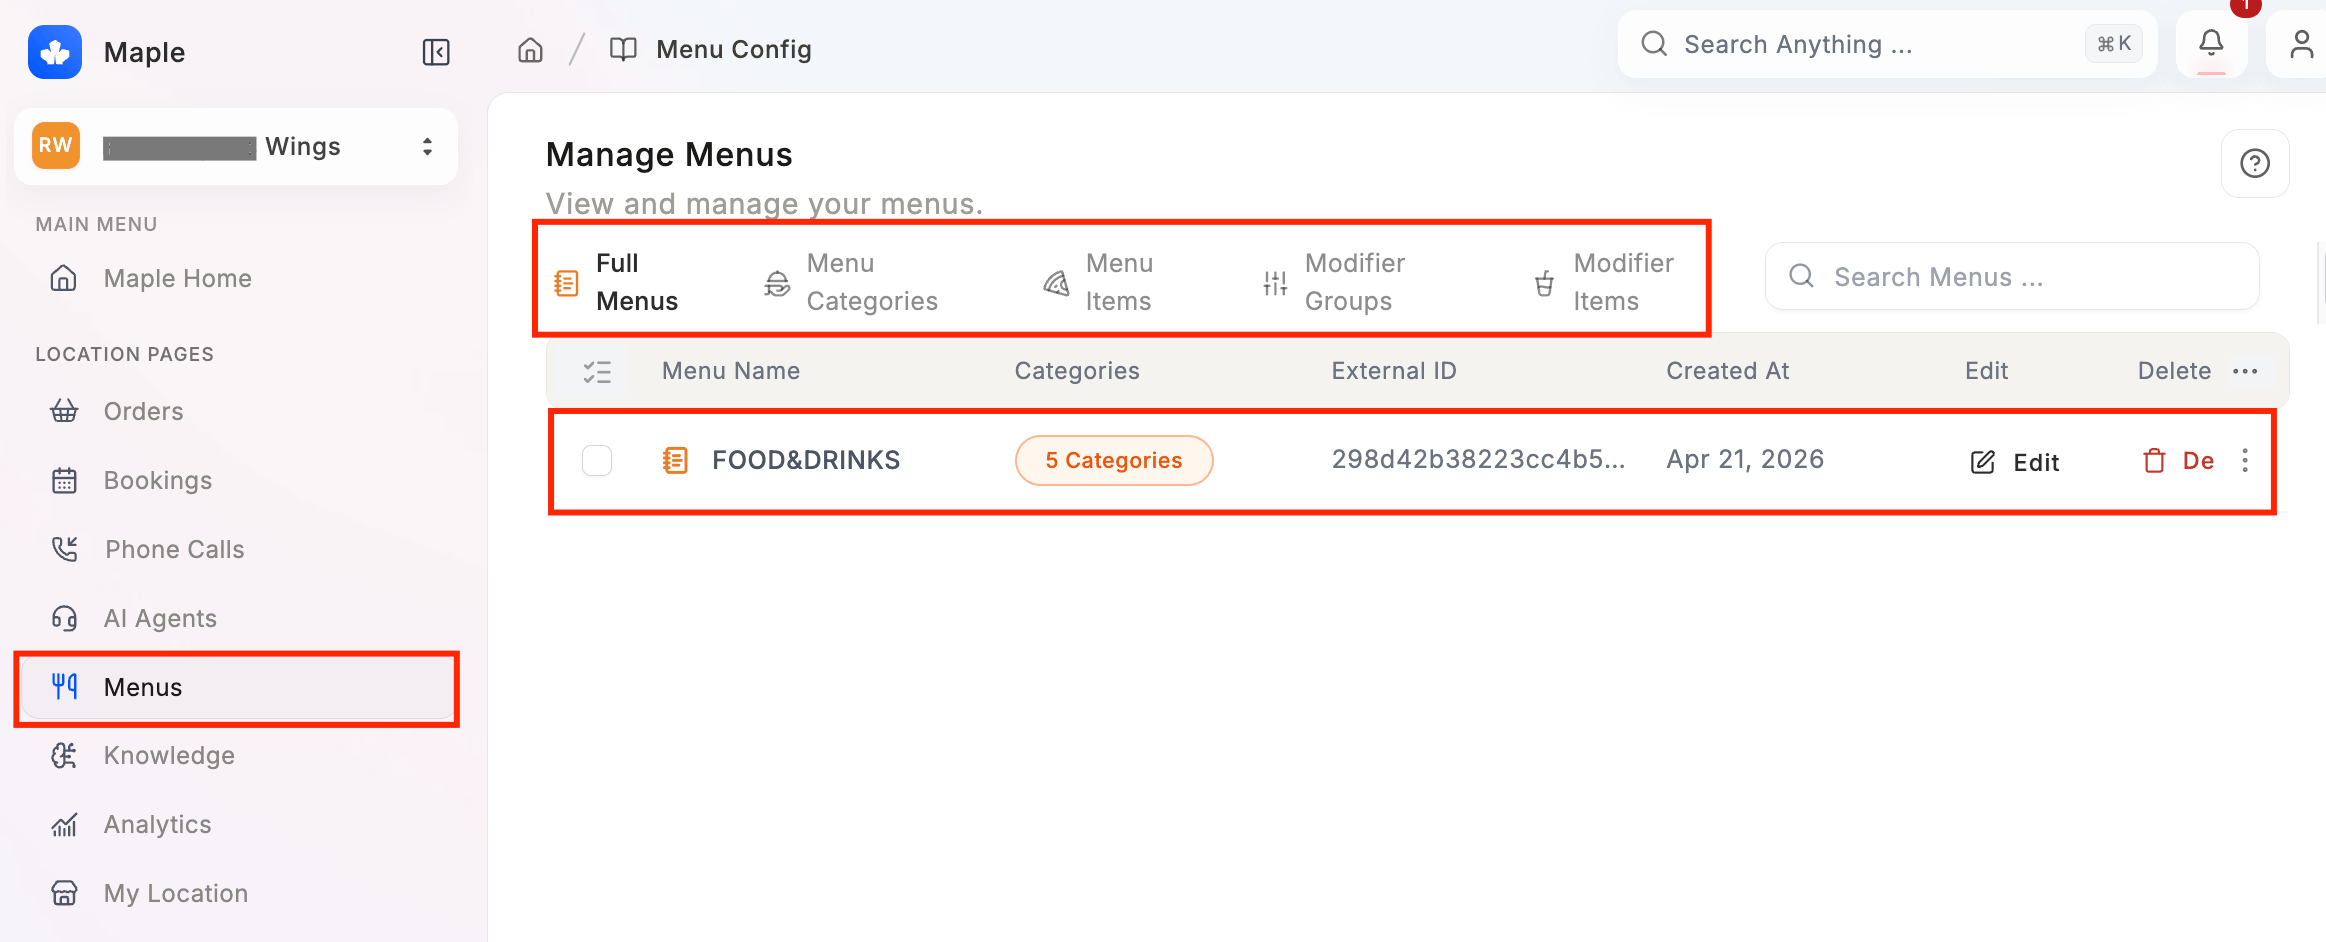
- Full Menus — top-level menus (e.g. Food & Drinks)
- Menu Categories — sections within a menu (e.g. Appetizers, Mains)
- Menu Items — individual items
- Modifier Groups — groups of modifiers (e.g. sauce choices)
- Modifier Items — individual modifier options
- Item names are clear and customer-facing
- Descriptions are accurate
- Modifiers, pricing, and tax are correct
- Items you don’t want available are disabled
Menu Hours vs. Store Hours
There are two separate hour settings in Maple, and it’s important to understand the difference:- Store Hours — your general restaurant operating hours, visible to customers. These will be displayed in “My Location.”
- Menu Hours — the hours during which your Maple agent will actually accept orders. If a customer calls outside your menu hours, the agent will let them know the kitchen isn’t currently taking orders.
Step 3 — Orders Tab
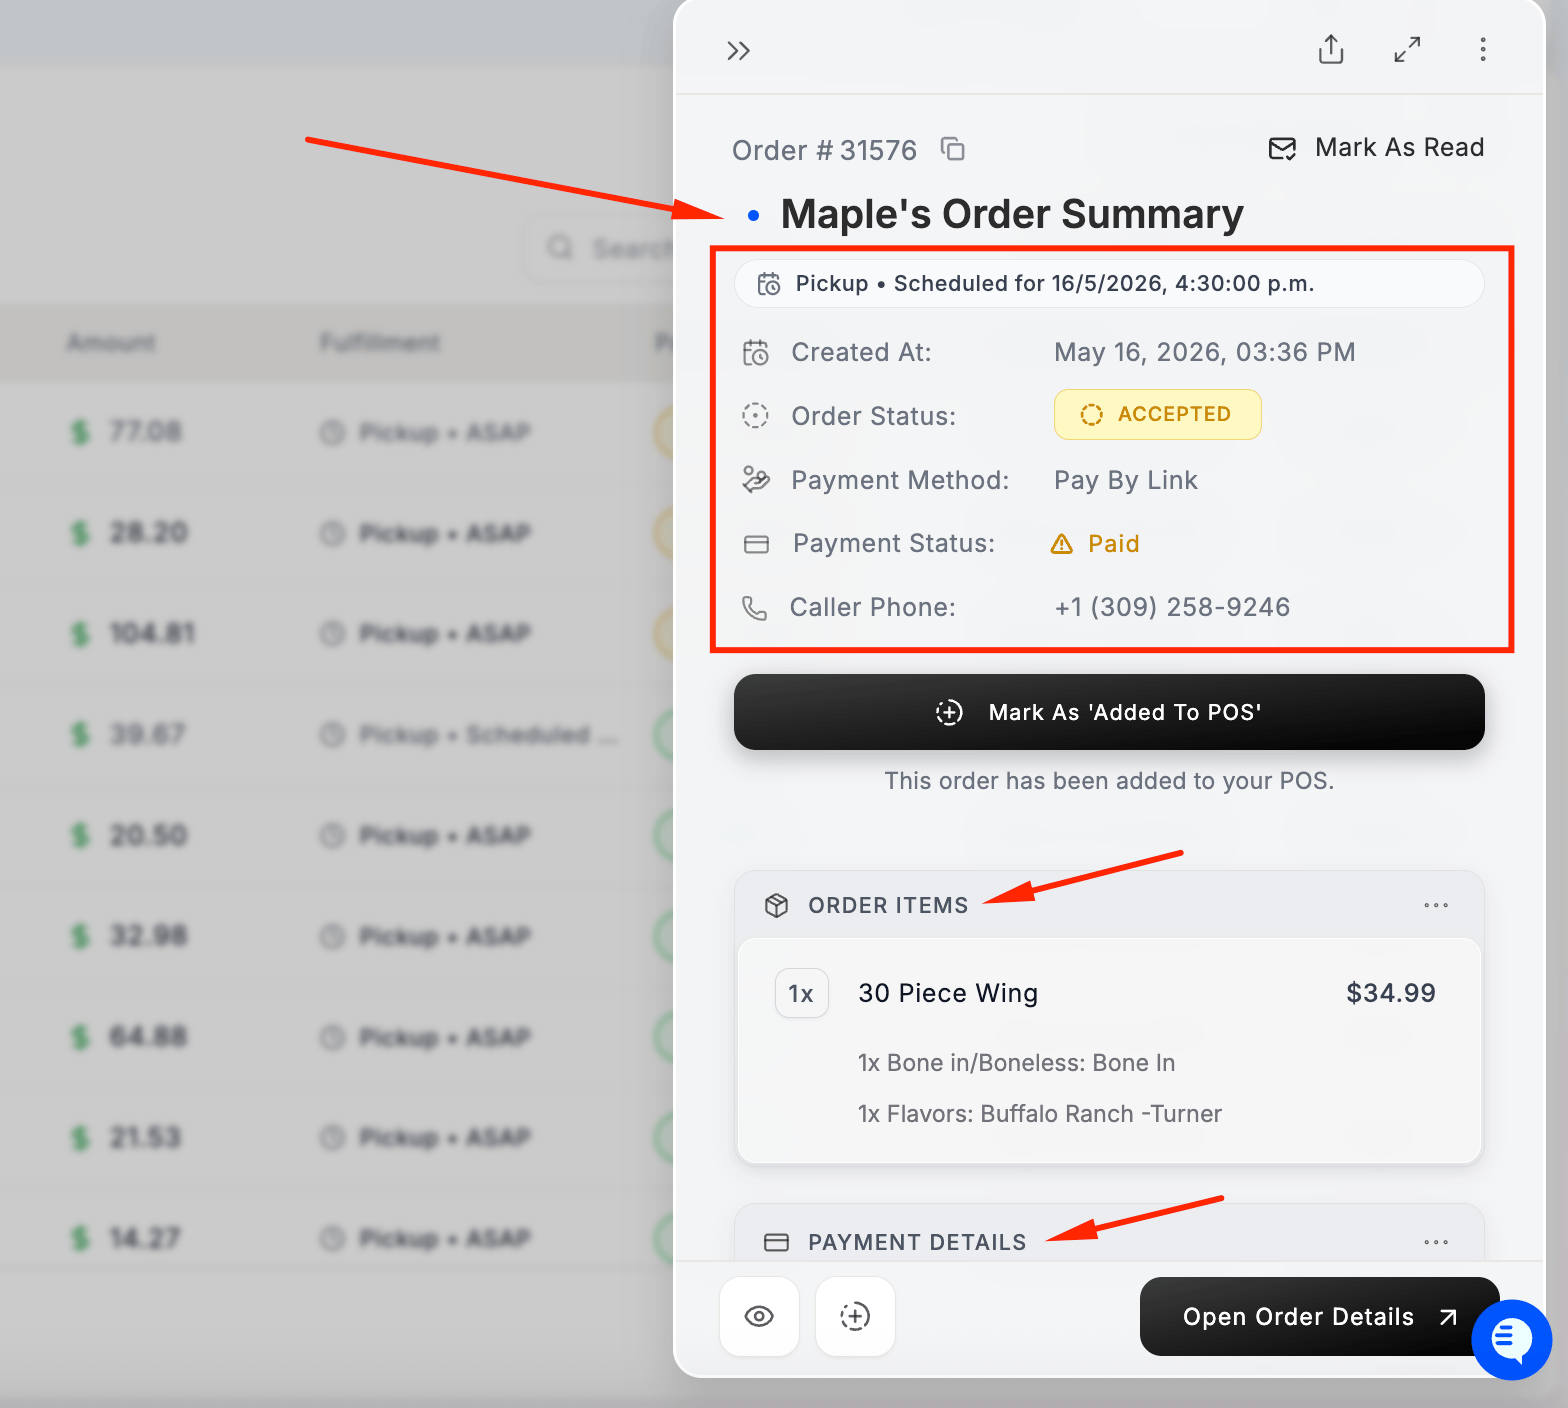
Once your POS is connected, orders taken by your Maple agent will appear here.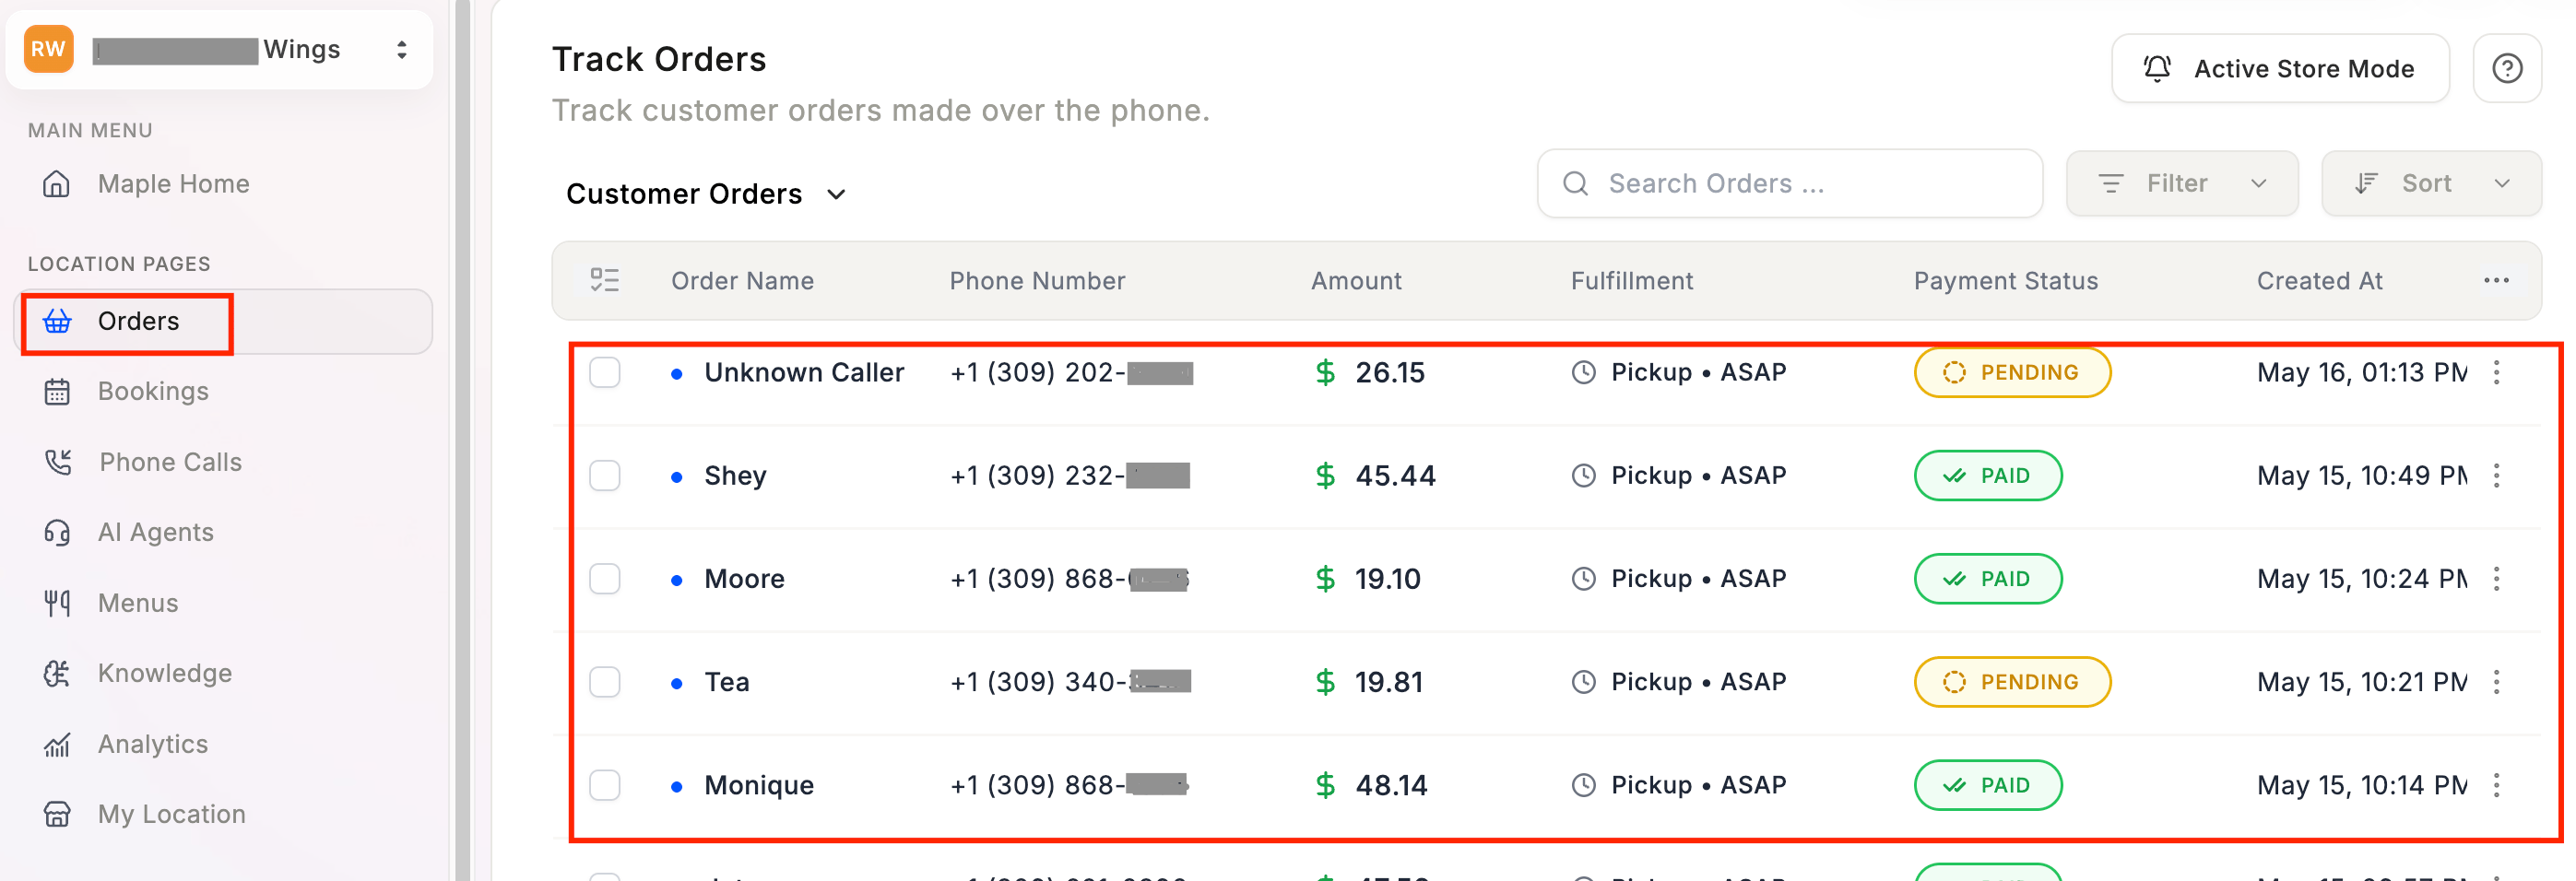
- Order name — customer’s name
- Phone number — caller’s number
- Amount — order total
- Fulfillment — pickup or delivery, ASAP or scheduled
- Payment status — Paid or Pending
- Created at — date and time
Step 4 — Bookings (if enabled)
Click Bookings to manage phone reservations.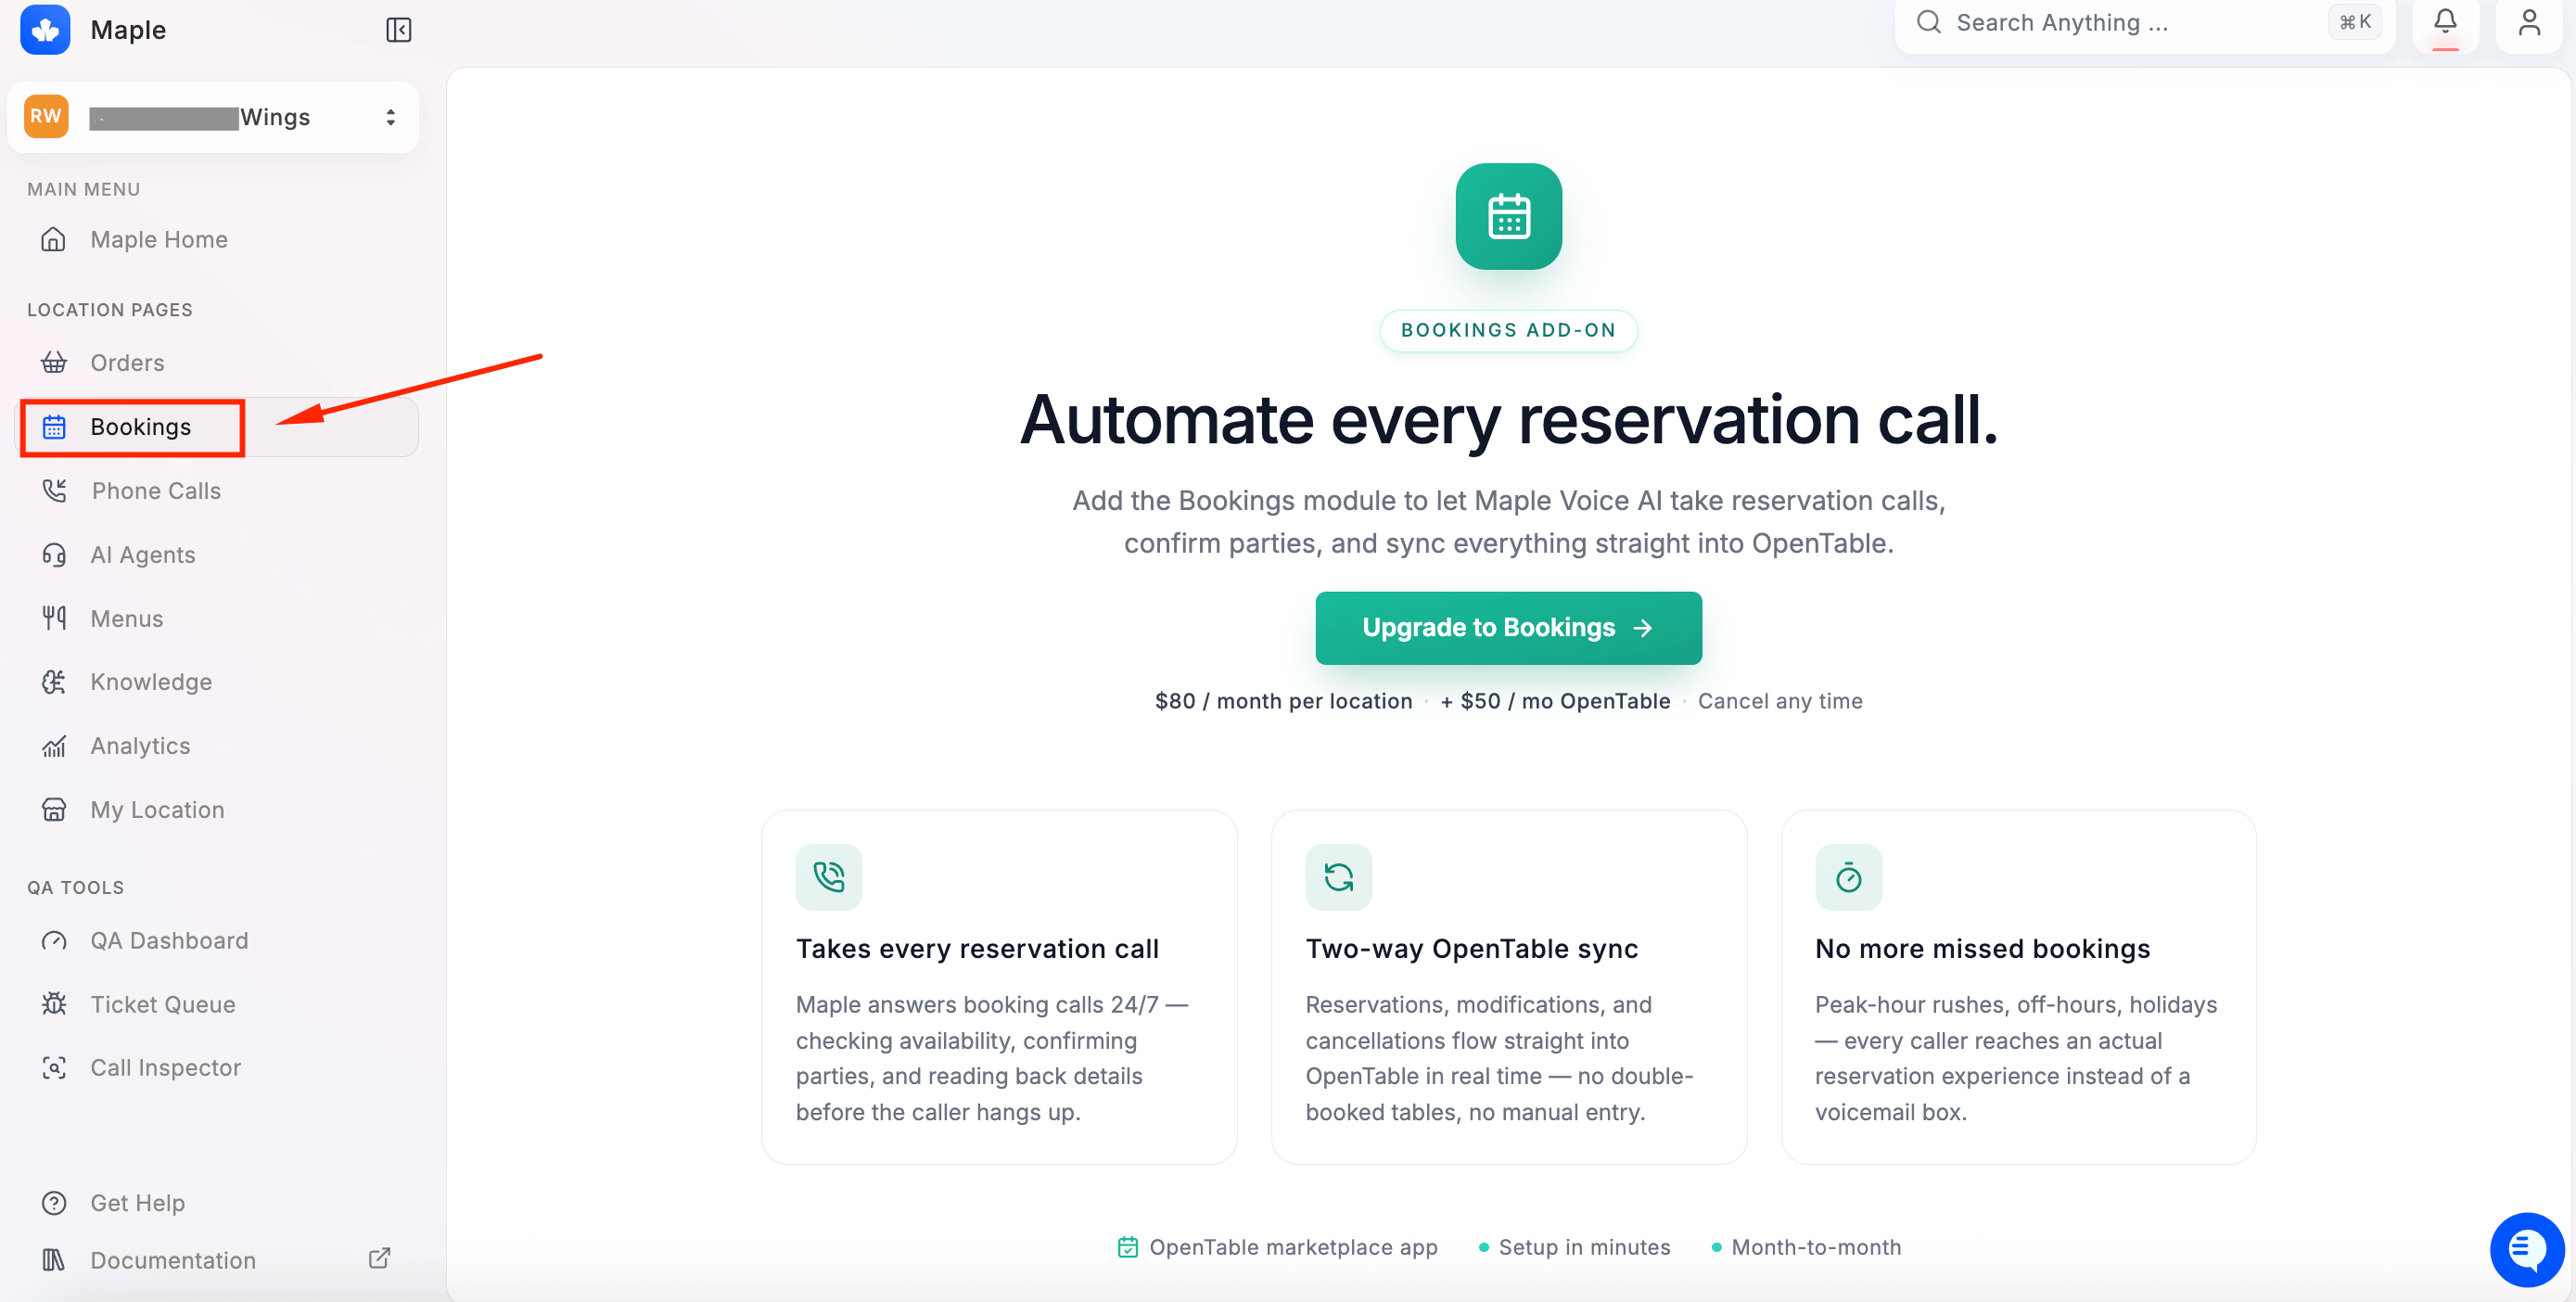
Step 5 — Phone Calls
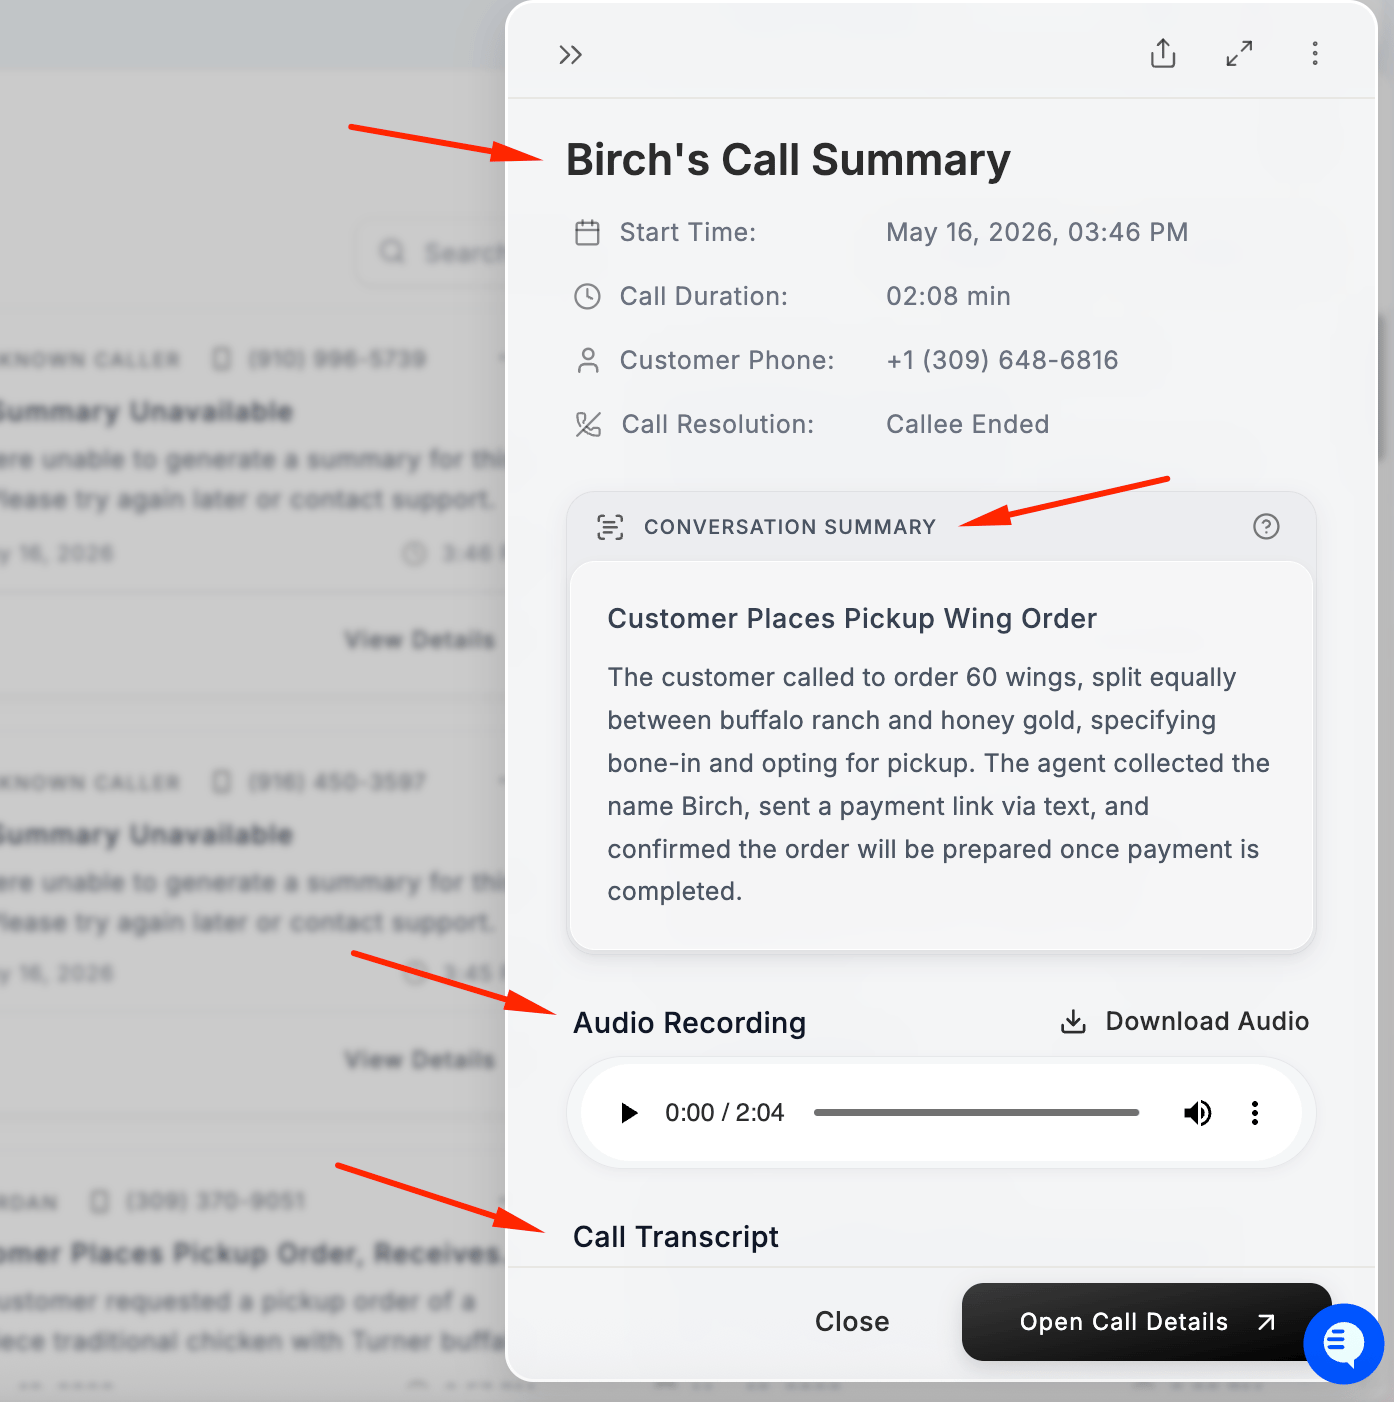
Click Phone Calls to view every call your Maple agent has handled.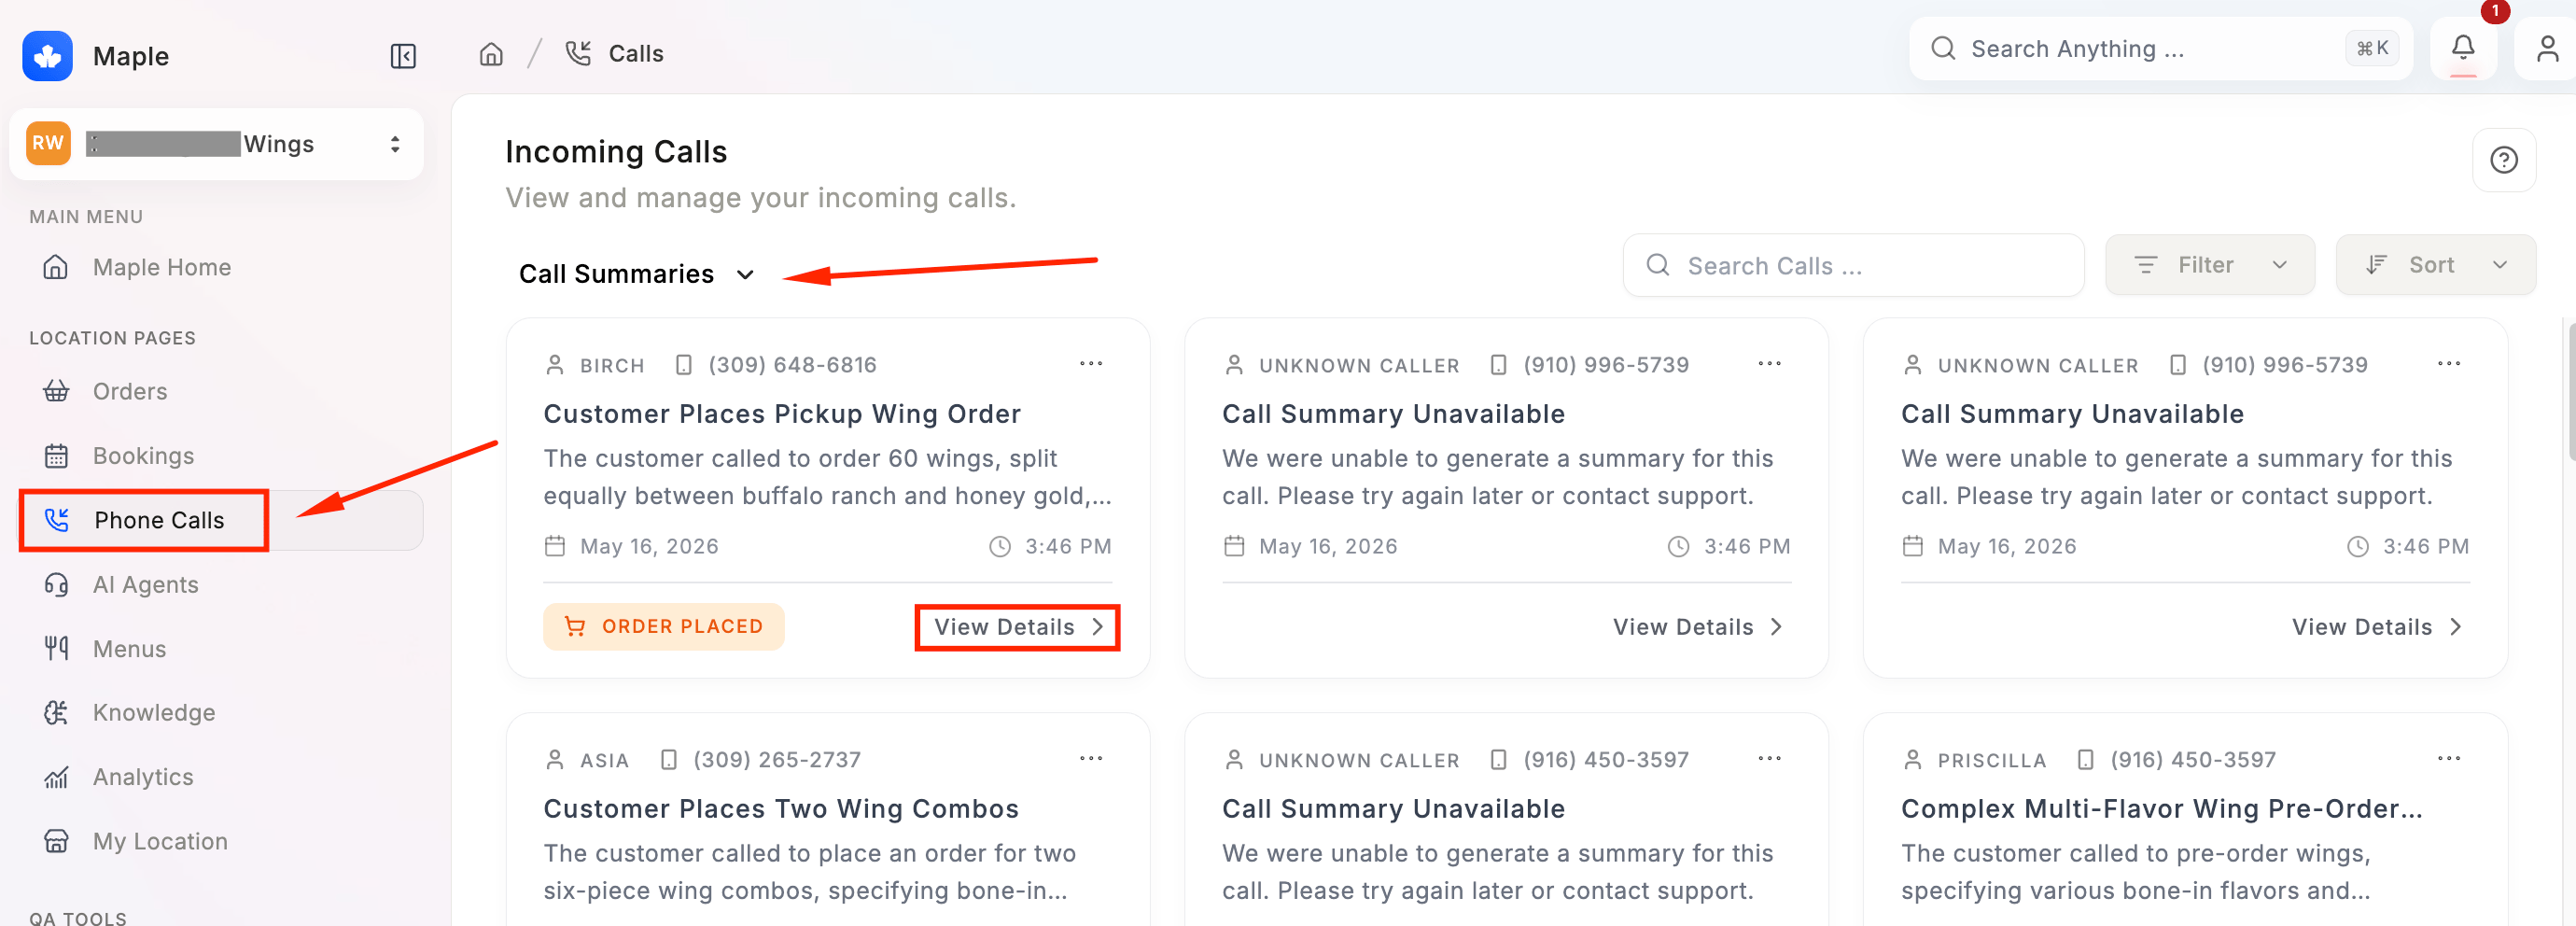
- Start time and call duration
- Customer phone number
- Call resolution — how the call ended
- Conversation Summary — a written AI summary of the full interaction
- Audio Recording — play or download the full call
- Call Transcript — complete written transcript of the conversation
Step 6 — AI Agents
This is one of the most important tabs. Click AI Agents to view and configure your Maple voice agent. Click on your agent to open its settings panel.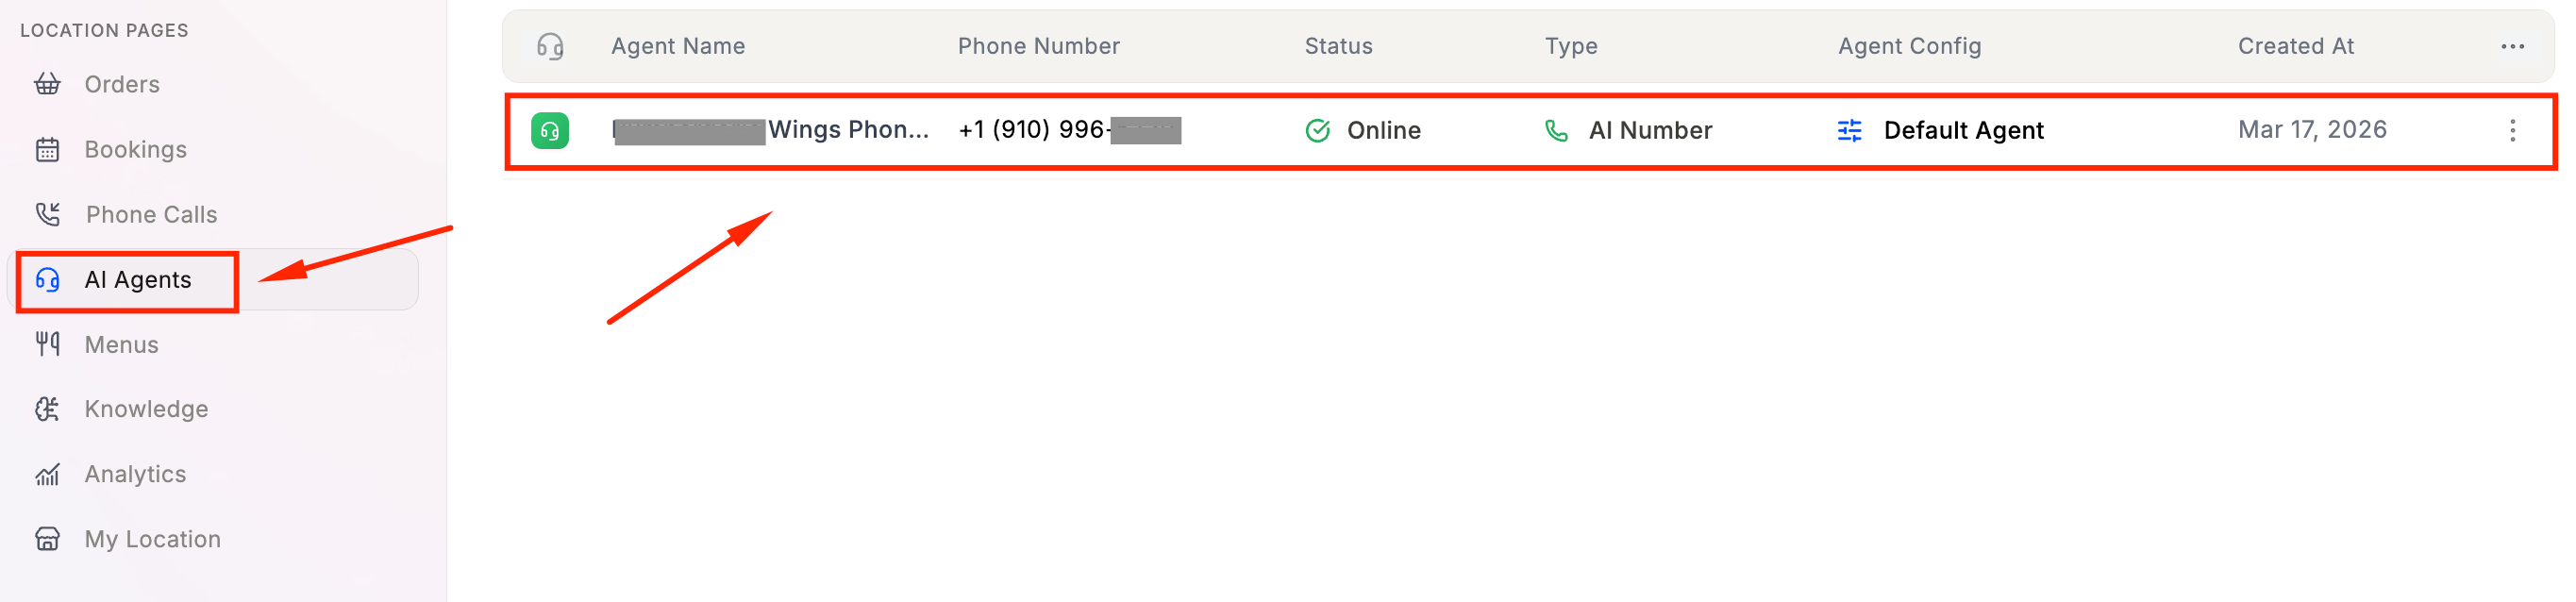
Message
Set your Welcome Message — the first thing customers hear when they call. Keep it short, warm, and direct.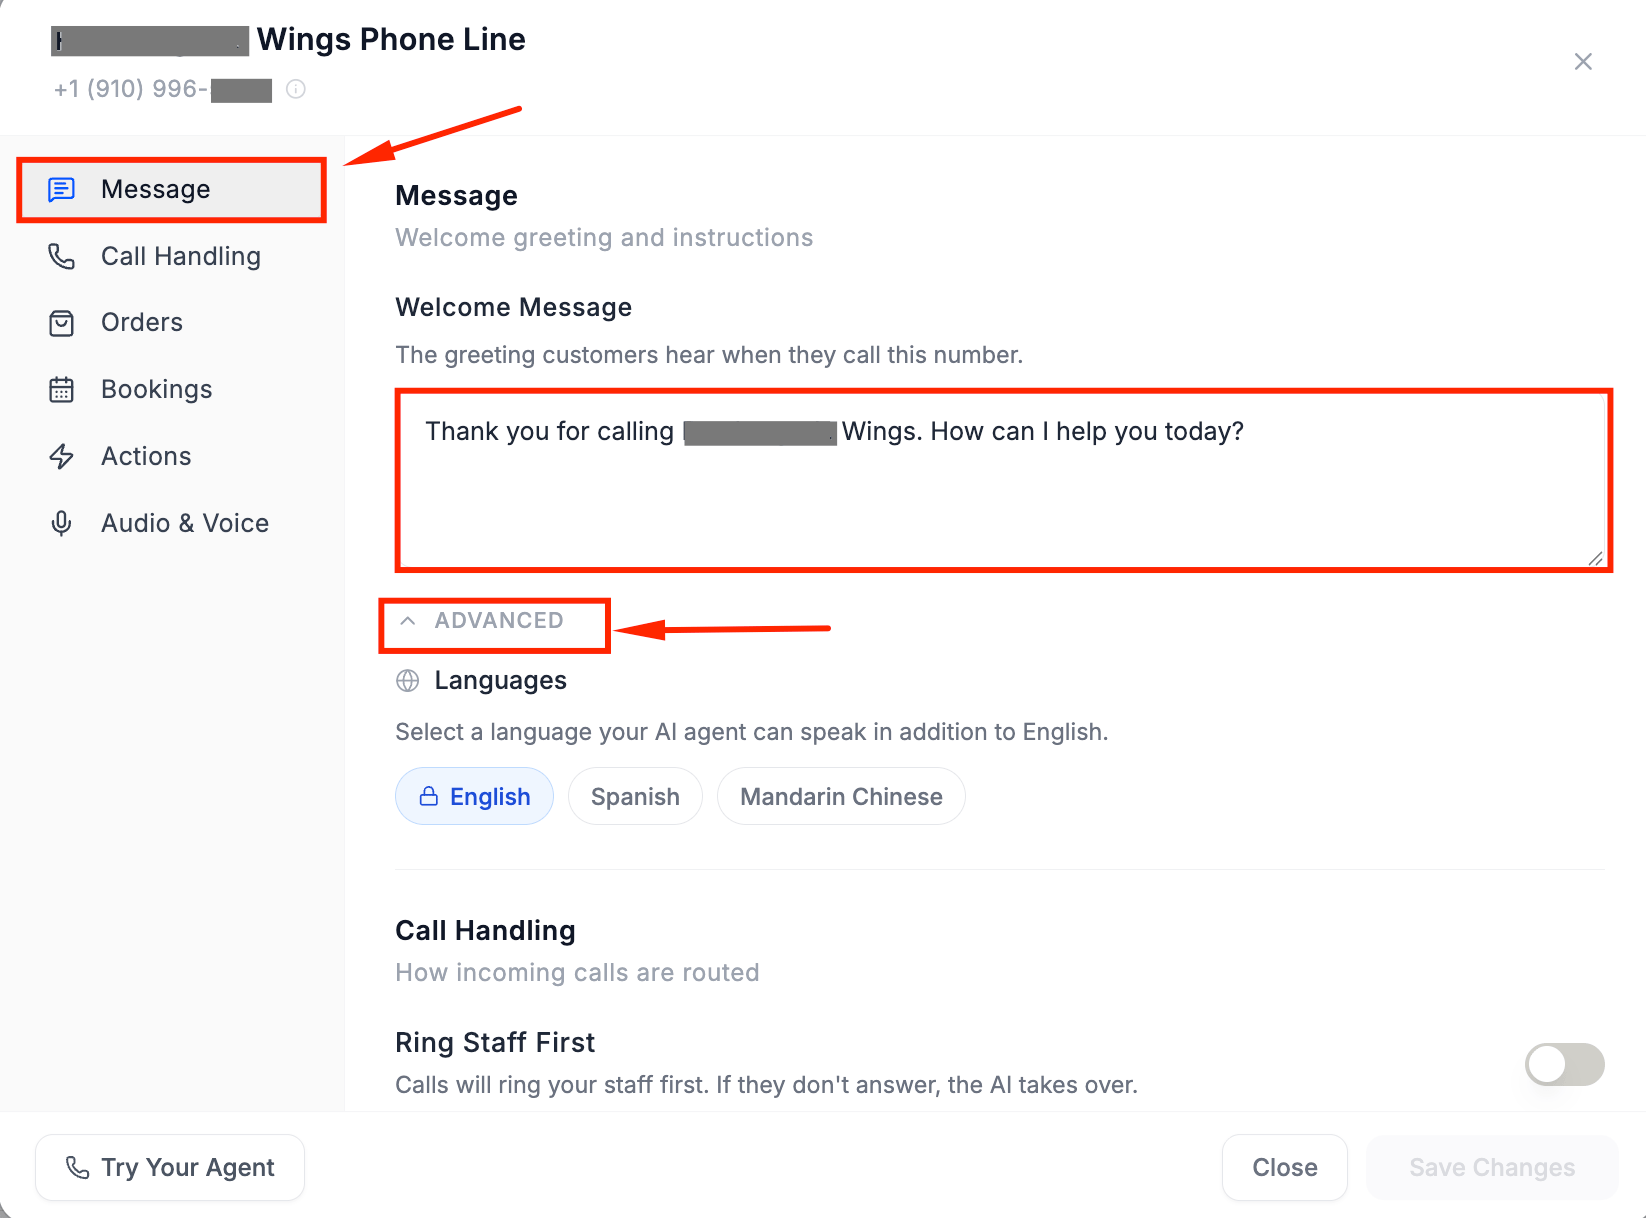
Call Handling
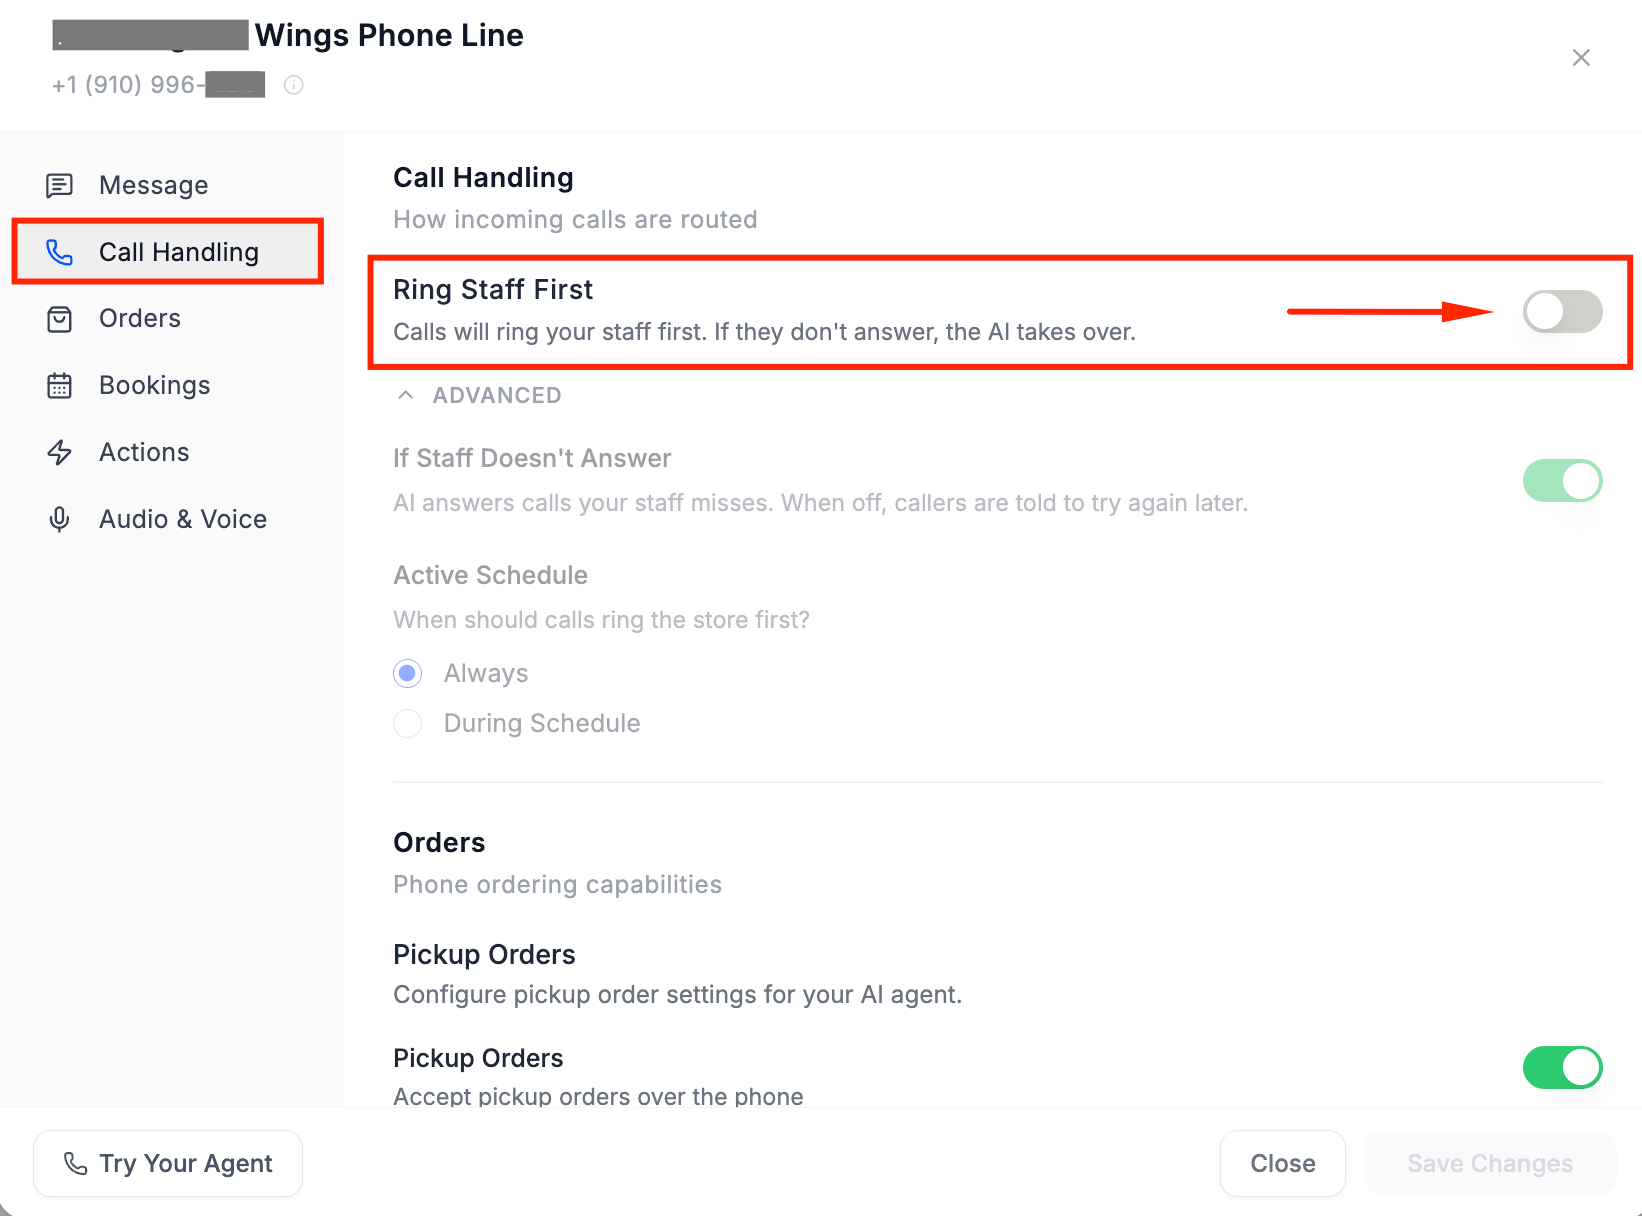
- Ring Staff First — when enabled, calls ring your staff first. If no one answers, the AI takes over. When disabled, Maple answers all calls immediately.
- If Staff Doesn’t Answer — when on, the AI handles any missed call. When off, callers are told to try again later.
- Active Schedule — choose whether Ring Staff First applies always or only during specific hours.
Orders
Configure your phone ordering behavior: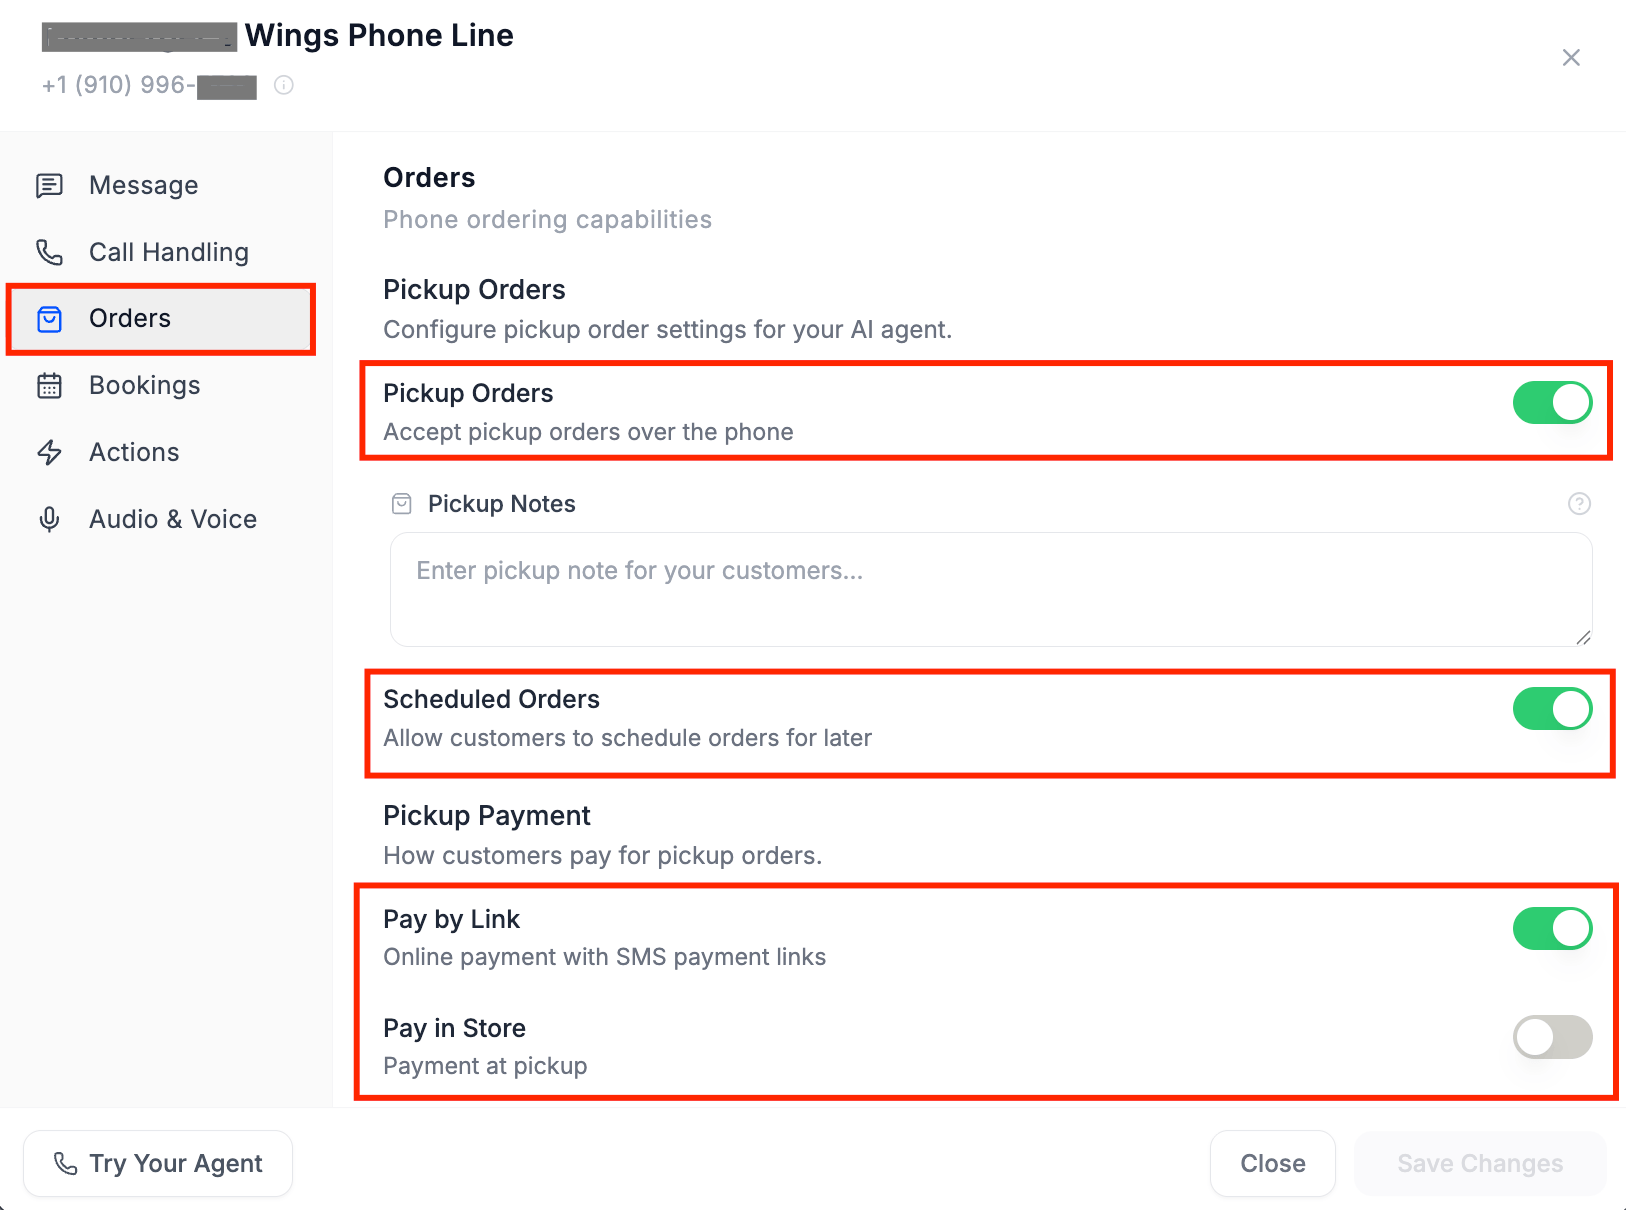
- Pickup Orders — toggle on to accept pickup orders over the phone
- Pickup Notes — add a note that appears on every pickup order
- Scheduled Orders — allow customers to place orders for a later pickup time
- Pickup Payment — choose how customers pay:
- Pay by Link — Maple sends an SMS payment link. The order goes to the kitchen once paid.
- Pay in Store — order goes straight to the kitchen. Customer pays at pickup.
Bookings
If you have the Bookings module, enable Phone Reservations here to let customers book, modify, or cancel reservations over the phone. If you’re not on the Bookings plan, you’ll see an upgrade prompt.Actions
Configure what your AI agent can do during calls.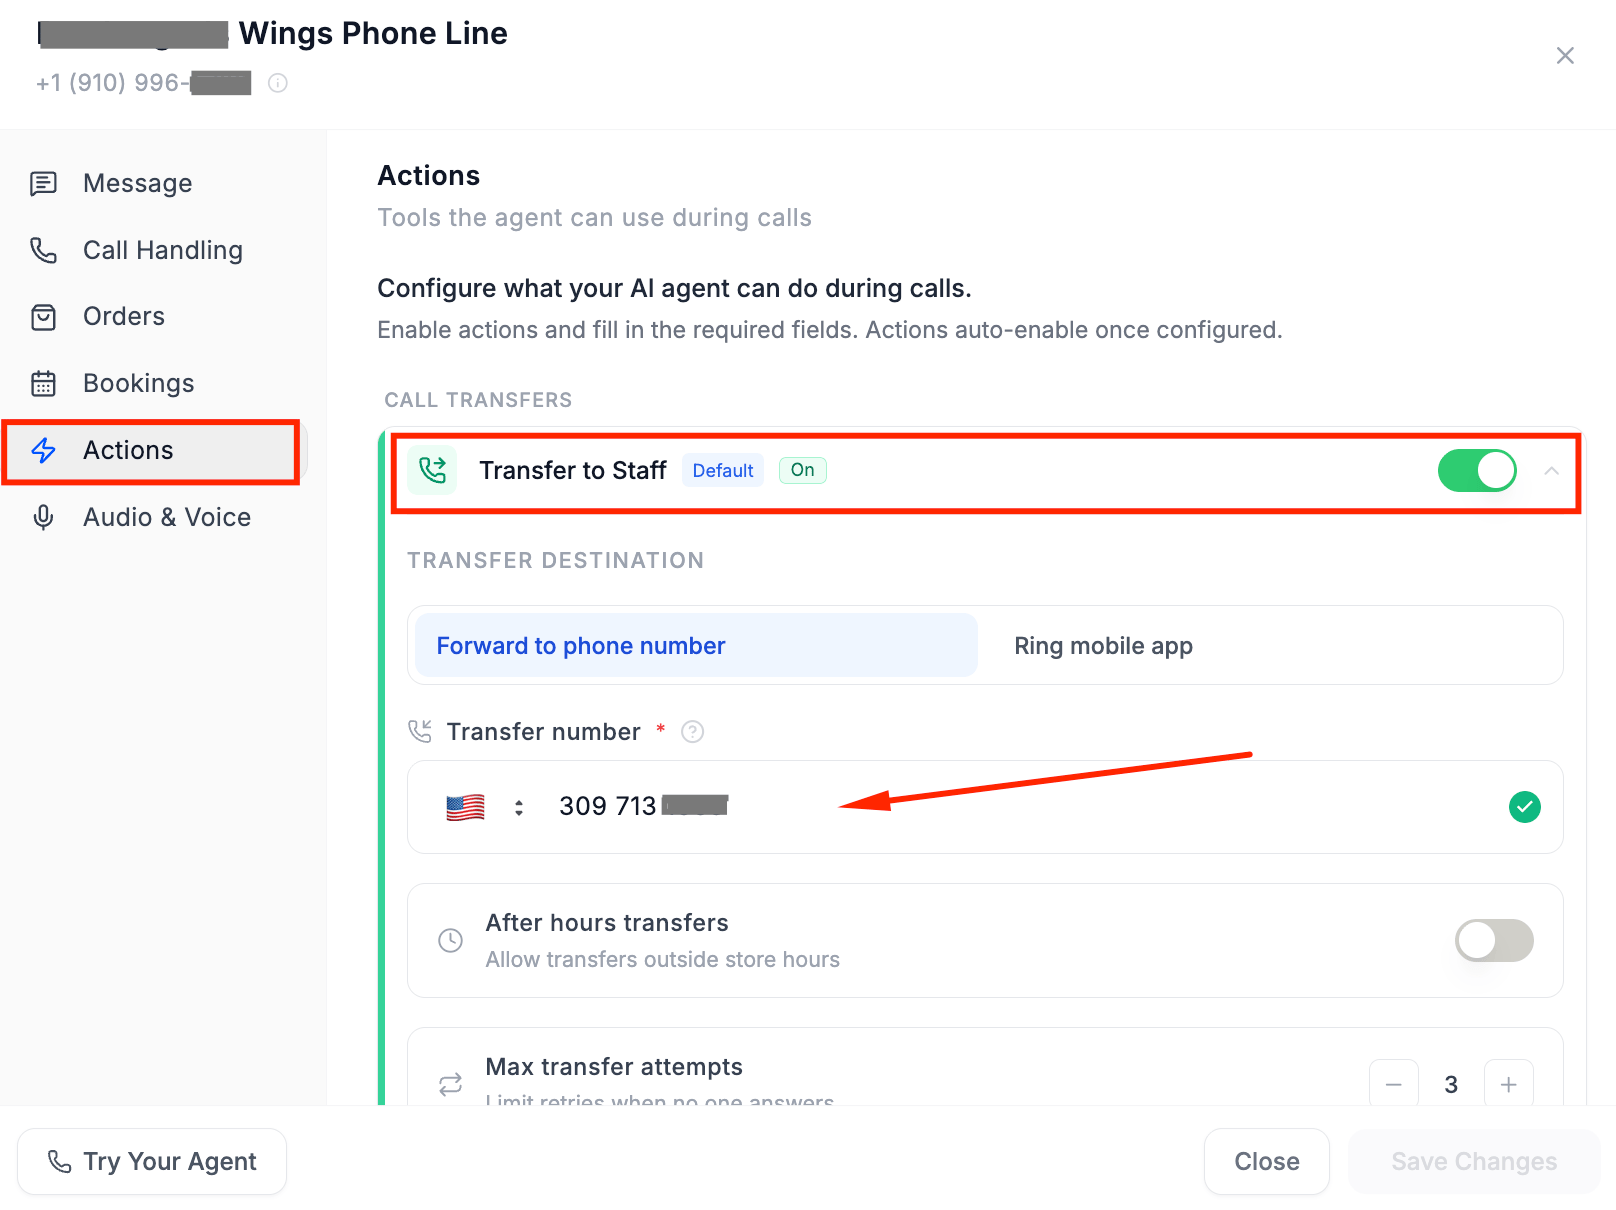
- Transfer to Staff — enabled by default. Set your transfer number, max transfer attempts, and whether after-hours transfers are allowed.
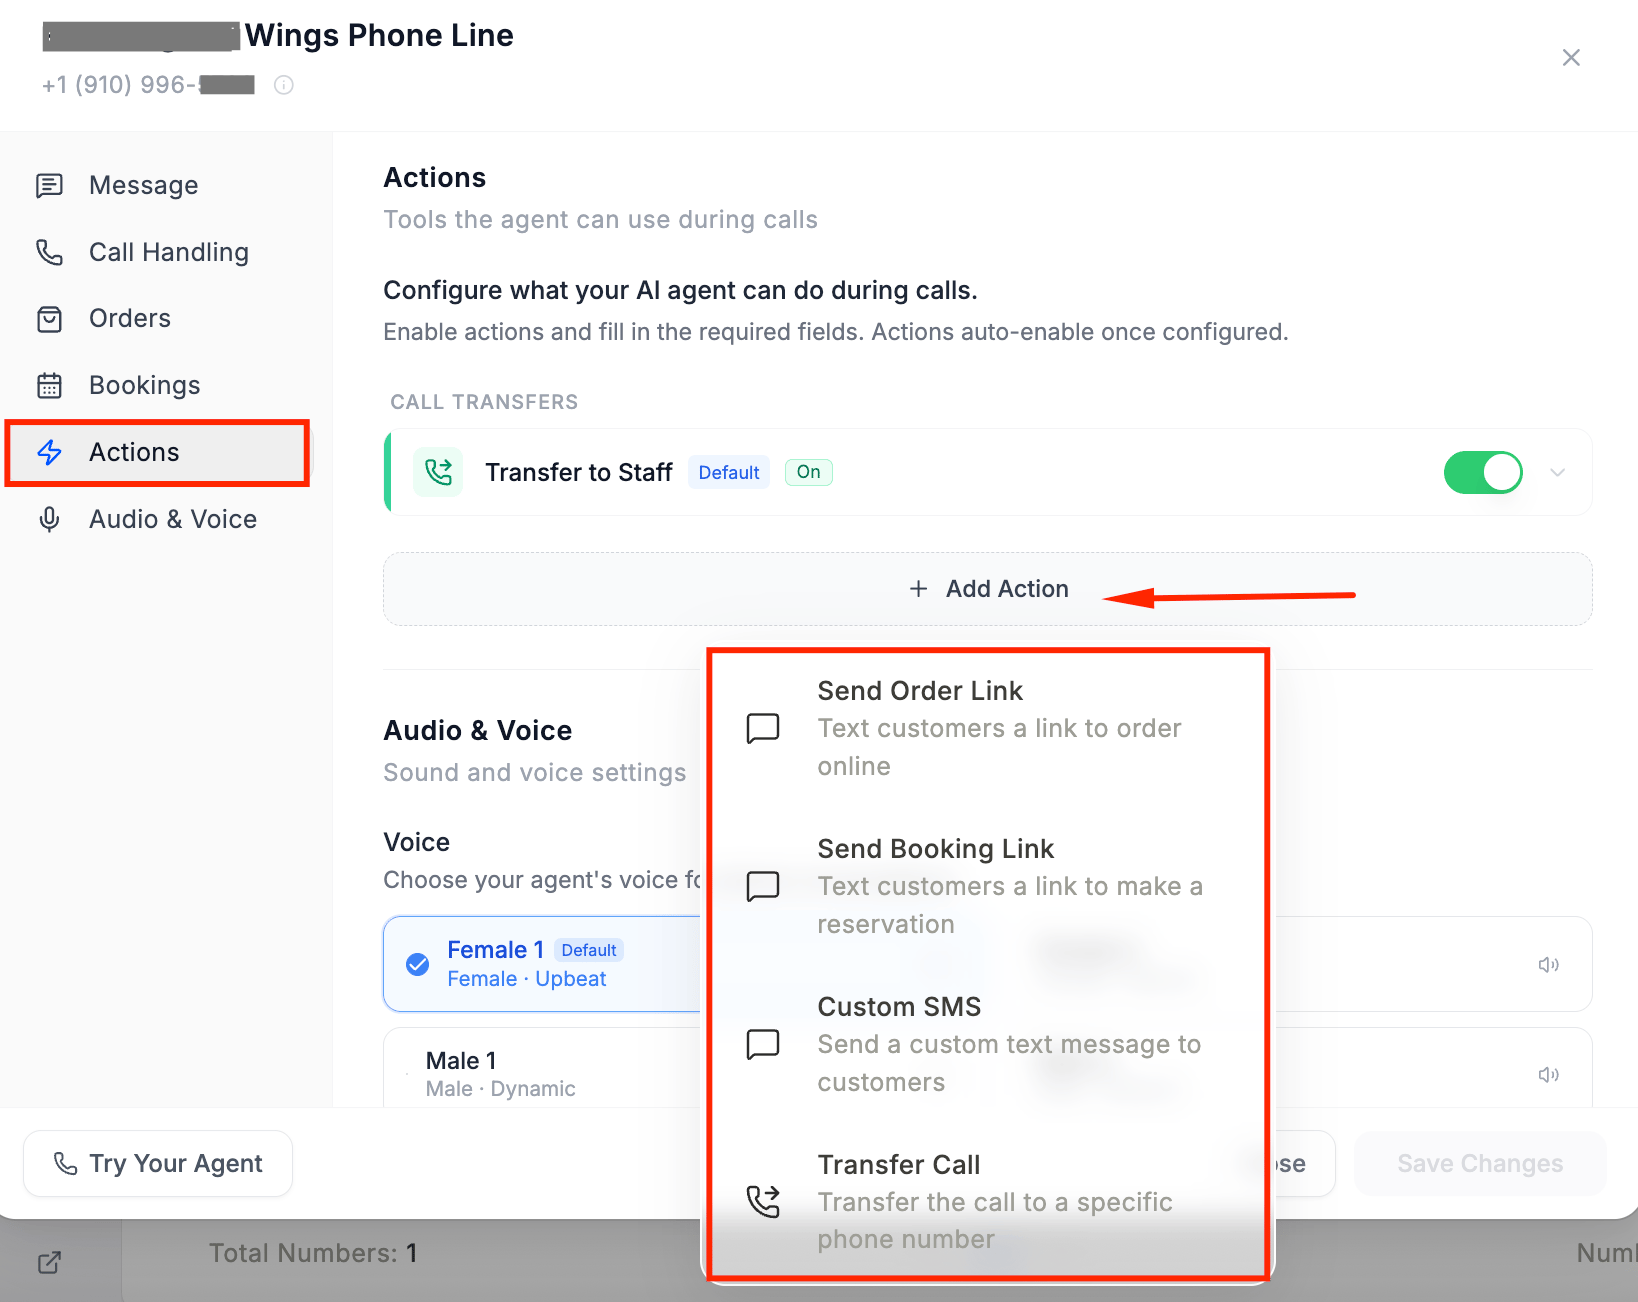
- Send Order Link — texts the customer a link to order online
- Send Booking Link — texts the customer a link to make a reservation
- Custom SMS — sends a custom text message to the customer
- Transfer Call — transfers the call to a specific phone number (catering, reservations, etc.)
Audio & Voice
Choose your agent’s voice. Four voices are available: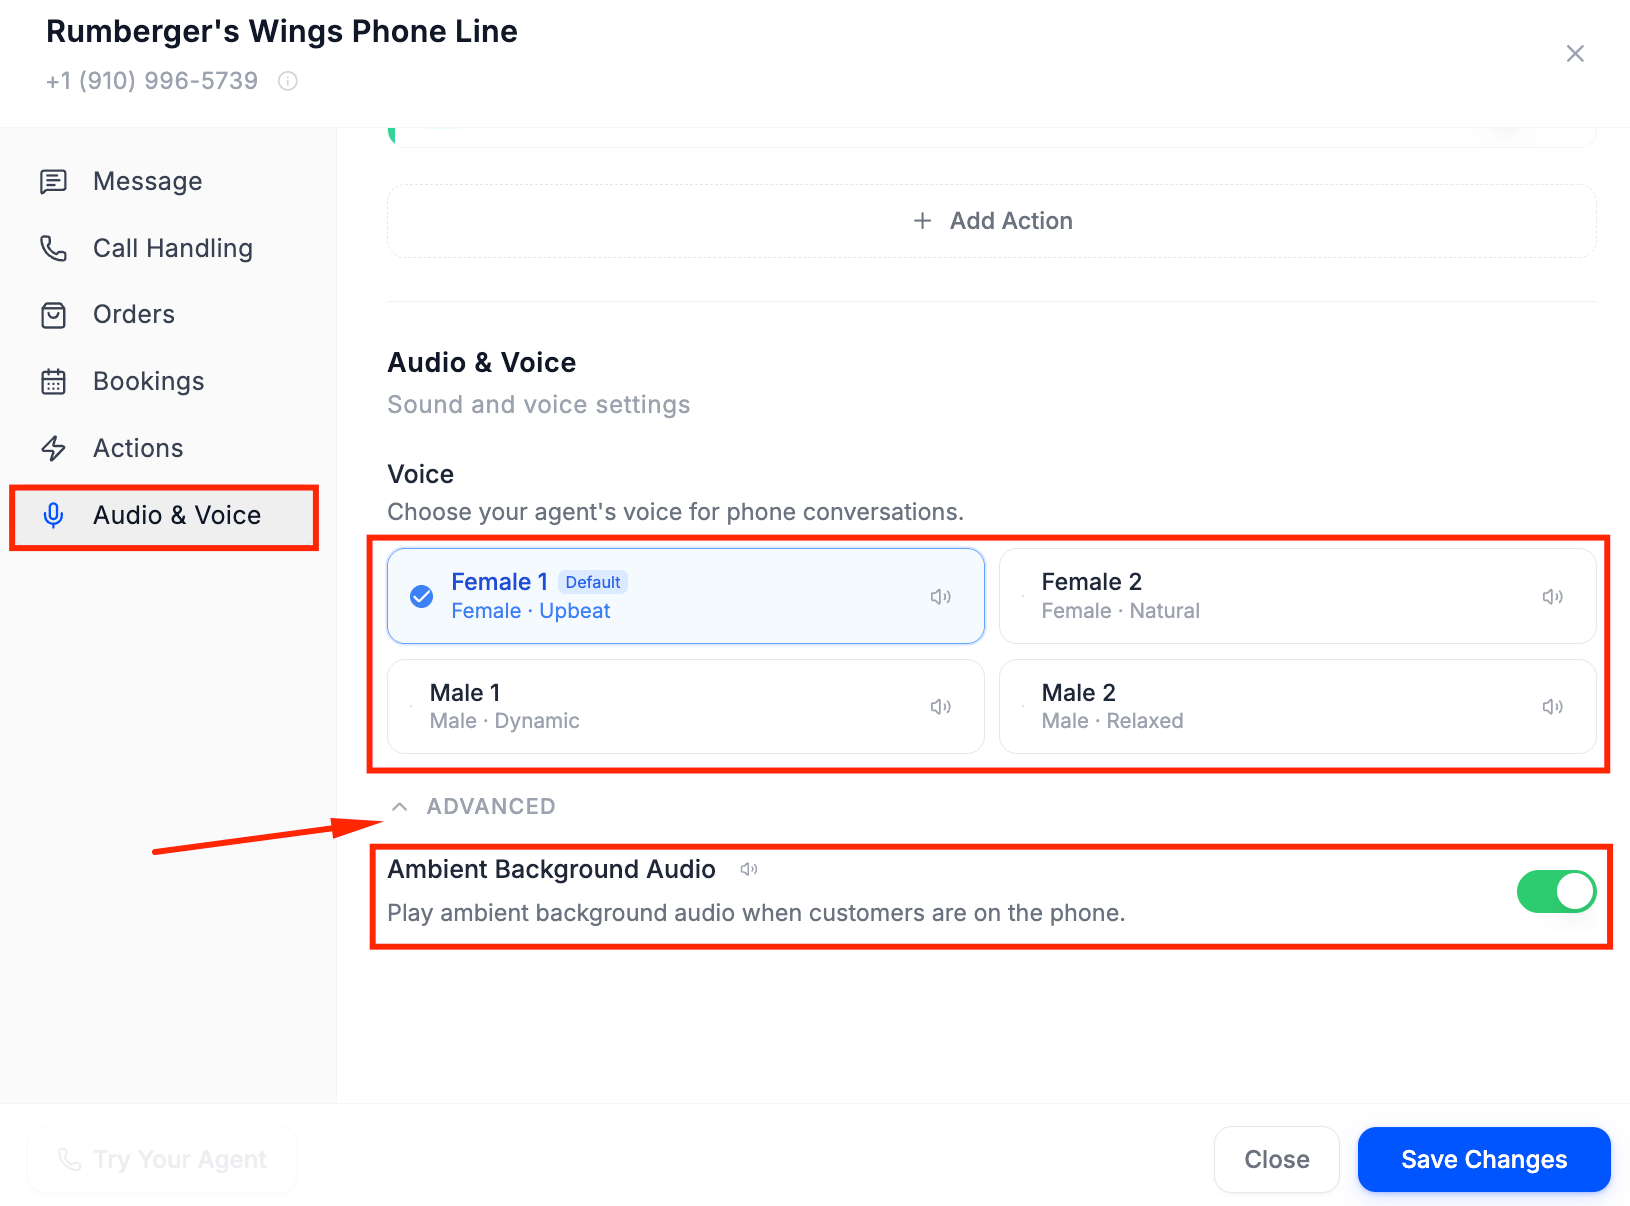
Step 7 — Knowledge Base
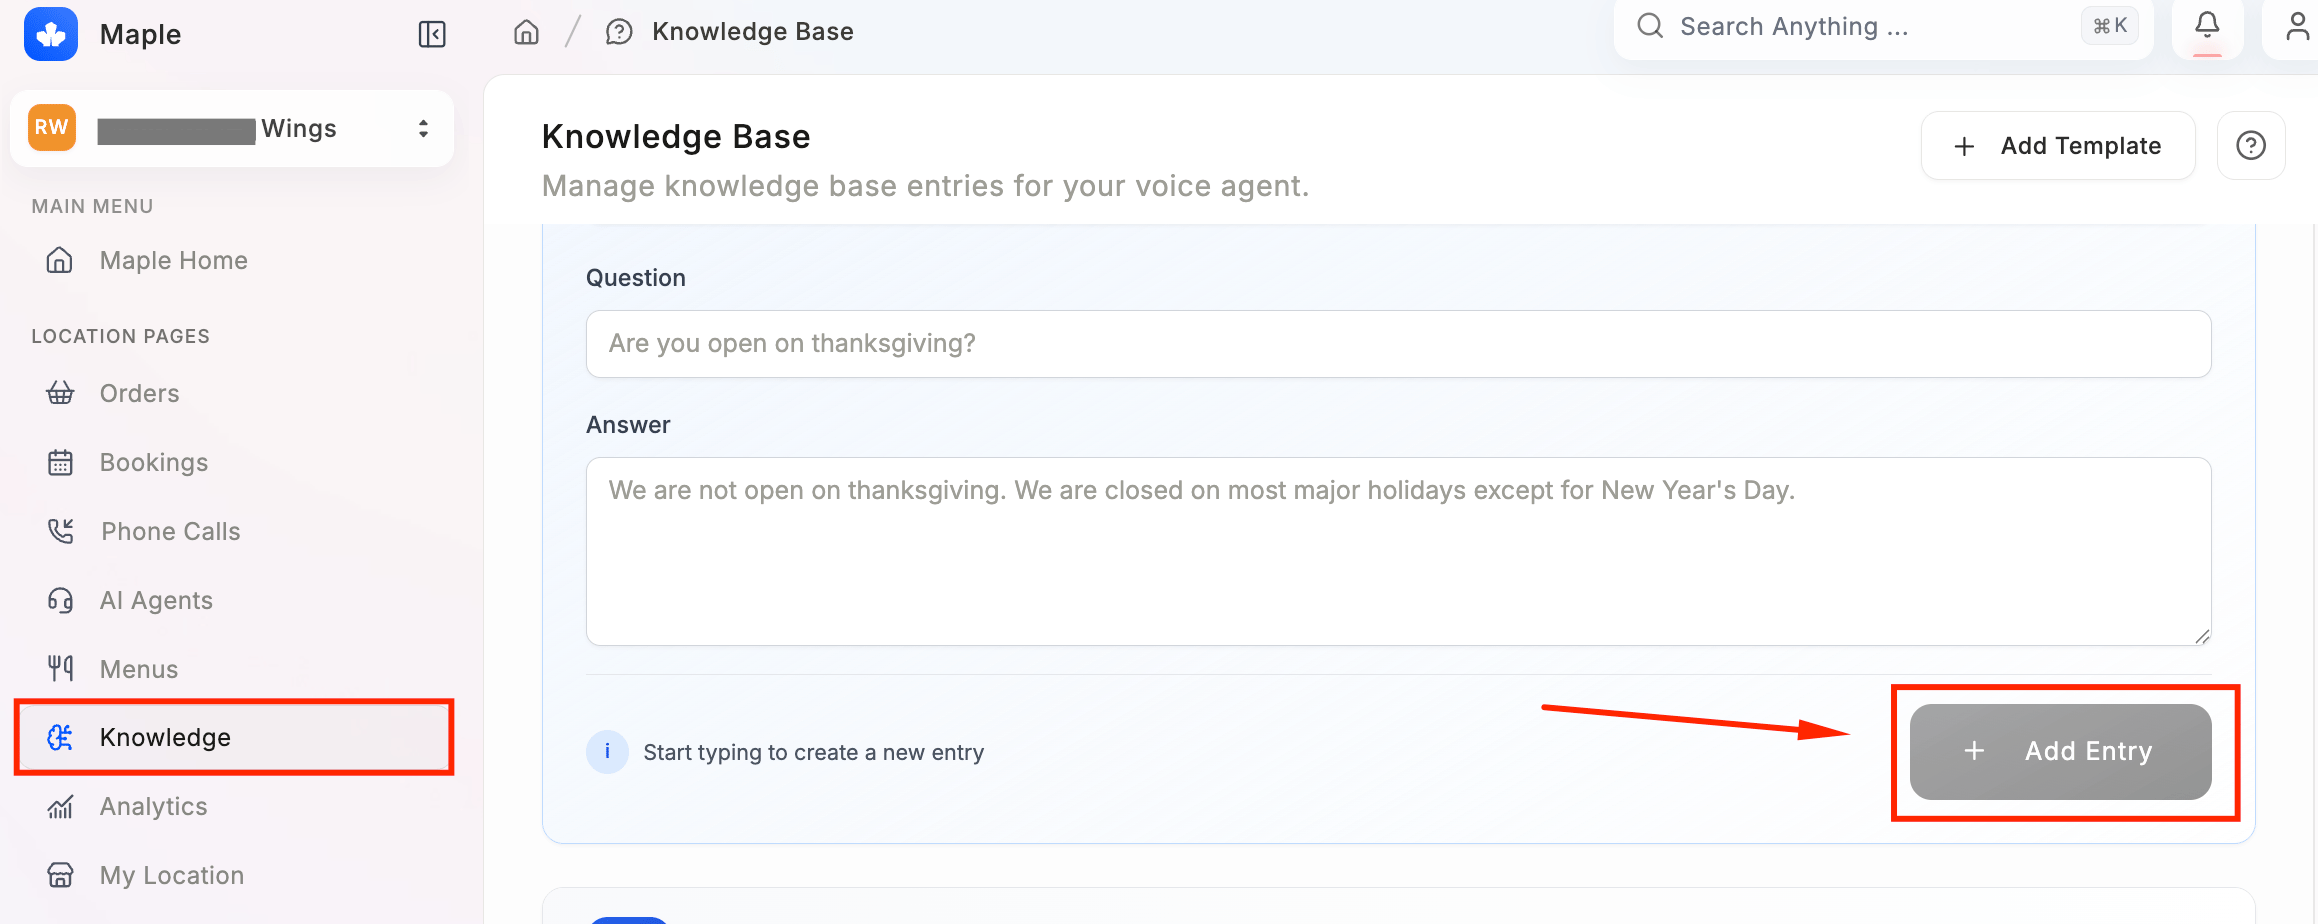
Click Knowledge to manage the information your agent uses to answer customer questions beyond the menu. Each entry has a Question and an Answer. Examples:- “Are you open on Thanksgiving?” → “We are closed on most major holidays…”
- “Do you offer delivery?” → “Yes, we deliver via…”
- “Do you have parking?” → “Yes, free parking is available…”
- Type your question in the Question field
- Type the answer in the Answer field
- Click + Add Entry
Step 8 — Analytics
Click Analytics to track how Maple is performing for your restaurant.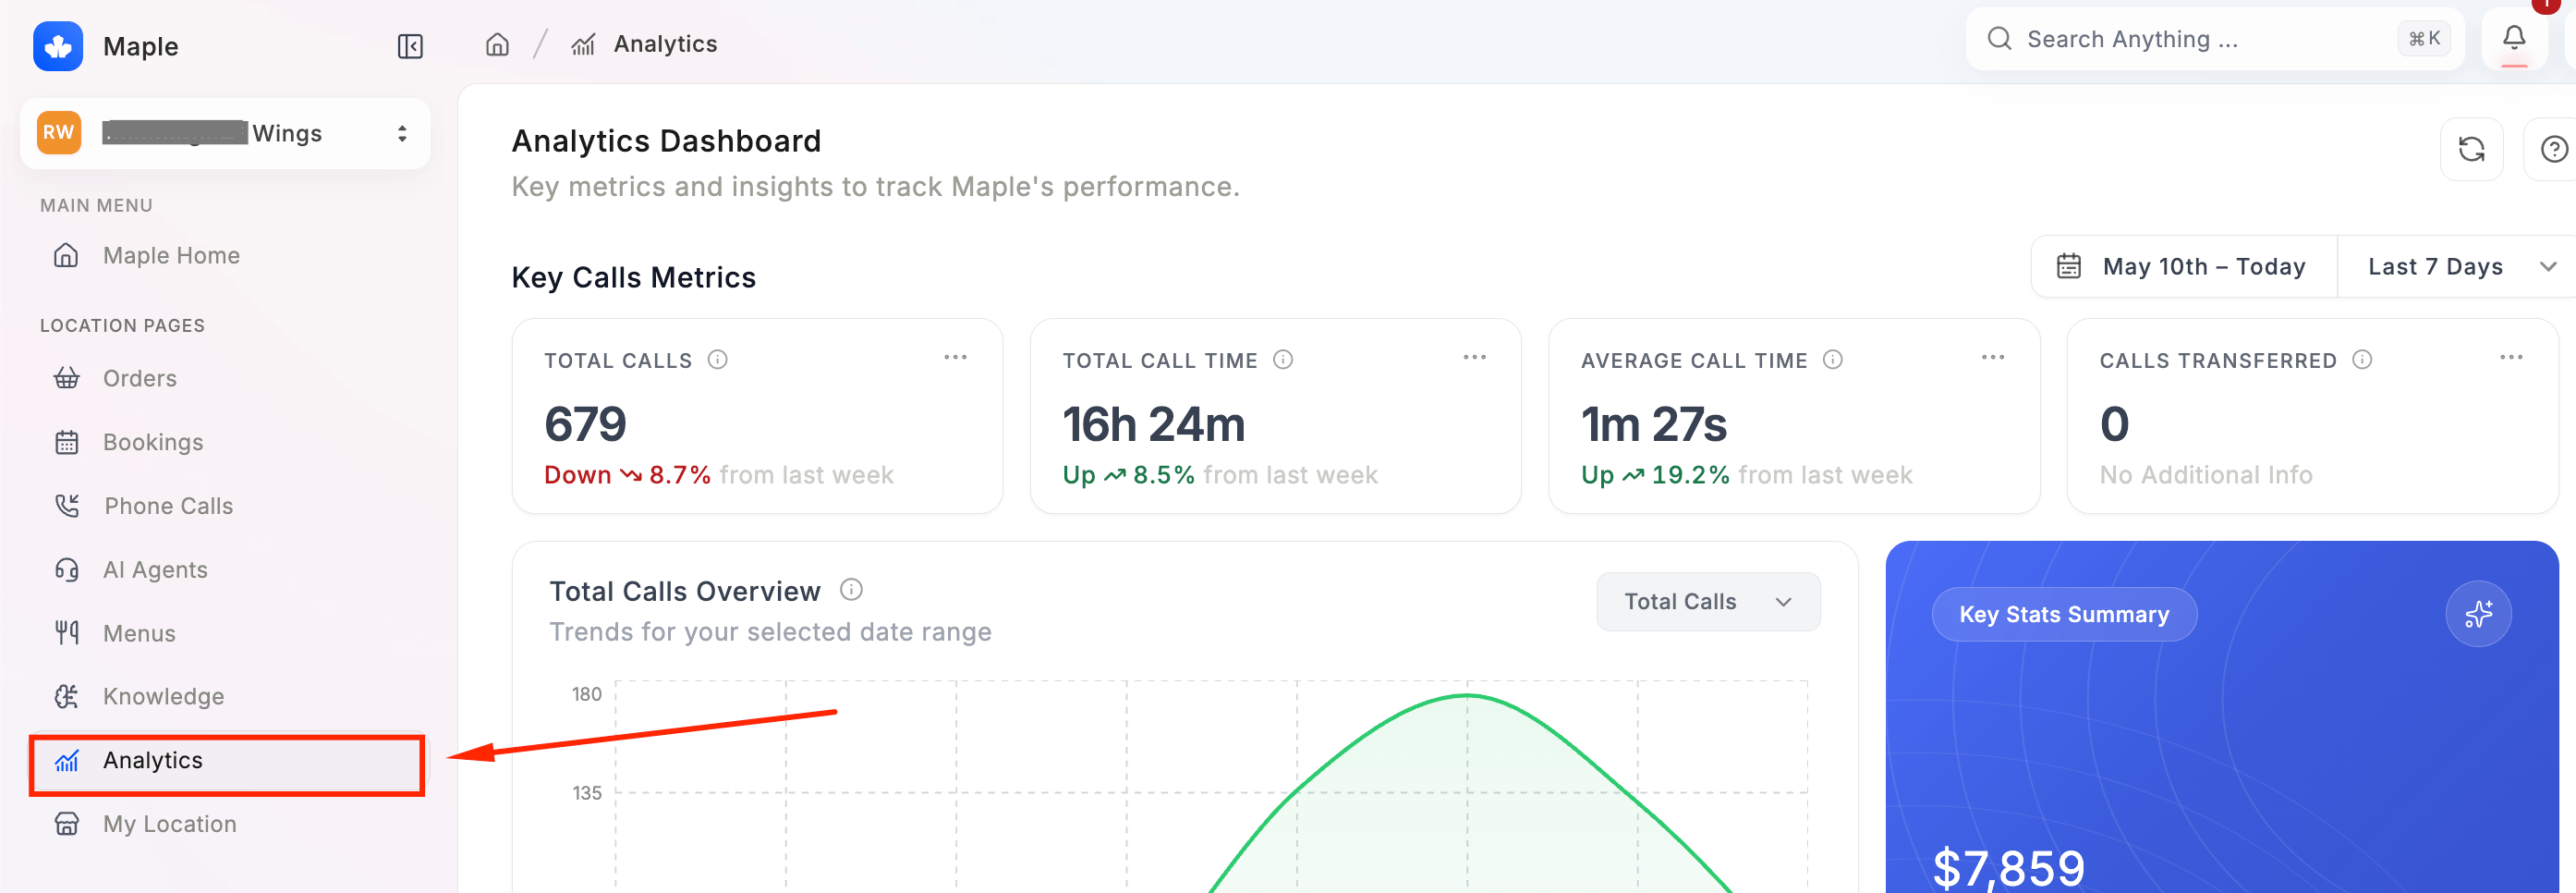
- Total Calls — total number of calls handled by Maple
- Total Call Time — combined duration of all calls
- Average Call Time — average length per call
- Calls Transferred — how many calls were handed off to your staff
Step 9 — My Location
Click My Location to manage your restaurant’s location details. Here you’ll find:- Restaurant name and address
- Business hours — your general operating hours (separate from menu hours — see Step 2 for the difference)
- Location, phone number, and website.
When you’re ready to test your agent and switch on call forwarding, head to Going Live.